
Dear friends, welcome to this tutorial. In this document, I will guide you step-by-step on how to use API Keys in NocoBase to retrieve data, using the “To Dos” example to help you understand every detail. Please read the following content carefully and follow the instructions.
1 Understanding the Concept of API Keys
Before we begin, it’s important to understand: What is an API Key? It works like an entry ticket that verifies whether an API request comes from an authorized user. When you access the NocoBase system via a website, mobile app, or backend script, this “secret key” quickly validates your identity.
In the HTTP request header, you’ll see a format like:
Authorization: Bearer {API key}
Here, “Bearer” indicates that what follows is a validated API Key, which allows the system to quickly confirm the requester’s permissions.
In practice, API Keys are commonly used in the following scenarios:
- Client-side Application Access: When users access the API through a web browser or mobile app, the system uses the API Key to verify the user’s identity, ensuring that only authorized users can retrieve data.
- Automated Task Execution: Background scheduled tasks or scripts use API Keys to ensure that updates or logging actions are secure and authorized.
- Development and Testing: Developers use API Keys during debugging and testing to simulate real requests and ensure that the interfaces respond correctly.
In short, API Keys not only help confirm the identity of the requester but also monitor usage, limit request frequency, and prevent potential security threats, thereby safeguarding the stable operation of NocoBase.
2 Creating API Keys in NocoBase
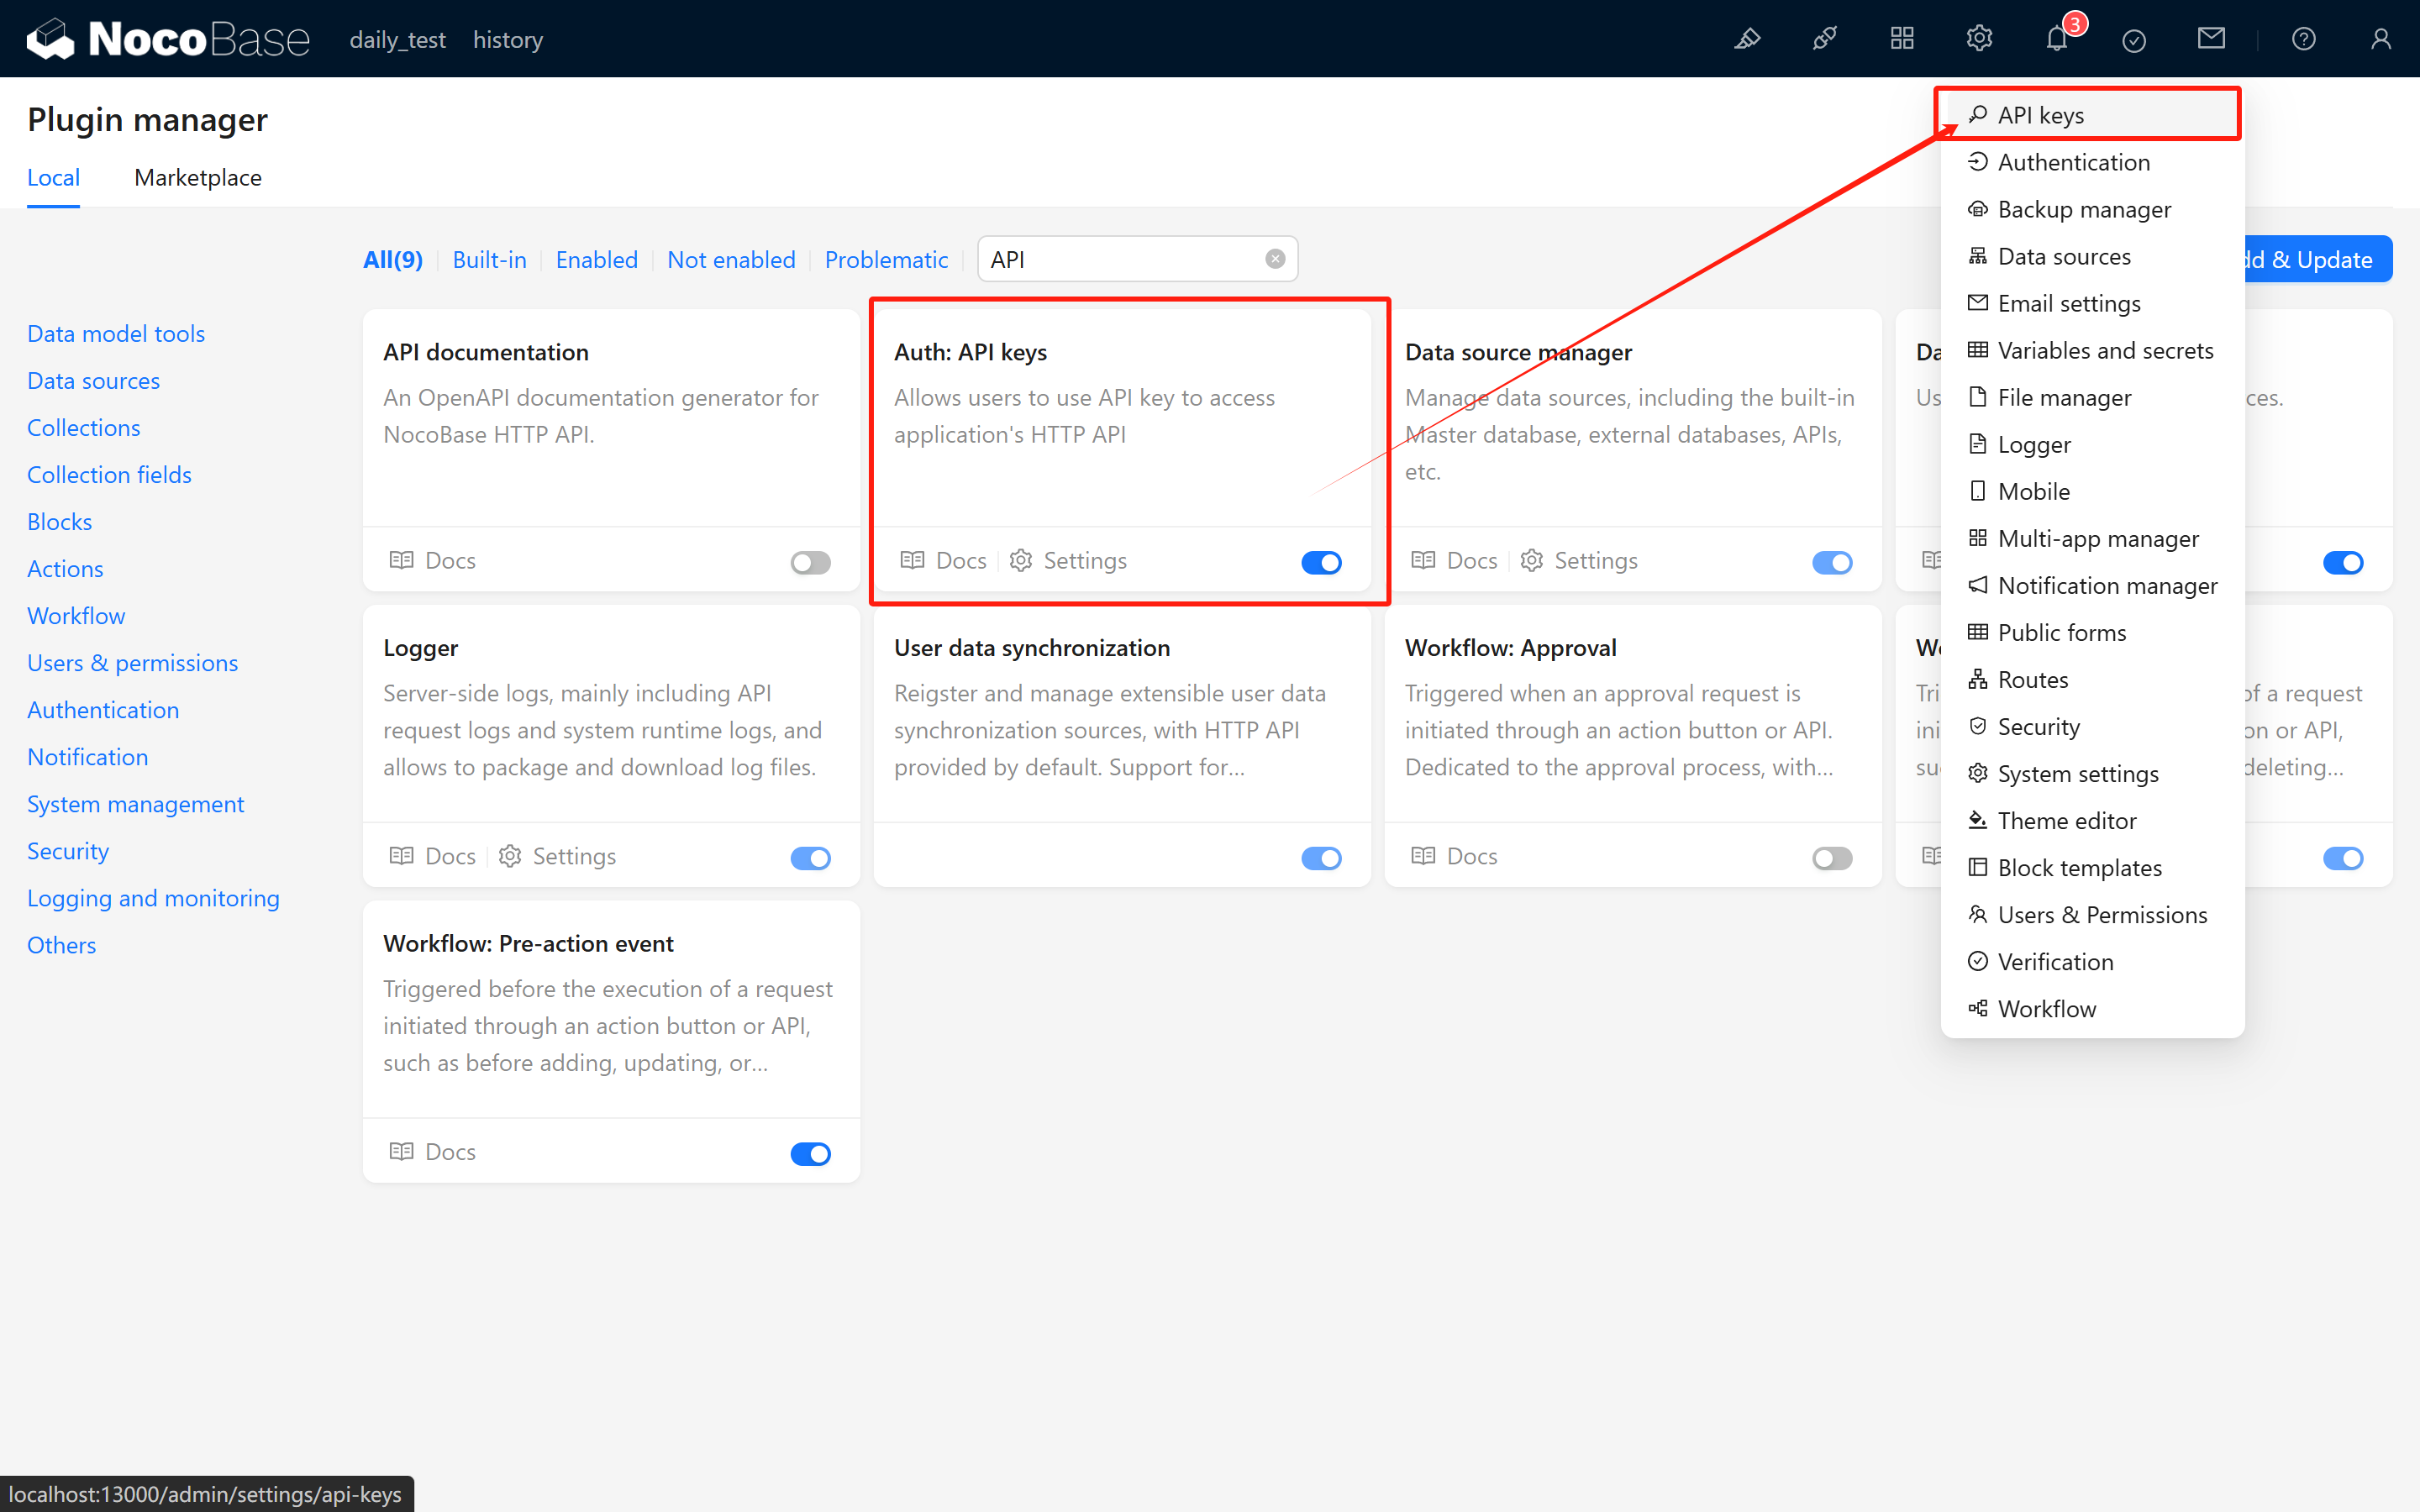
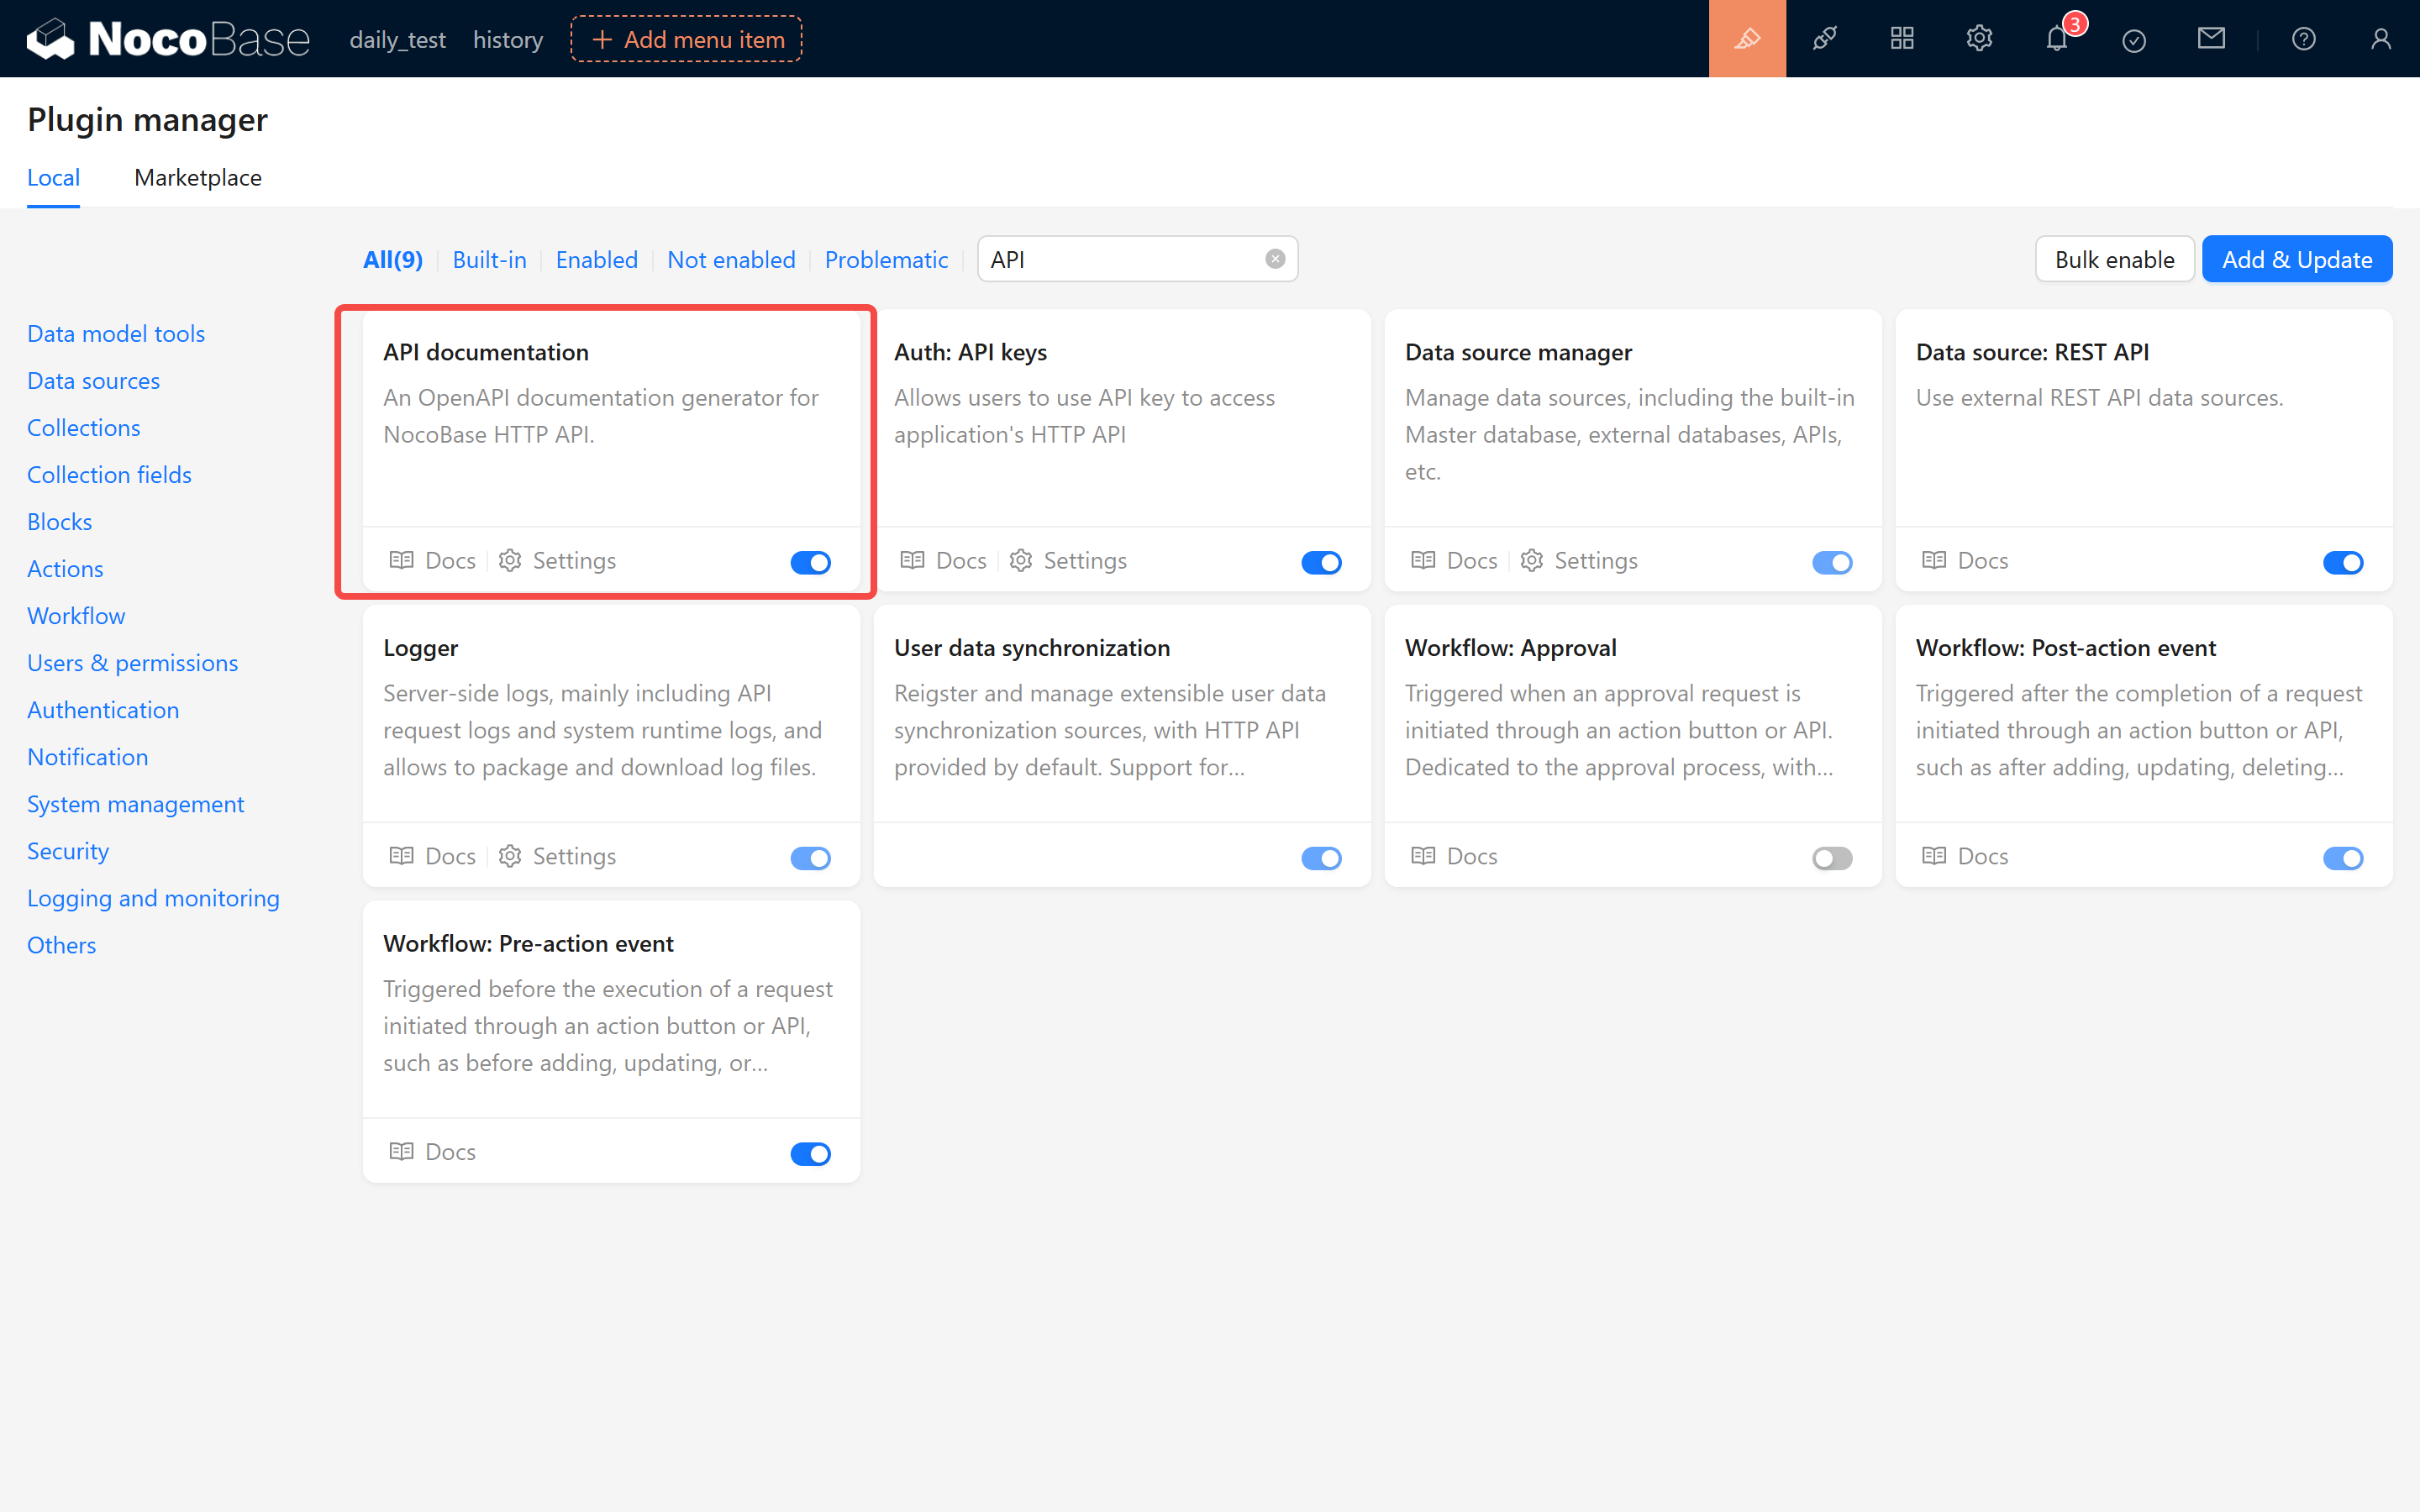
2.1 Activate the Auth: API Keys Plugin
First, make sure that the built-in Auth: API Keys plugin in NocoBase is activated. Once activated, the system settings center will feature a new configuration page for API keys.
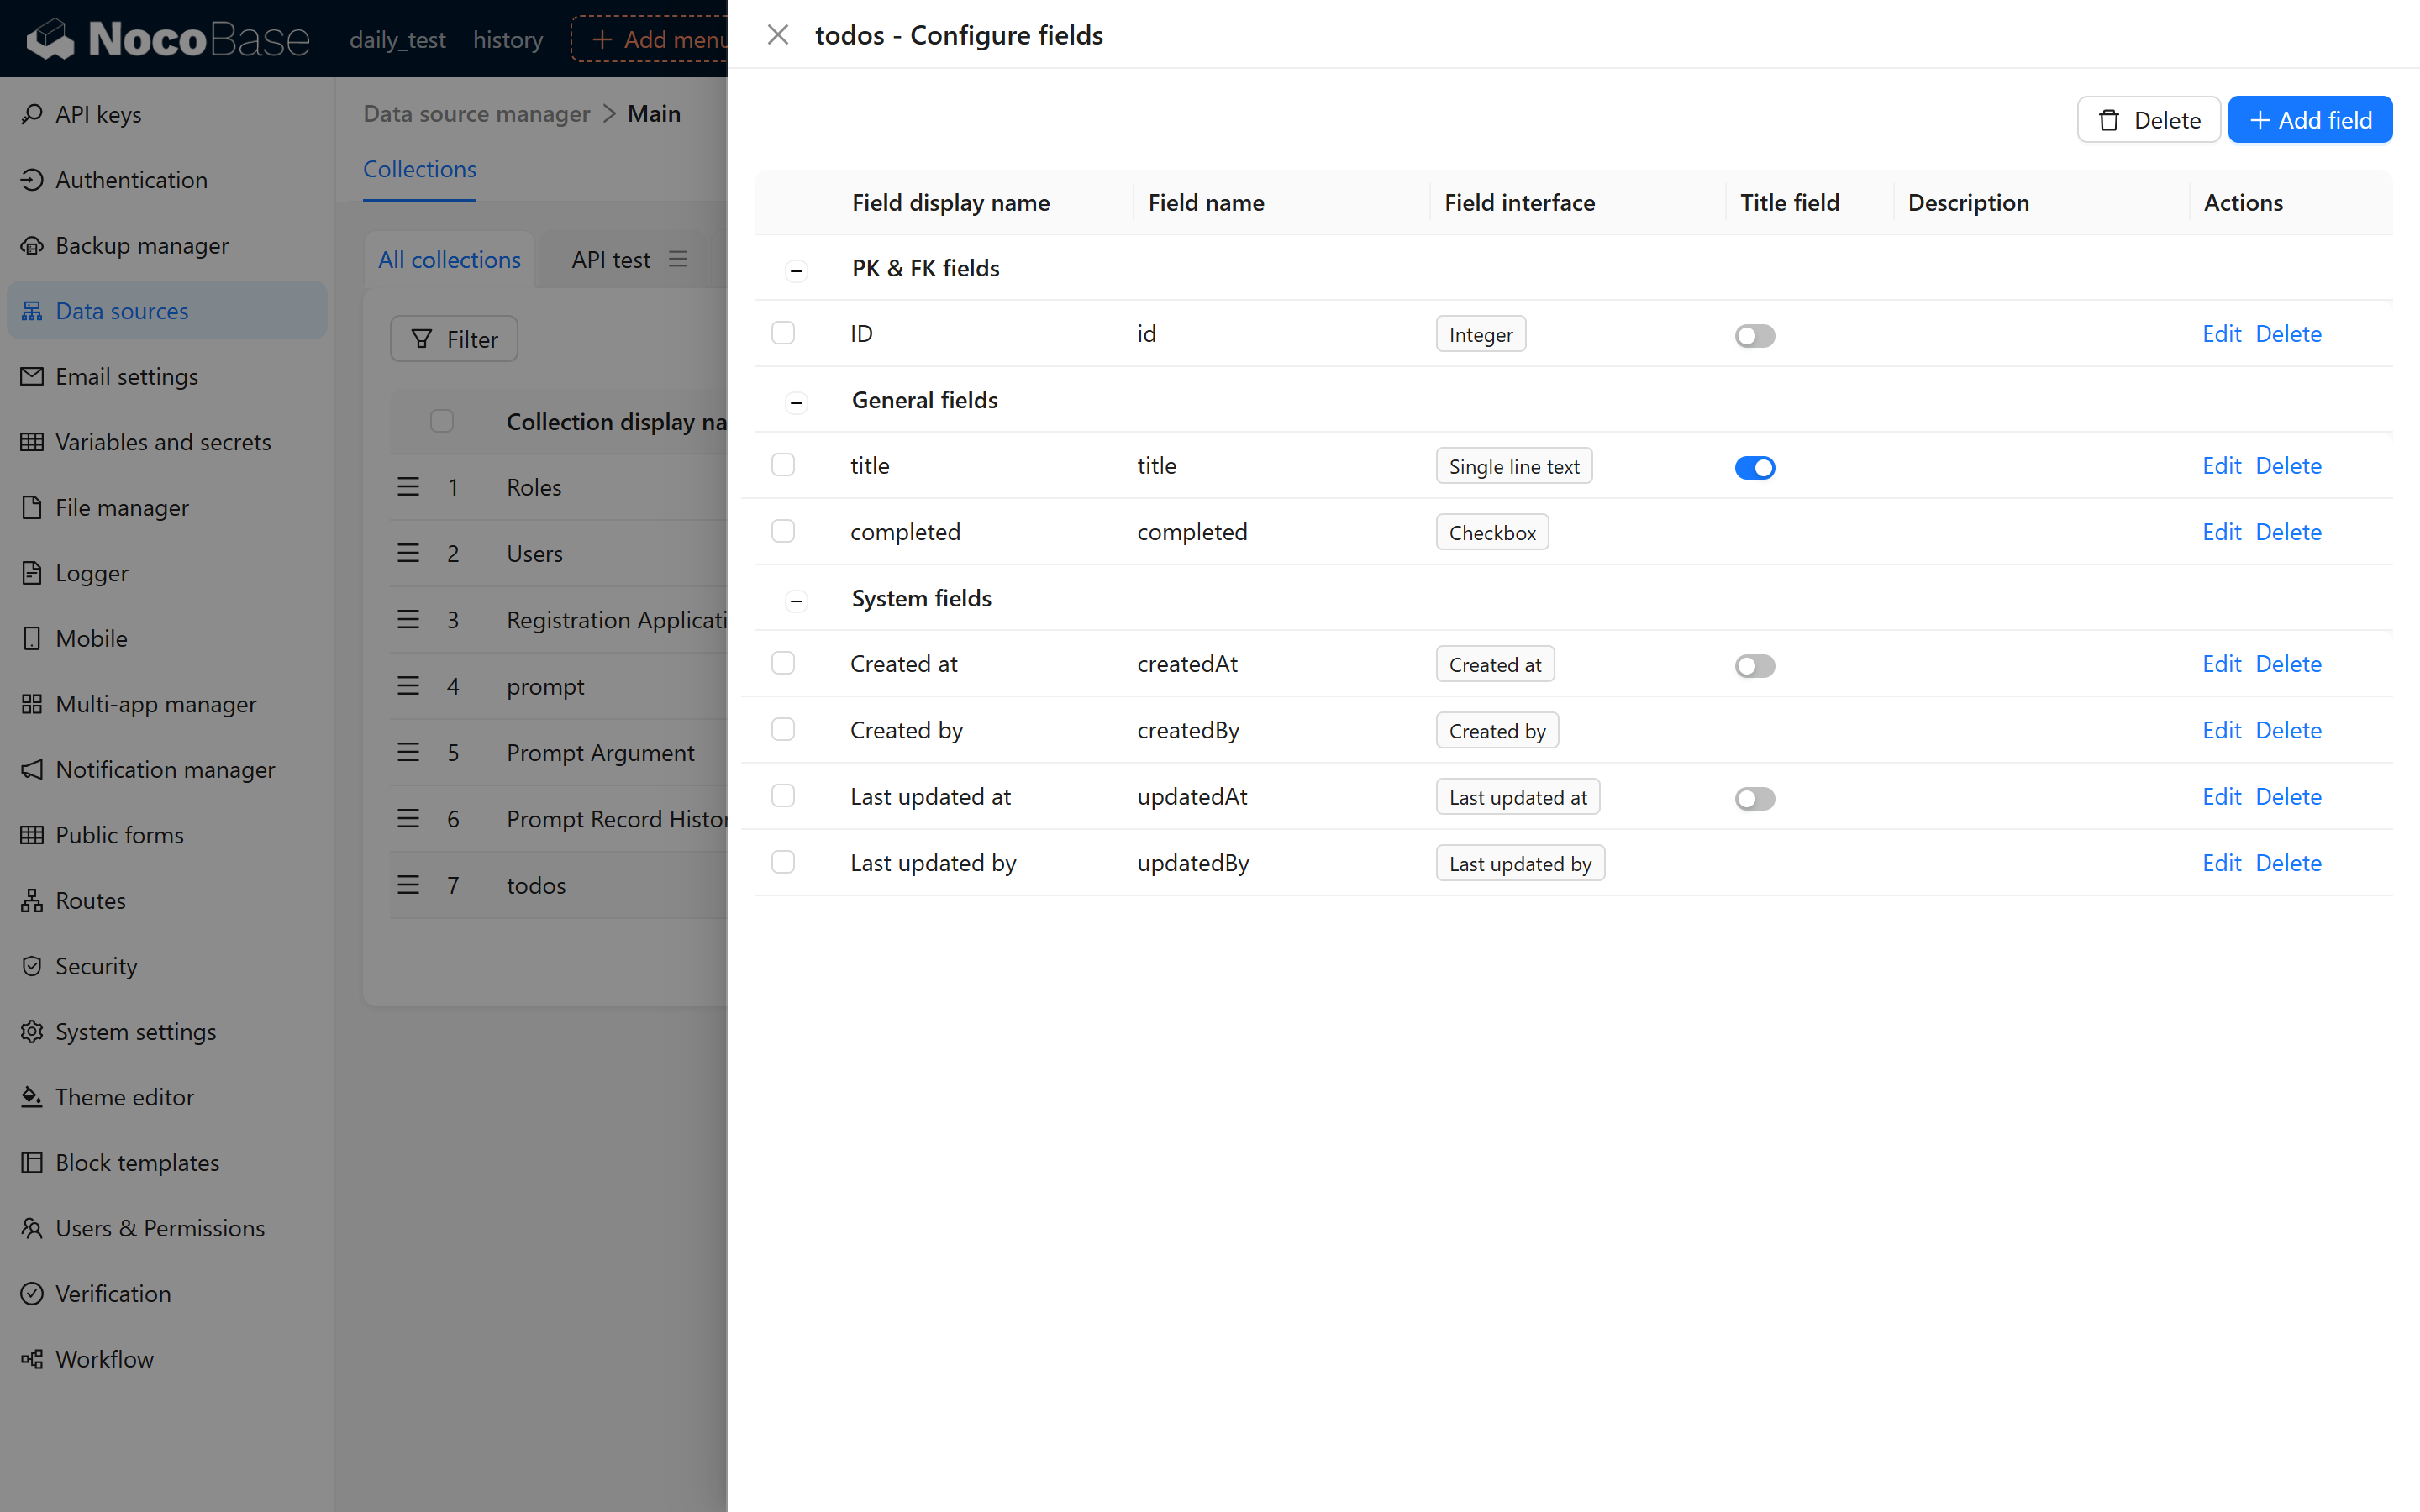
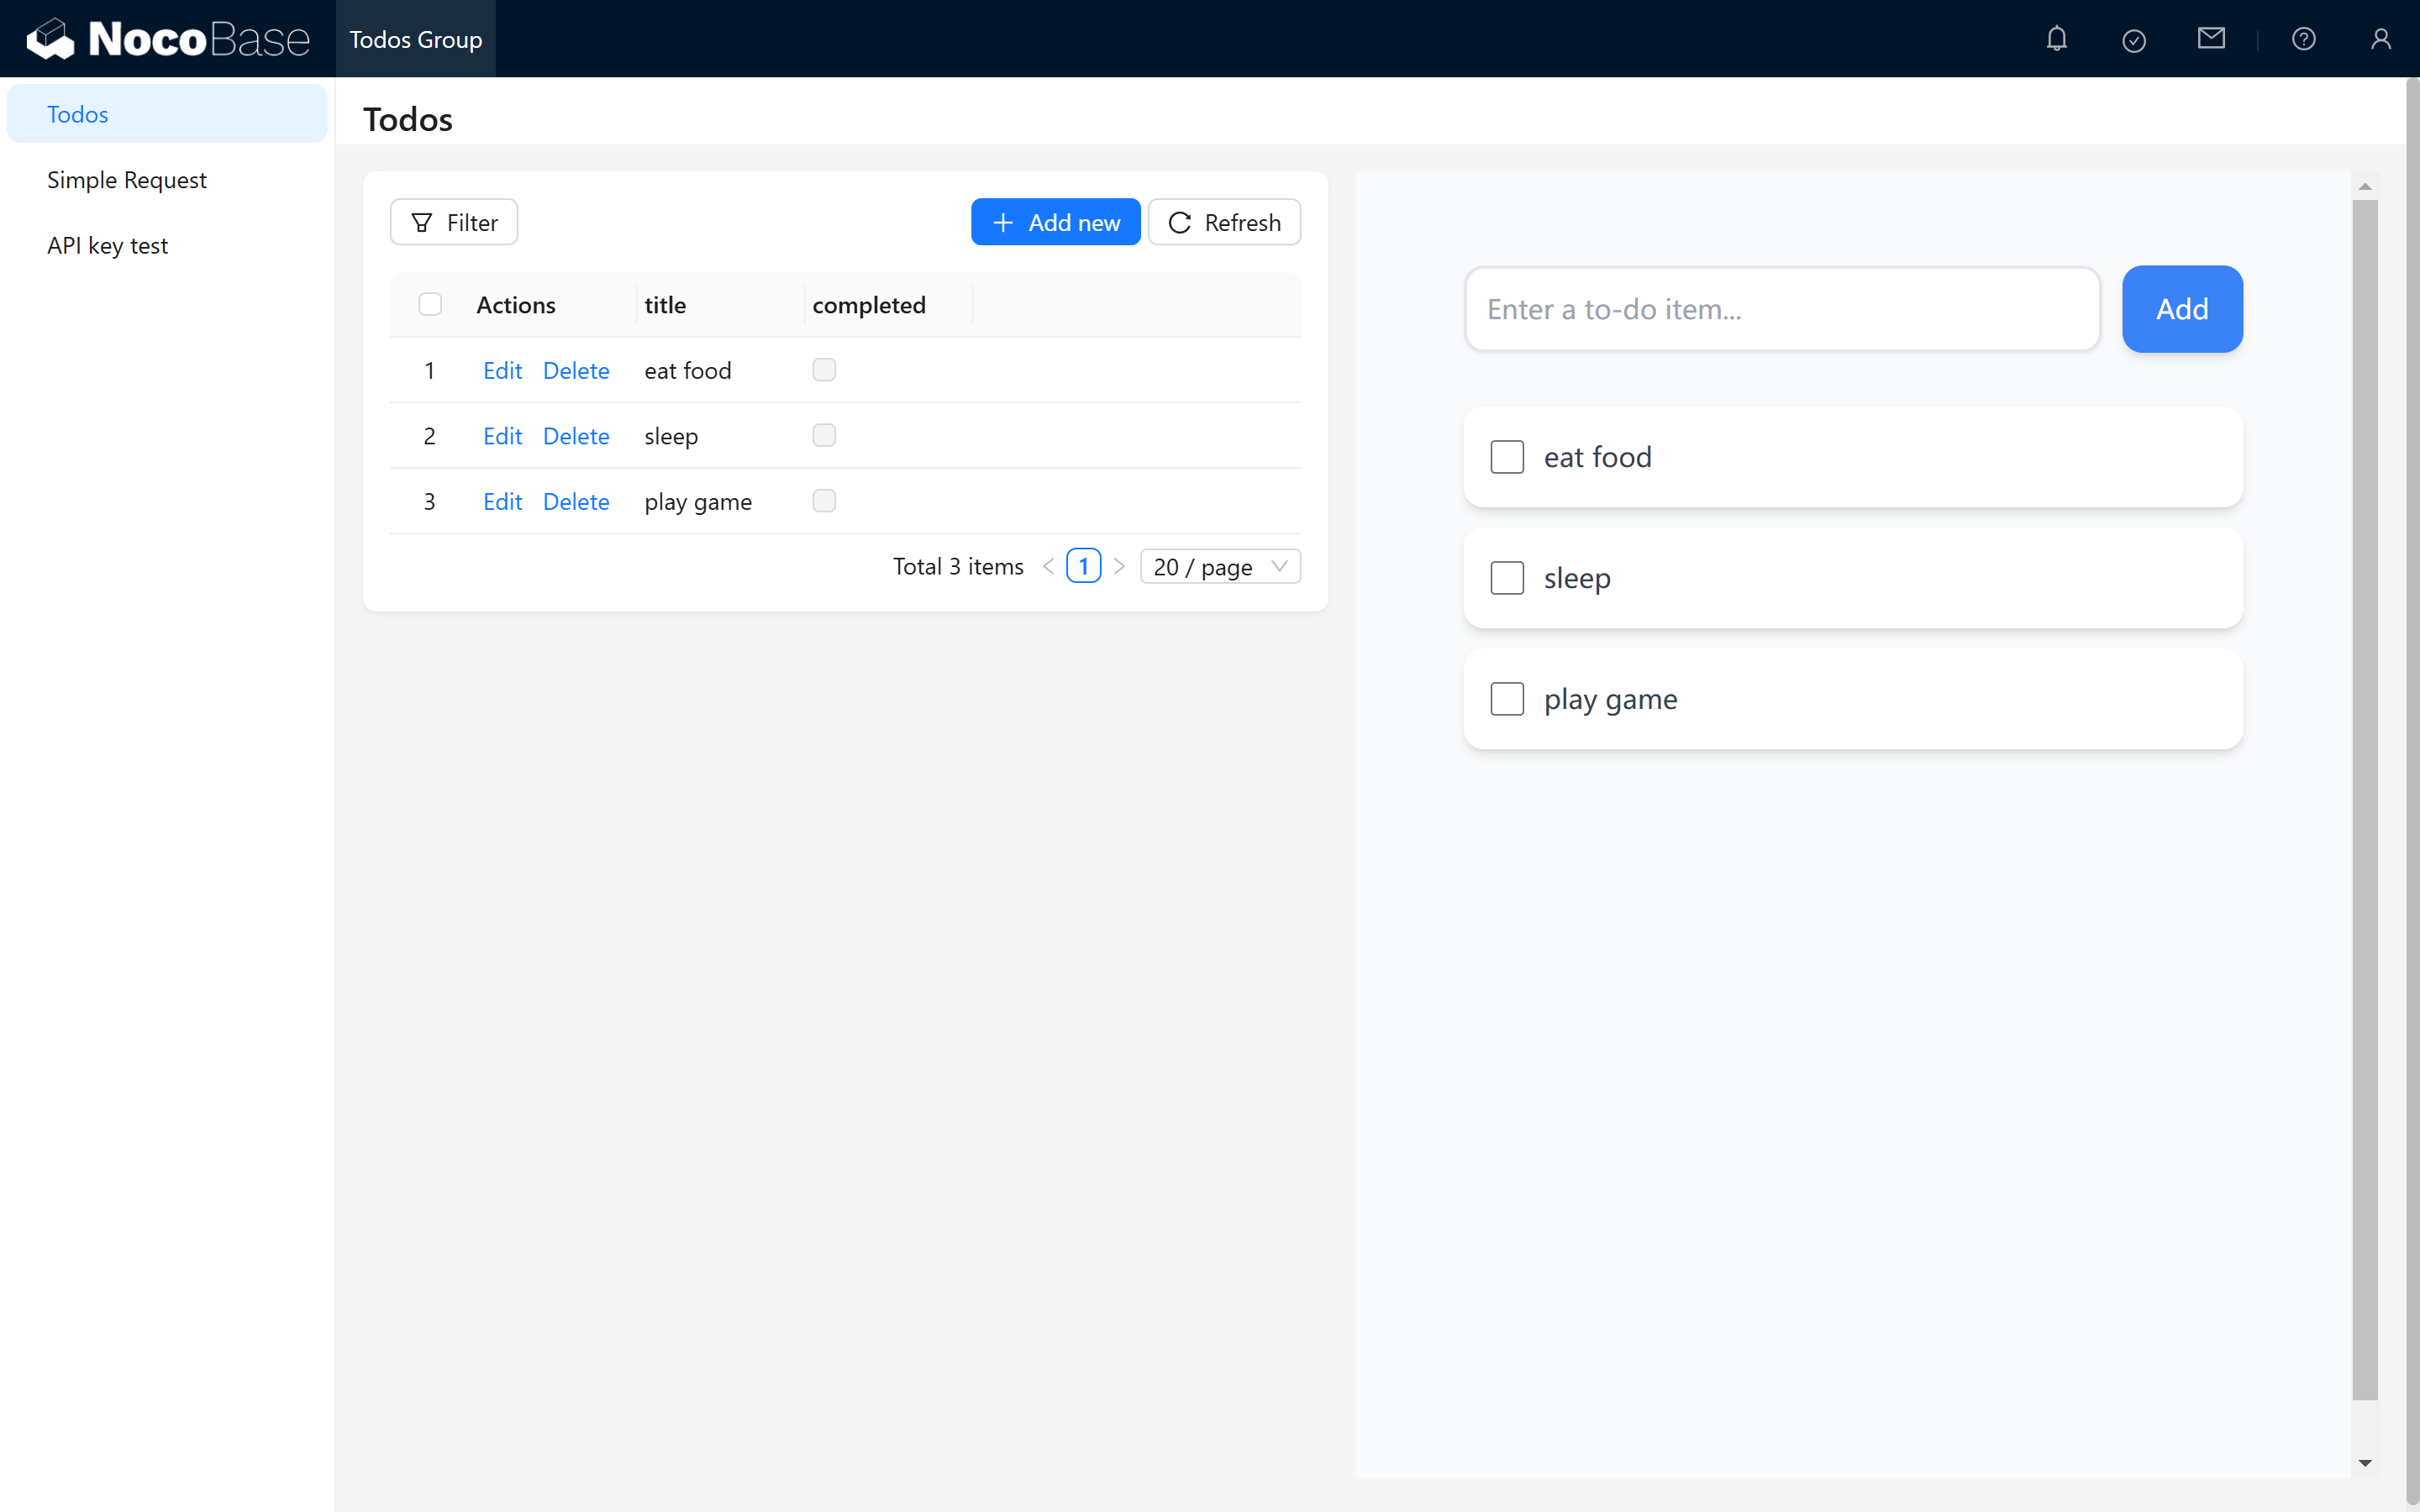
2.2 Create a Test To Dos Collection
For testing purposes, create a collection named todos (To Dos collection) with the following fields:
idtitlecompleted
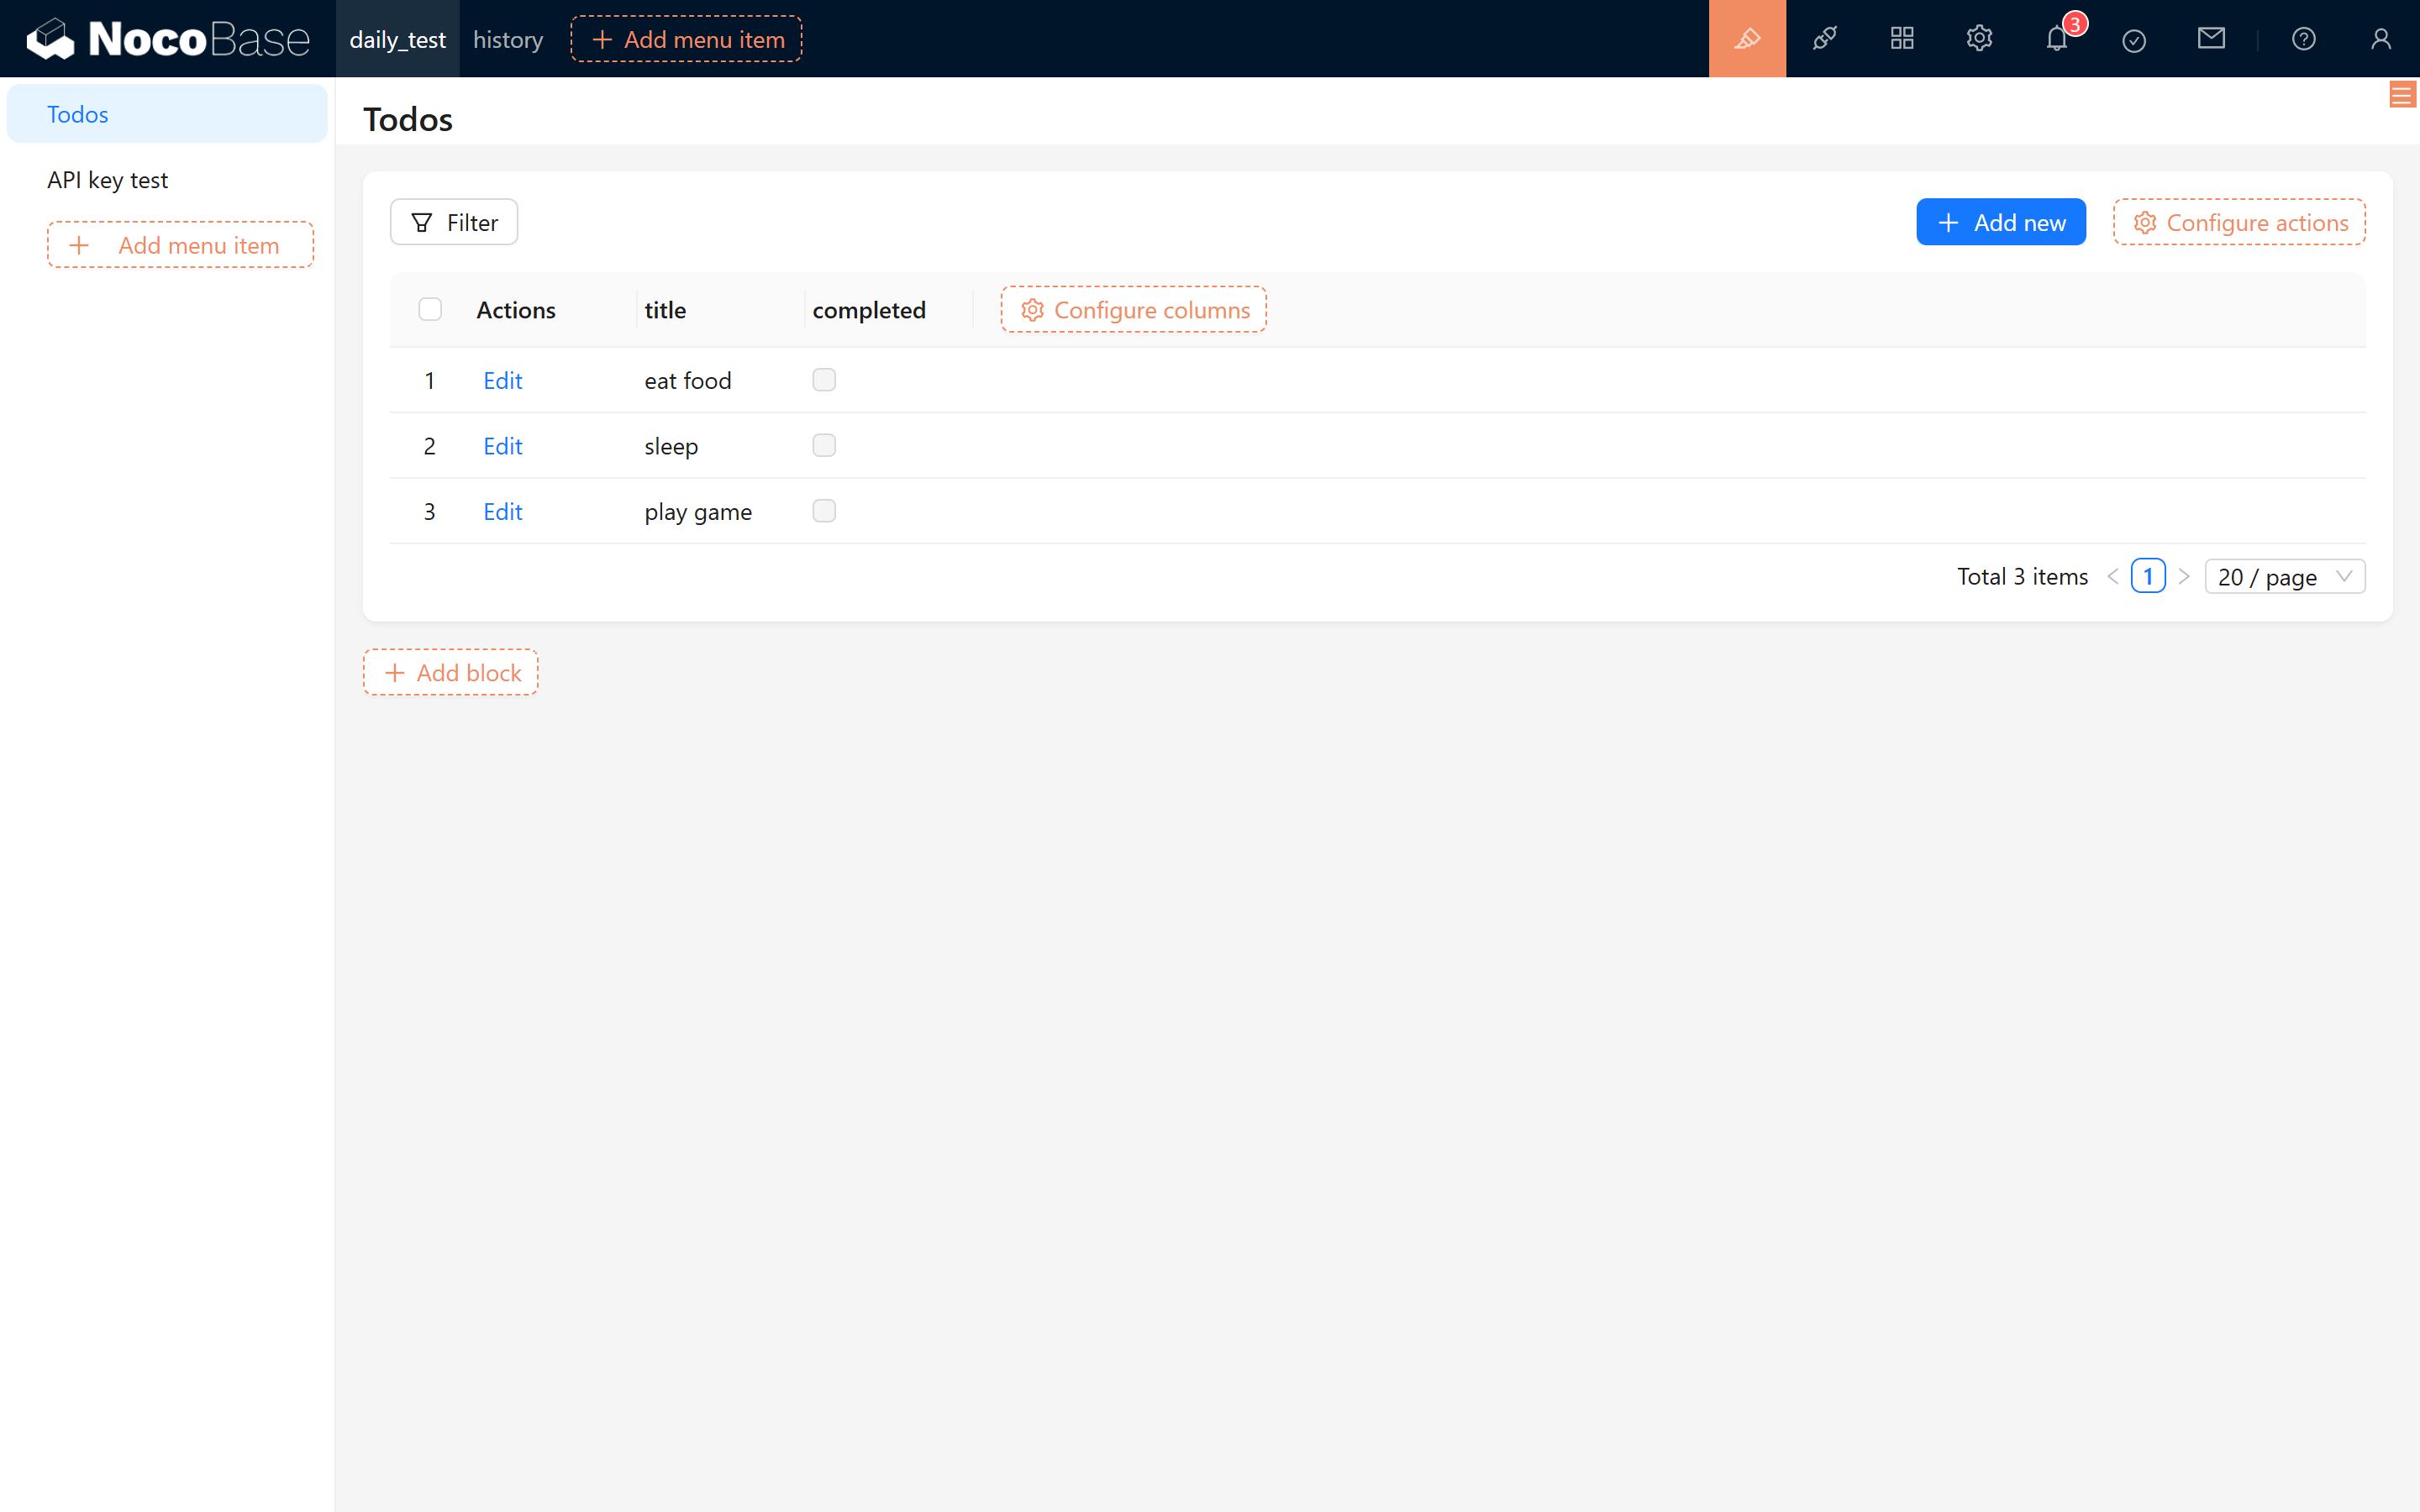
Then, enter a few sample to-dos into the collection, such as:
- eat food
- sleep
- play games
2.3 Create and Bind a Role
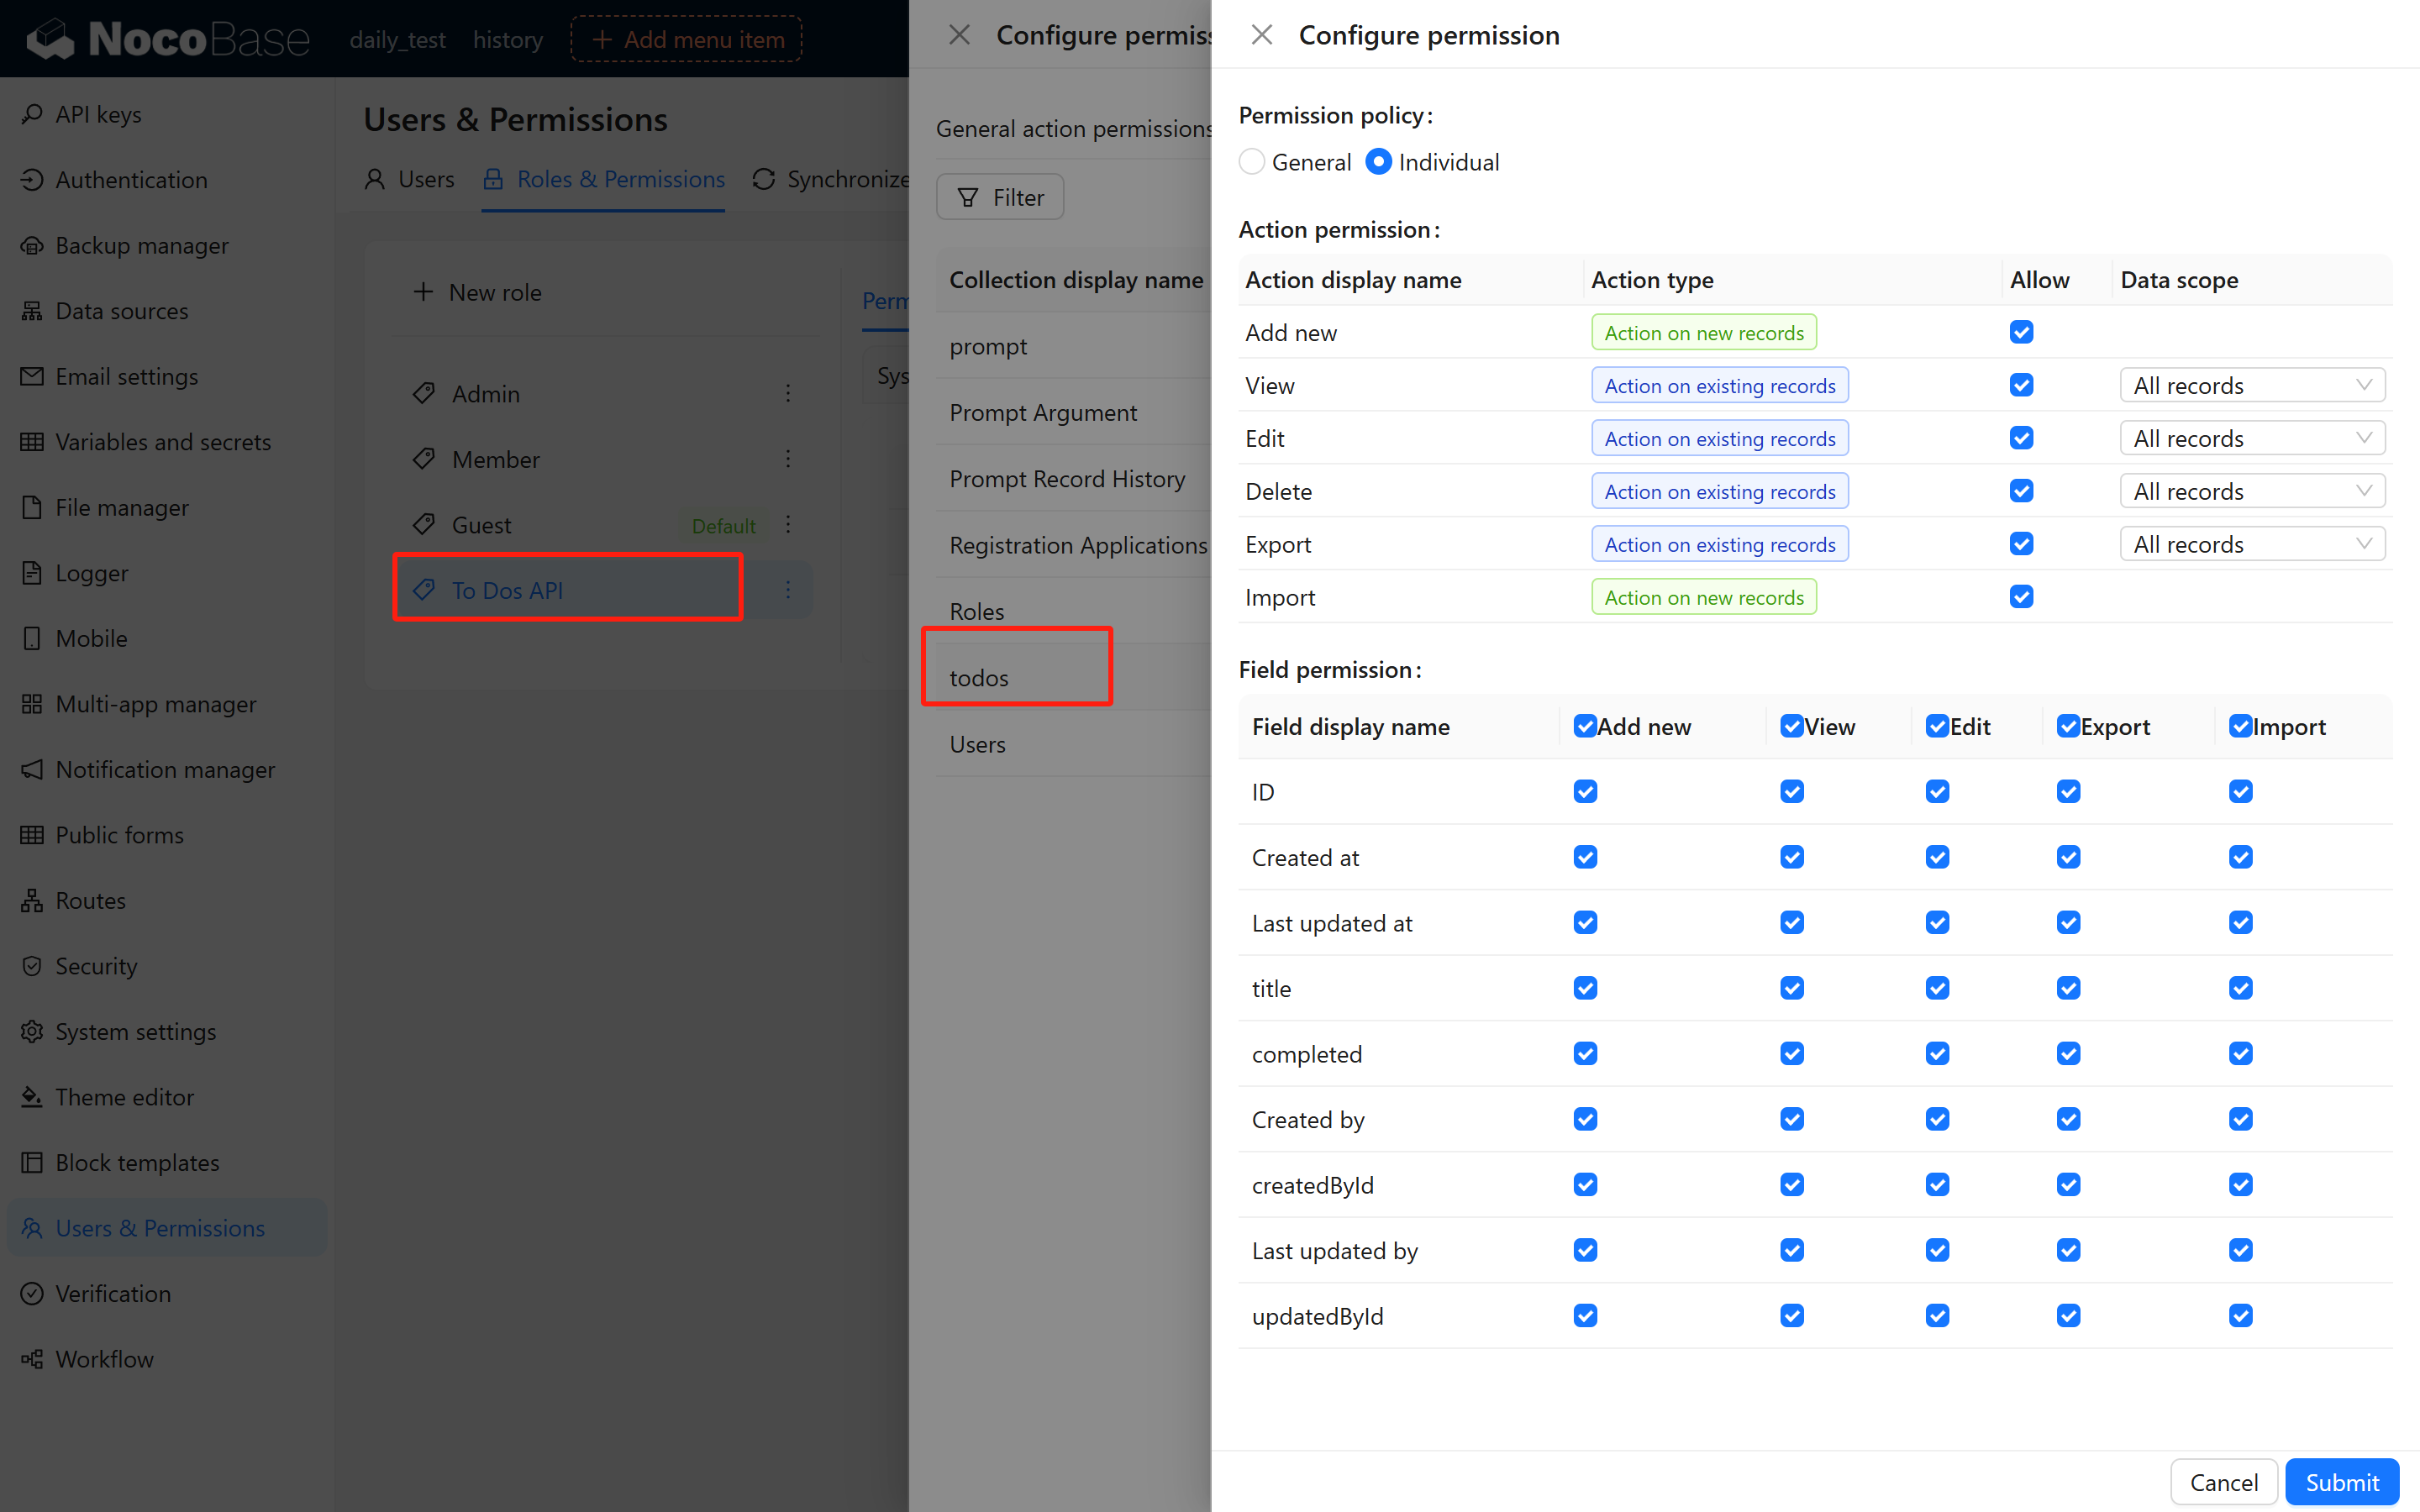
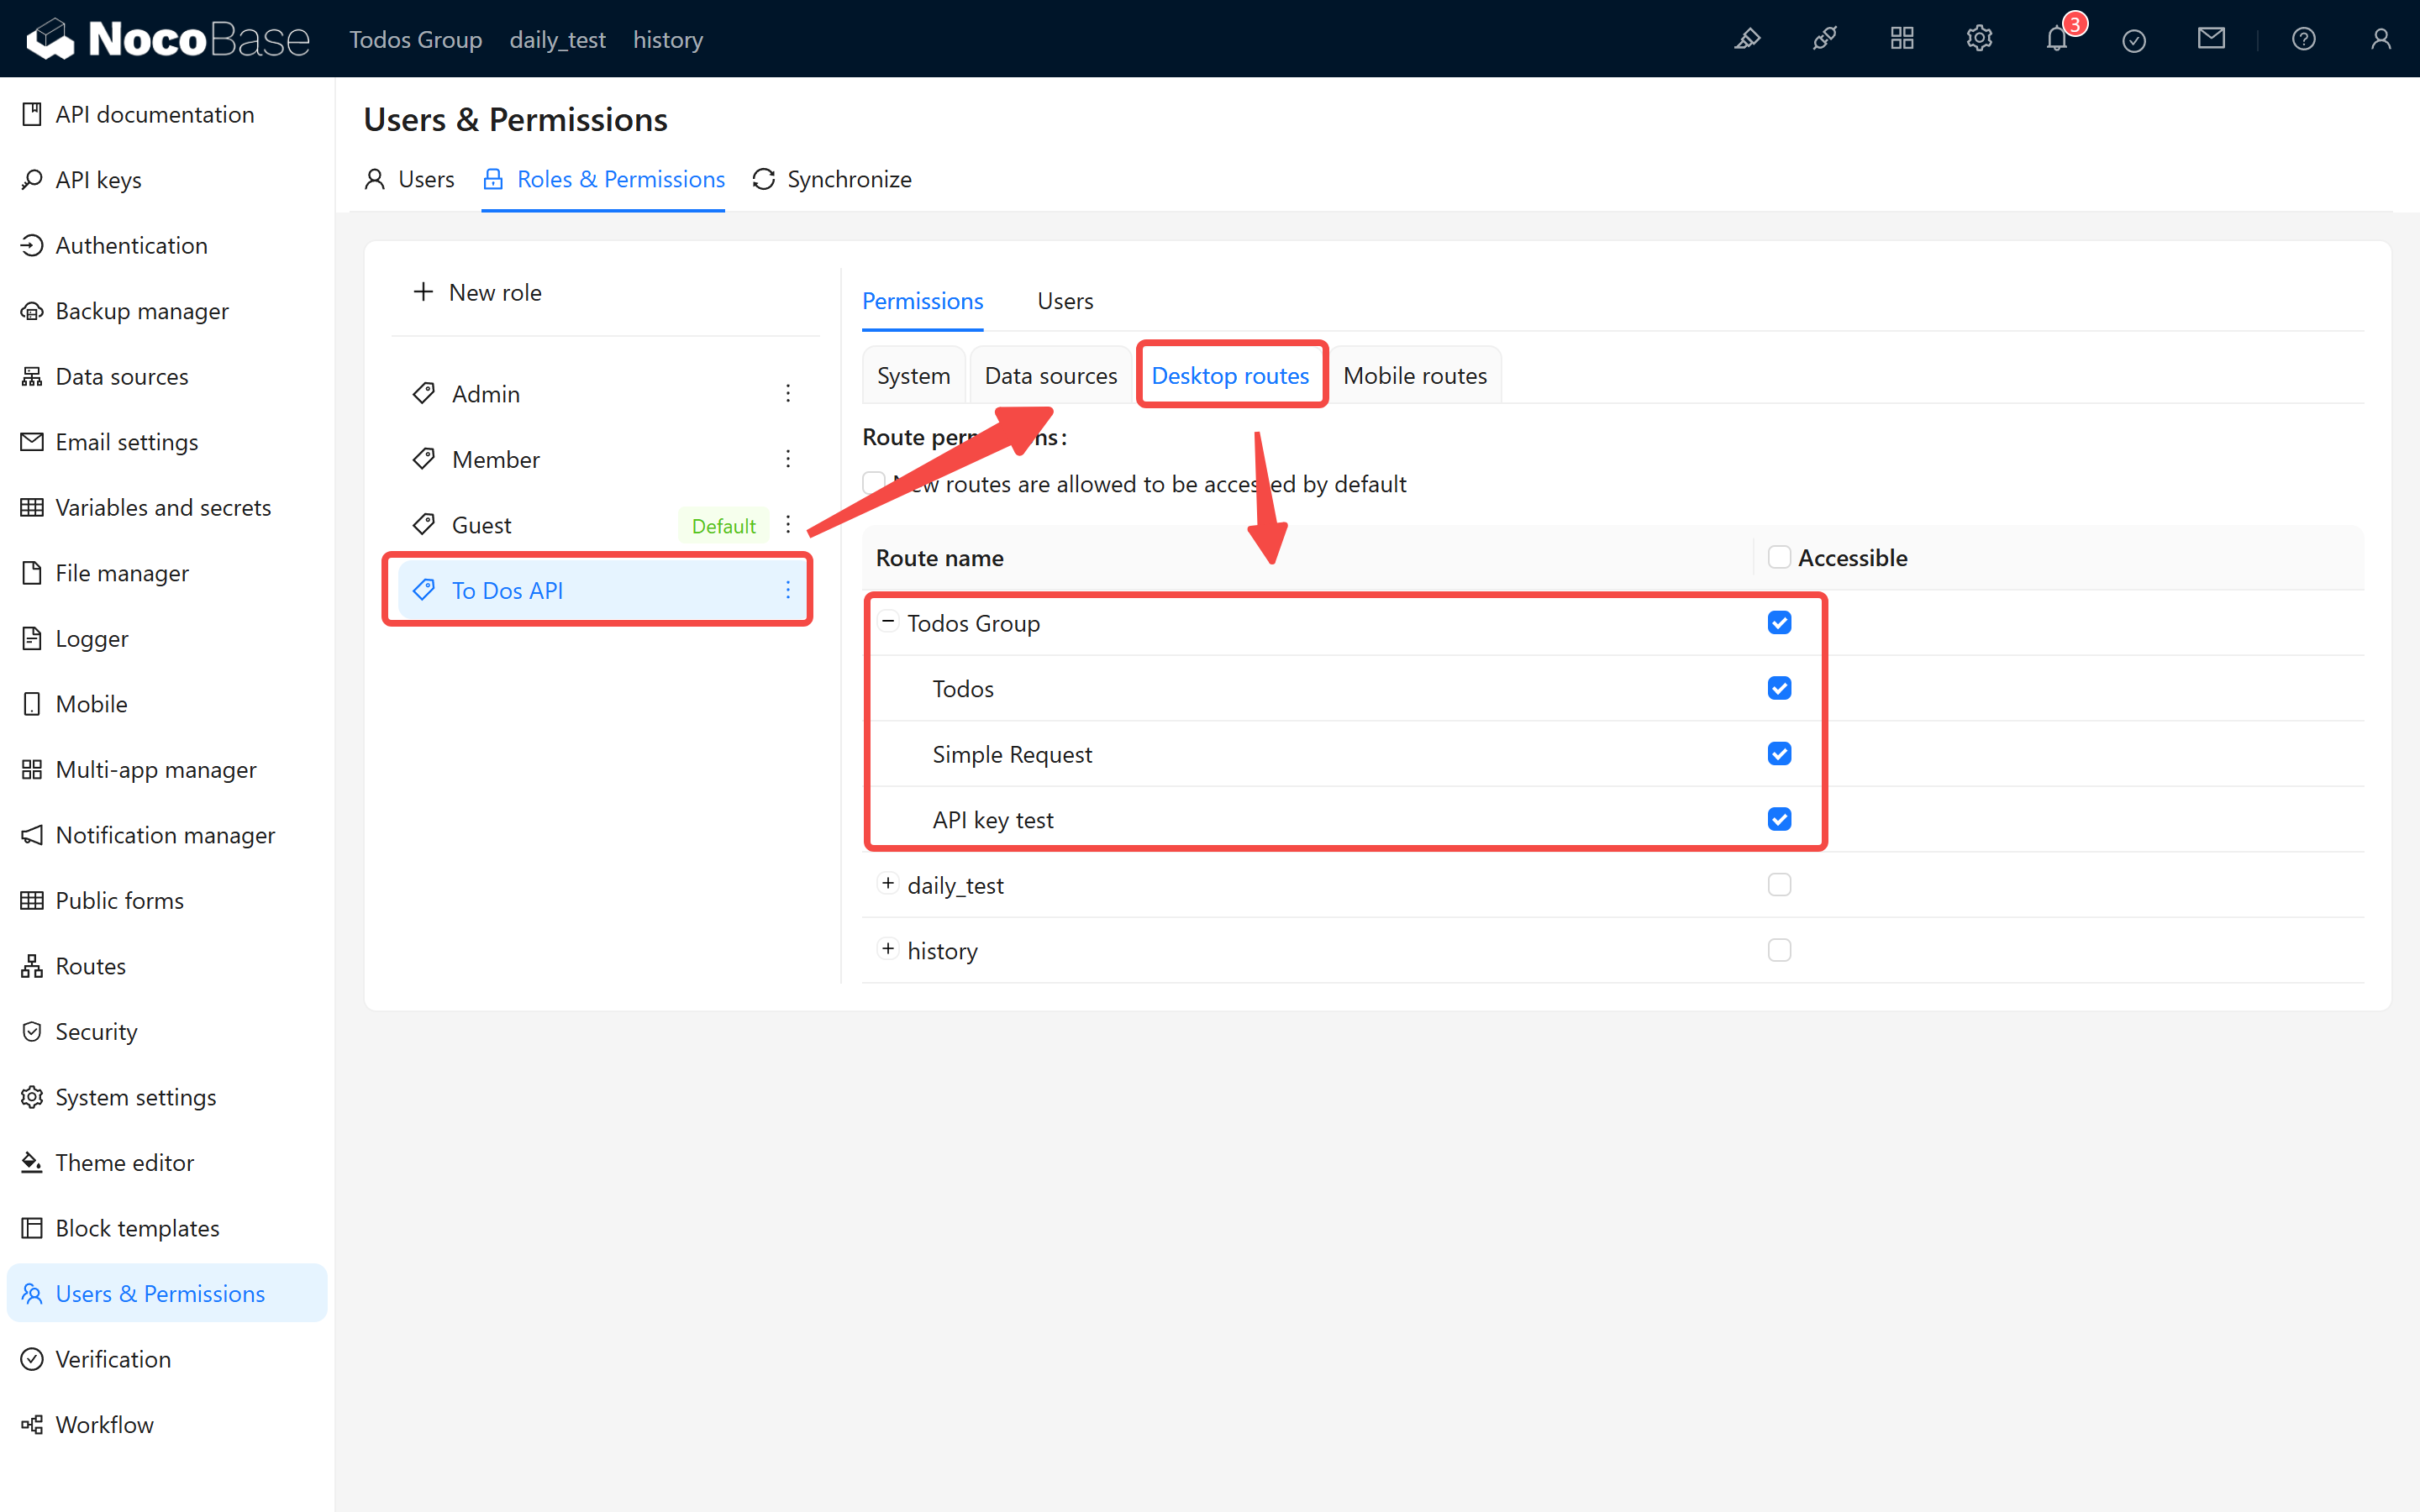
Since API keys are bound to user roles, the system determines request permissions based on the role. Therefore, before creating an API key, you need to create a role and assign the appropriate permissions. It is recommended to create a test role called “To Dos API Role” and assign all permissions for the To Dos collection to this role.
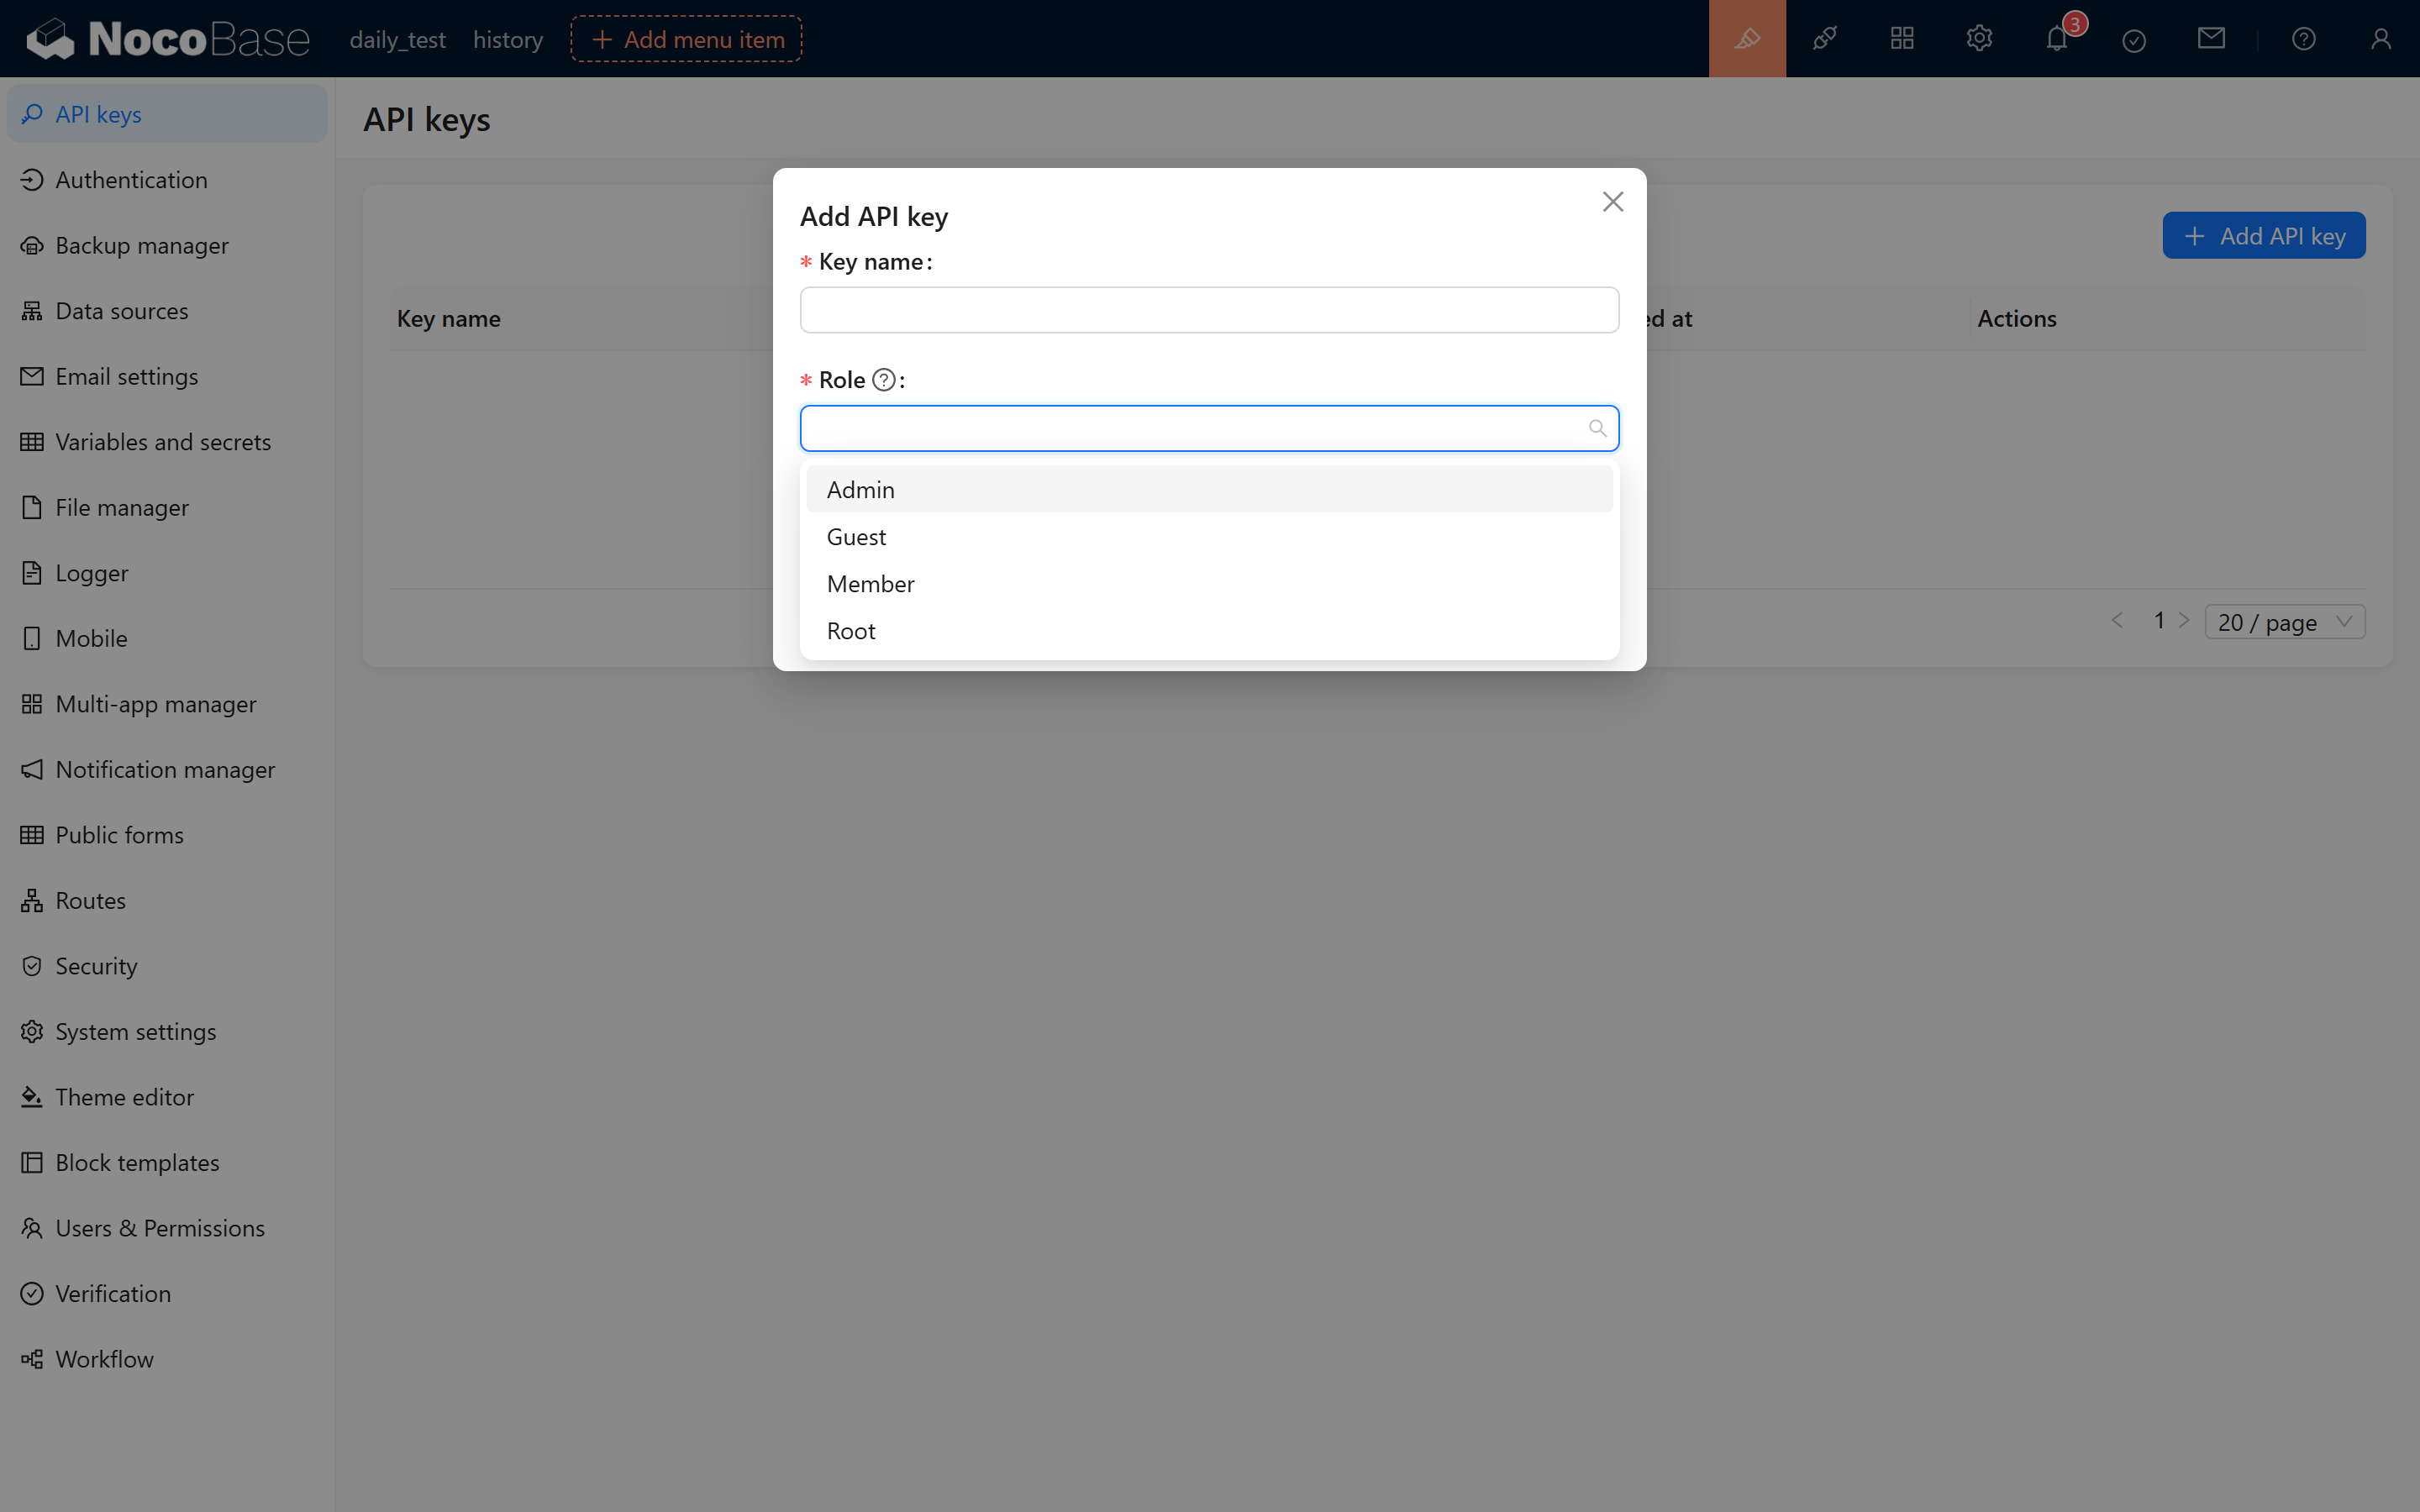
If “To Dos API Role” is not available when creating an API key, it may be because the current user has not been assigned this role. In that case, please assign this role to the current user:
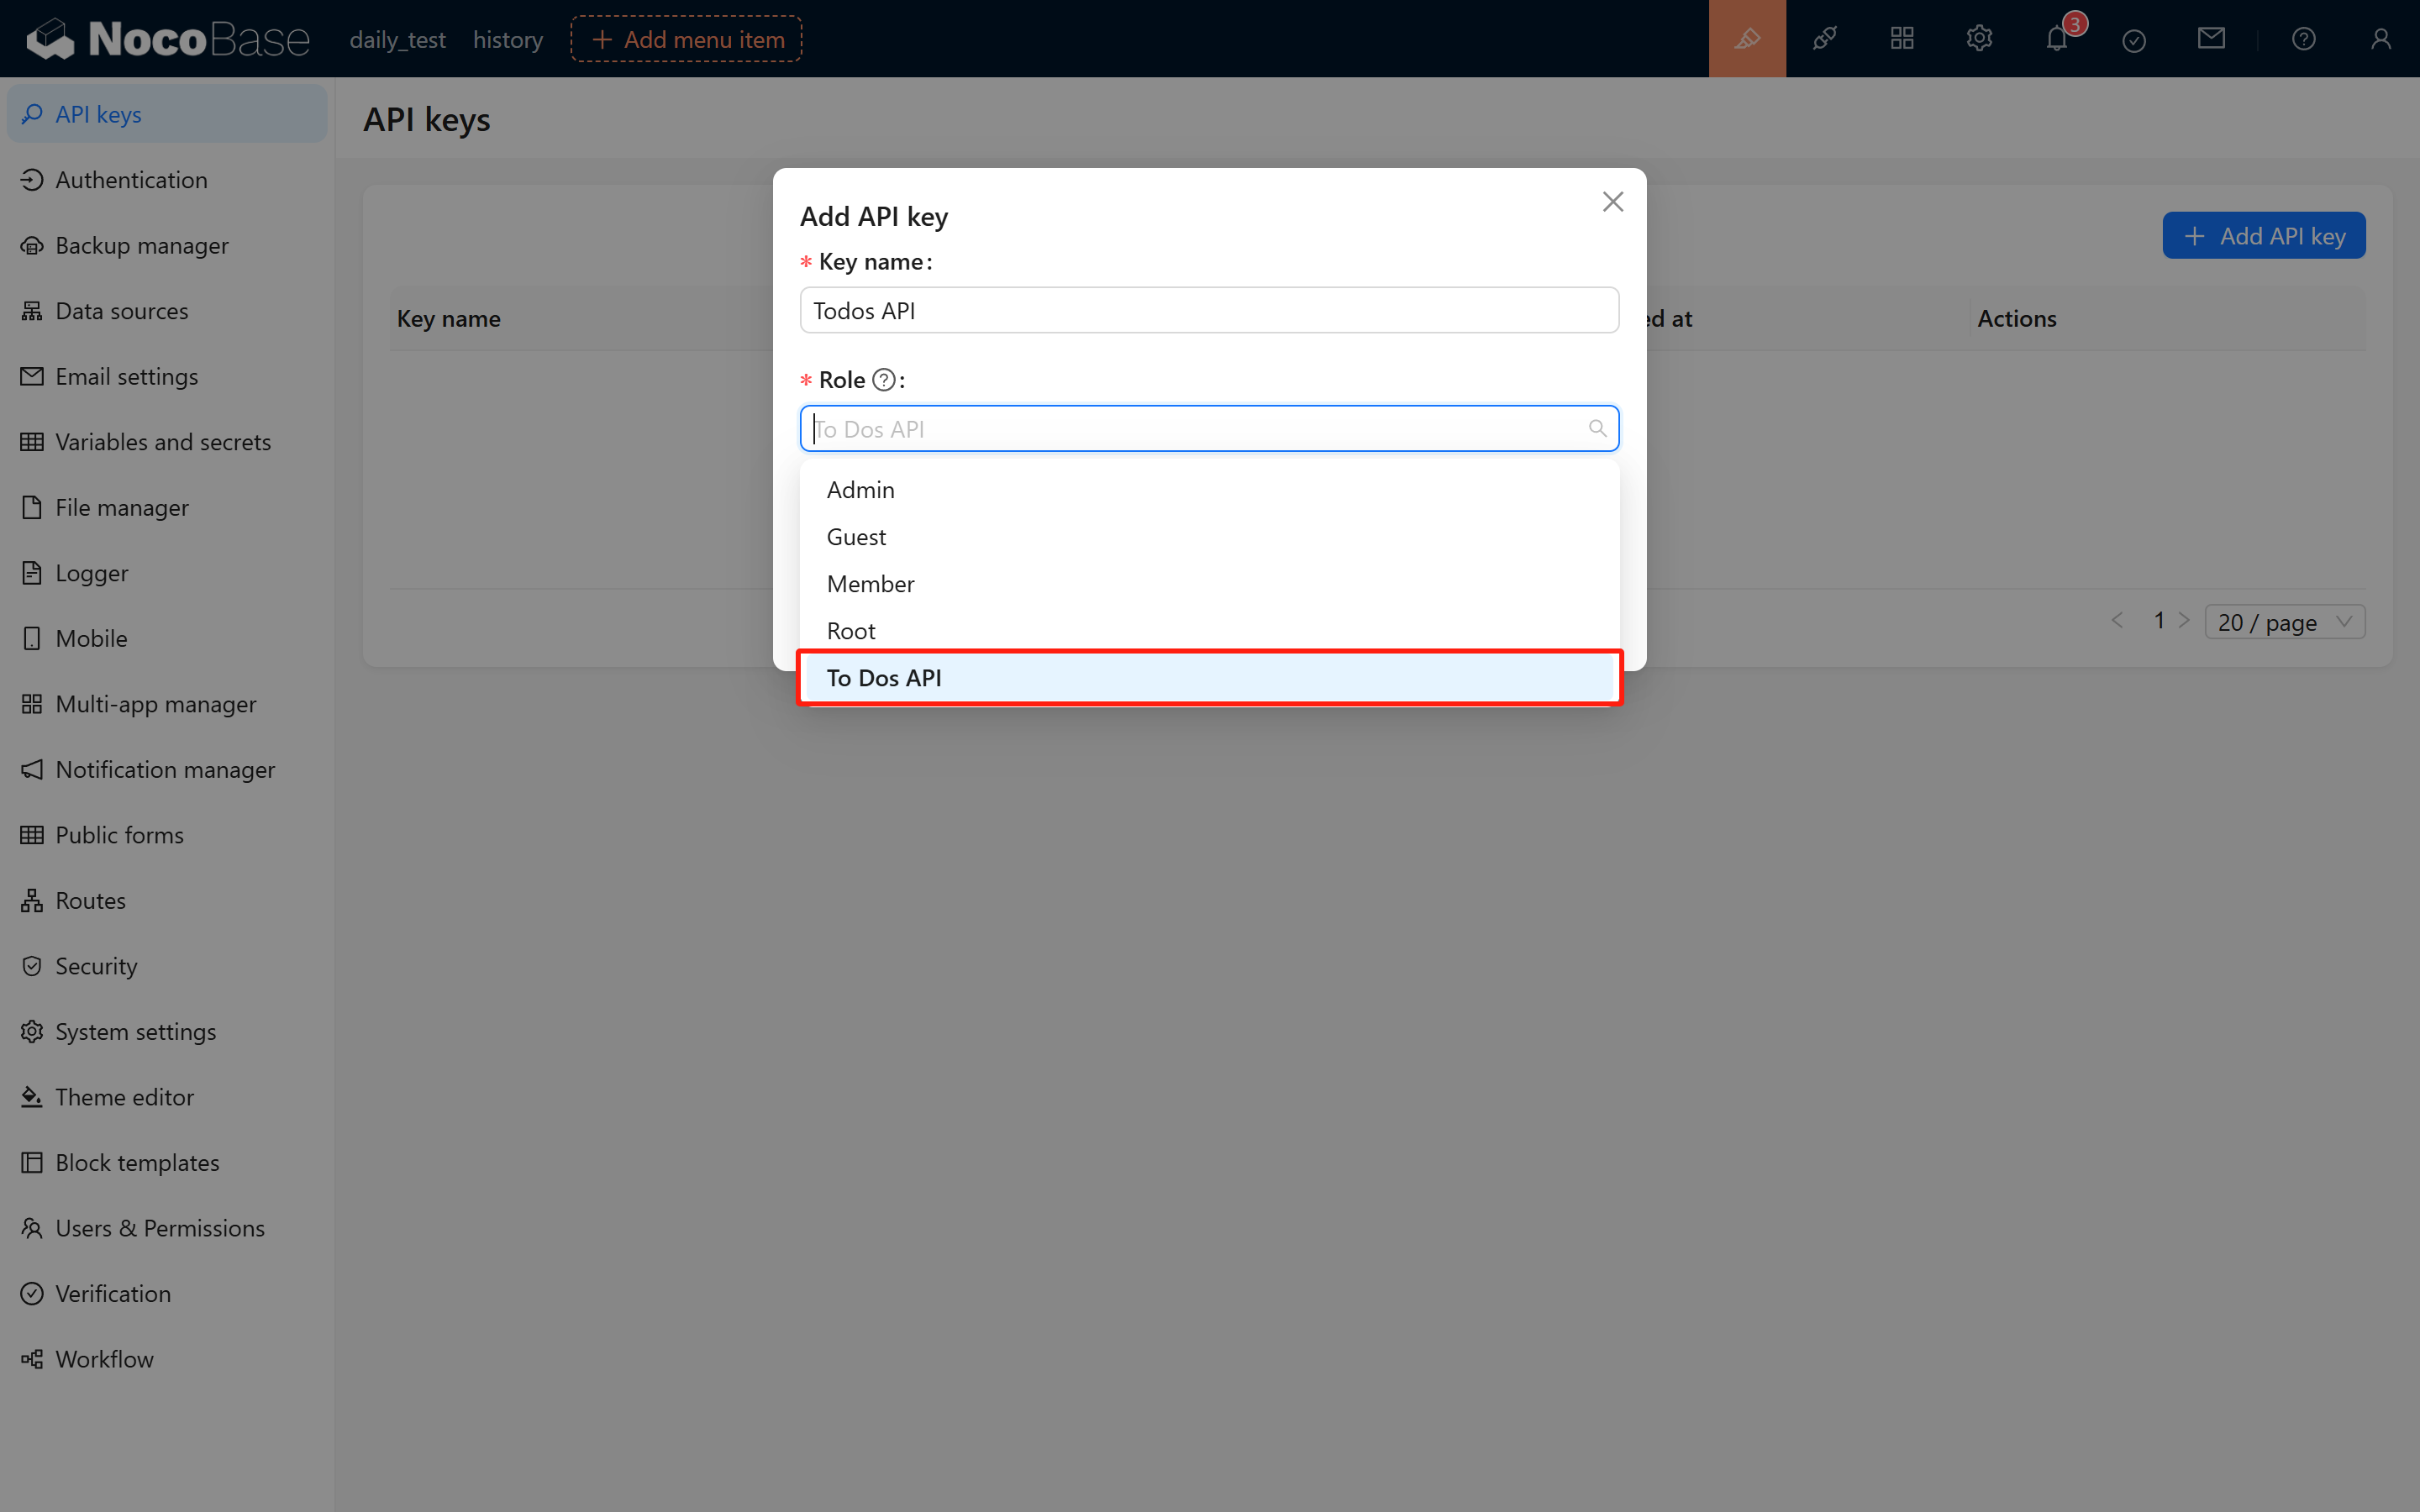
After assigning the role, refresh the page and navigate to the API key management page. Click “Add API Key,” and you should see the “To Dos API Role” role available.

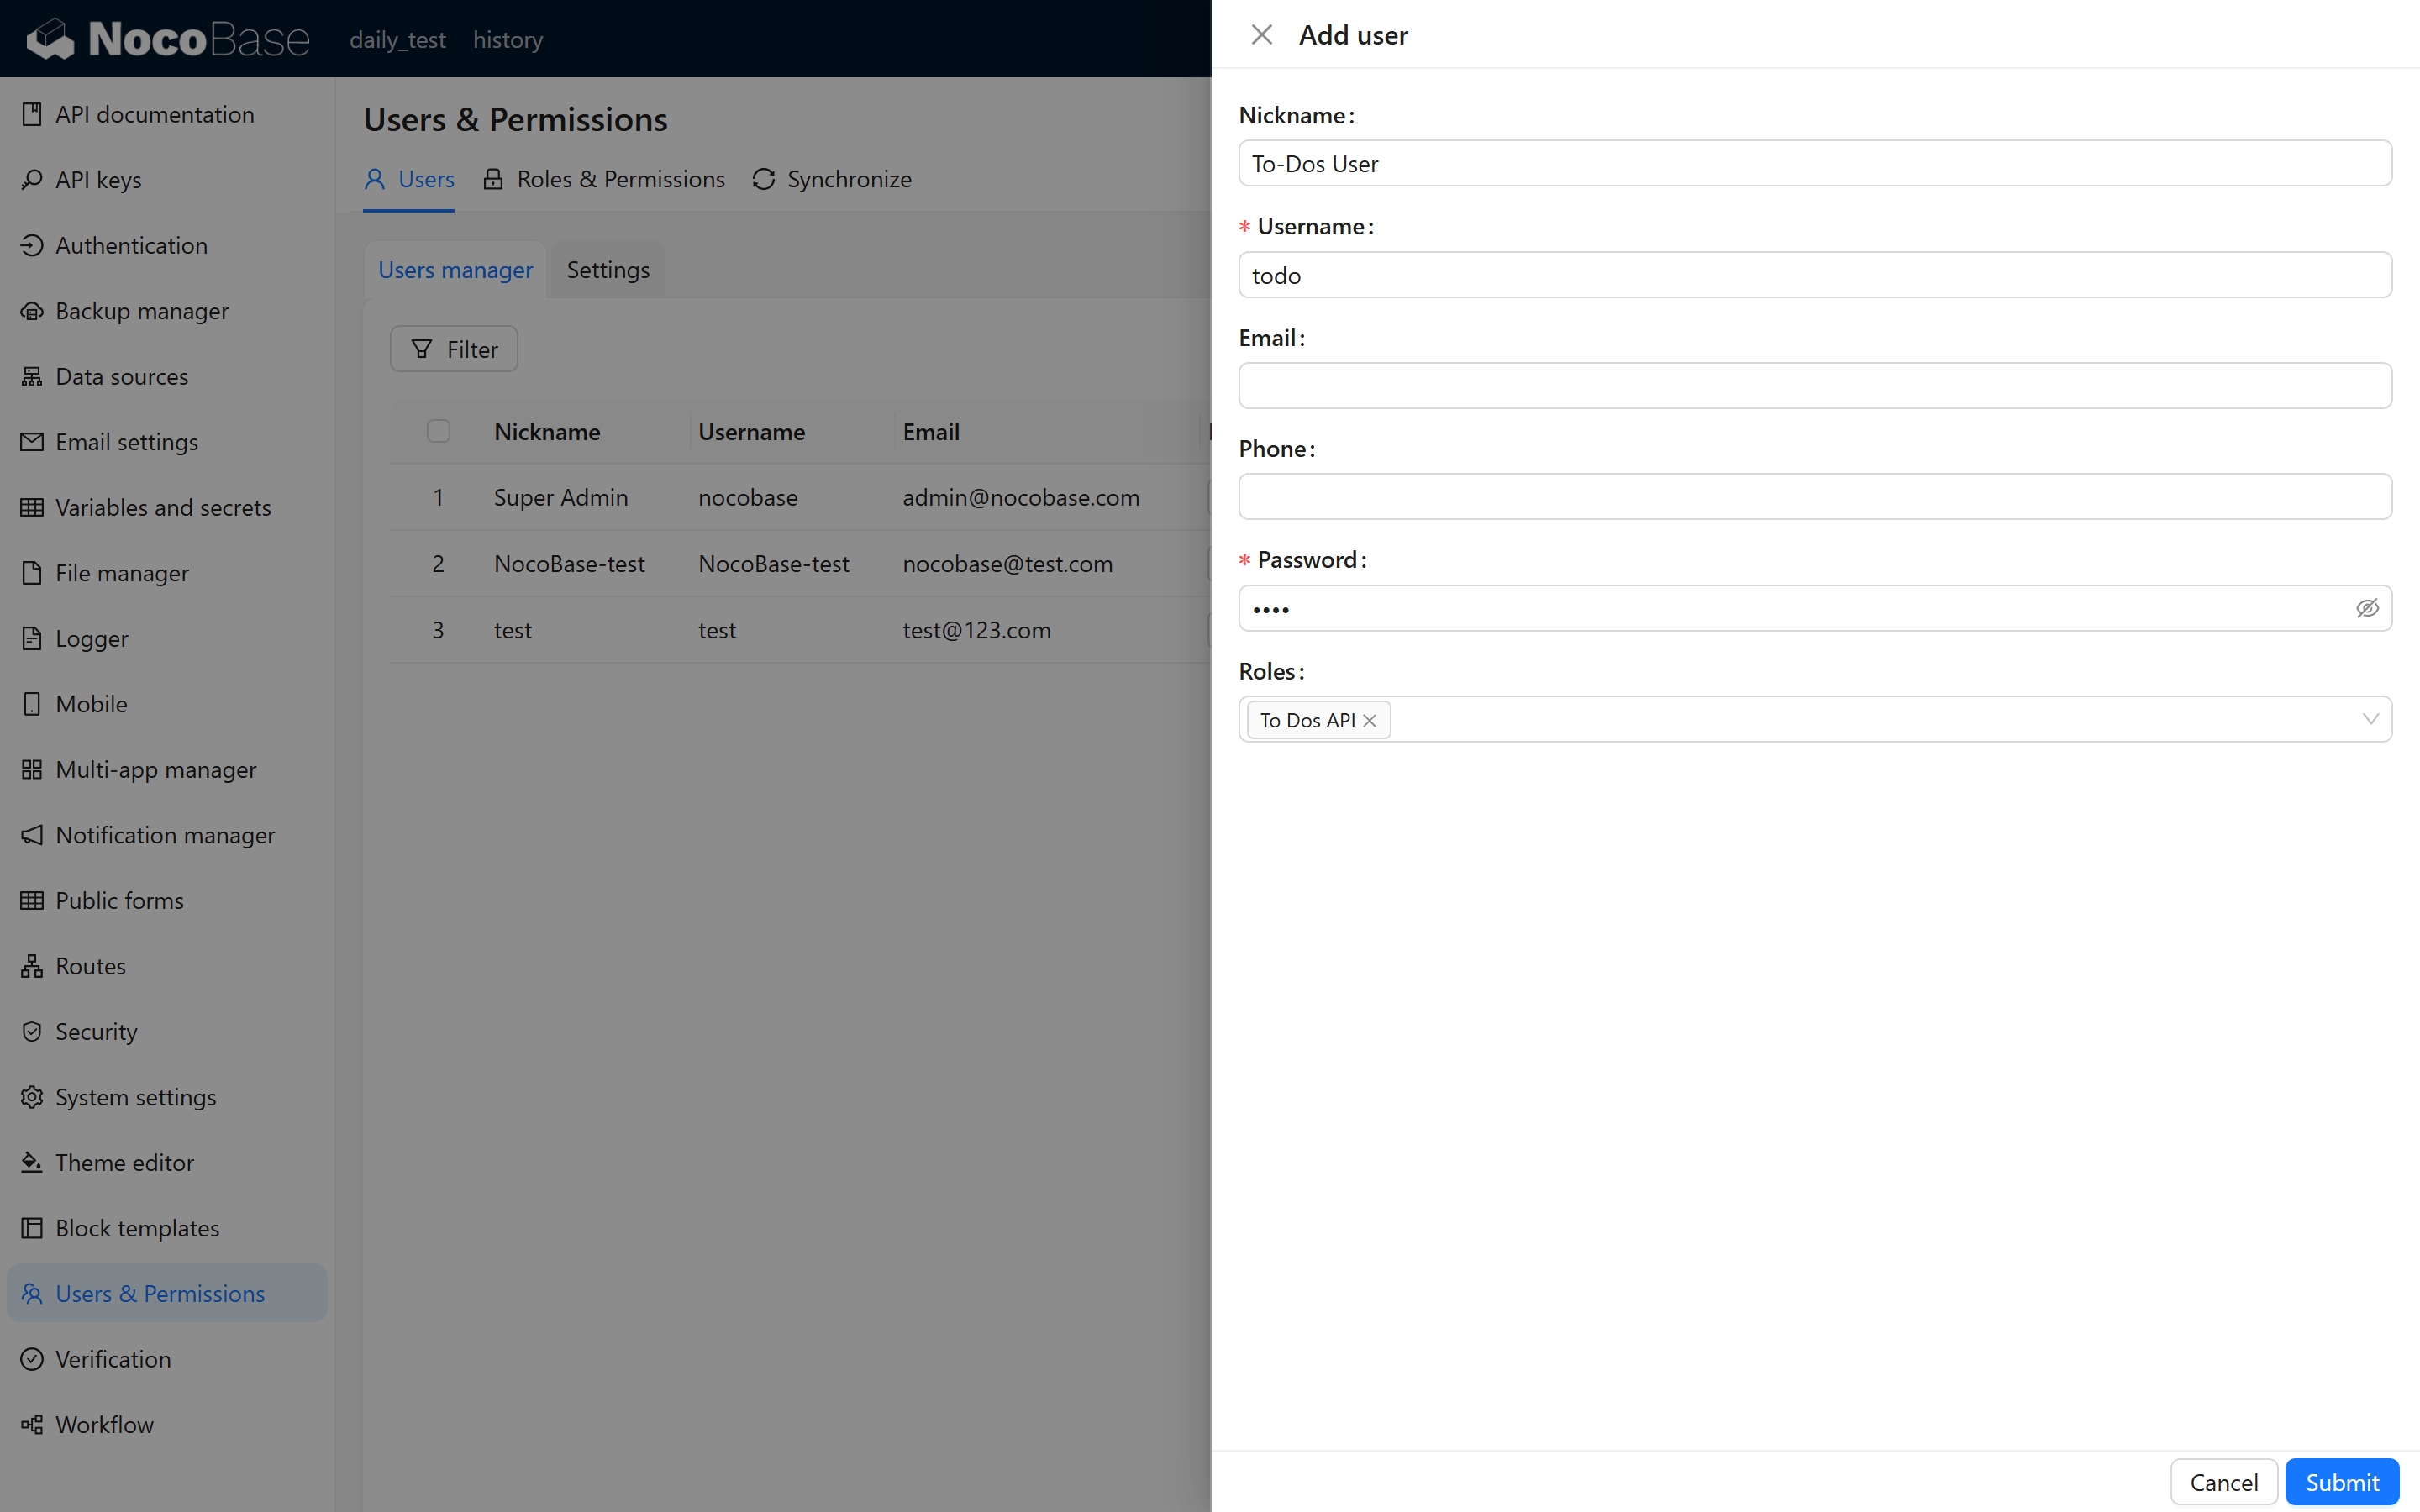
For more precise management, you can also create a dedicated “To Dos API User” to log into the system, test permissions, and manage API keys. Simply assign the “To Dos API Role” to this user.
2.4 Create and Save the API Key
After clicking submit, the system will display a prompt indicating that the API key has been created successfully, and the key will be shown in a popup. Be sure to copy and save this key, as it will not be shown again for security reasons.
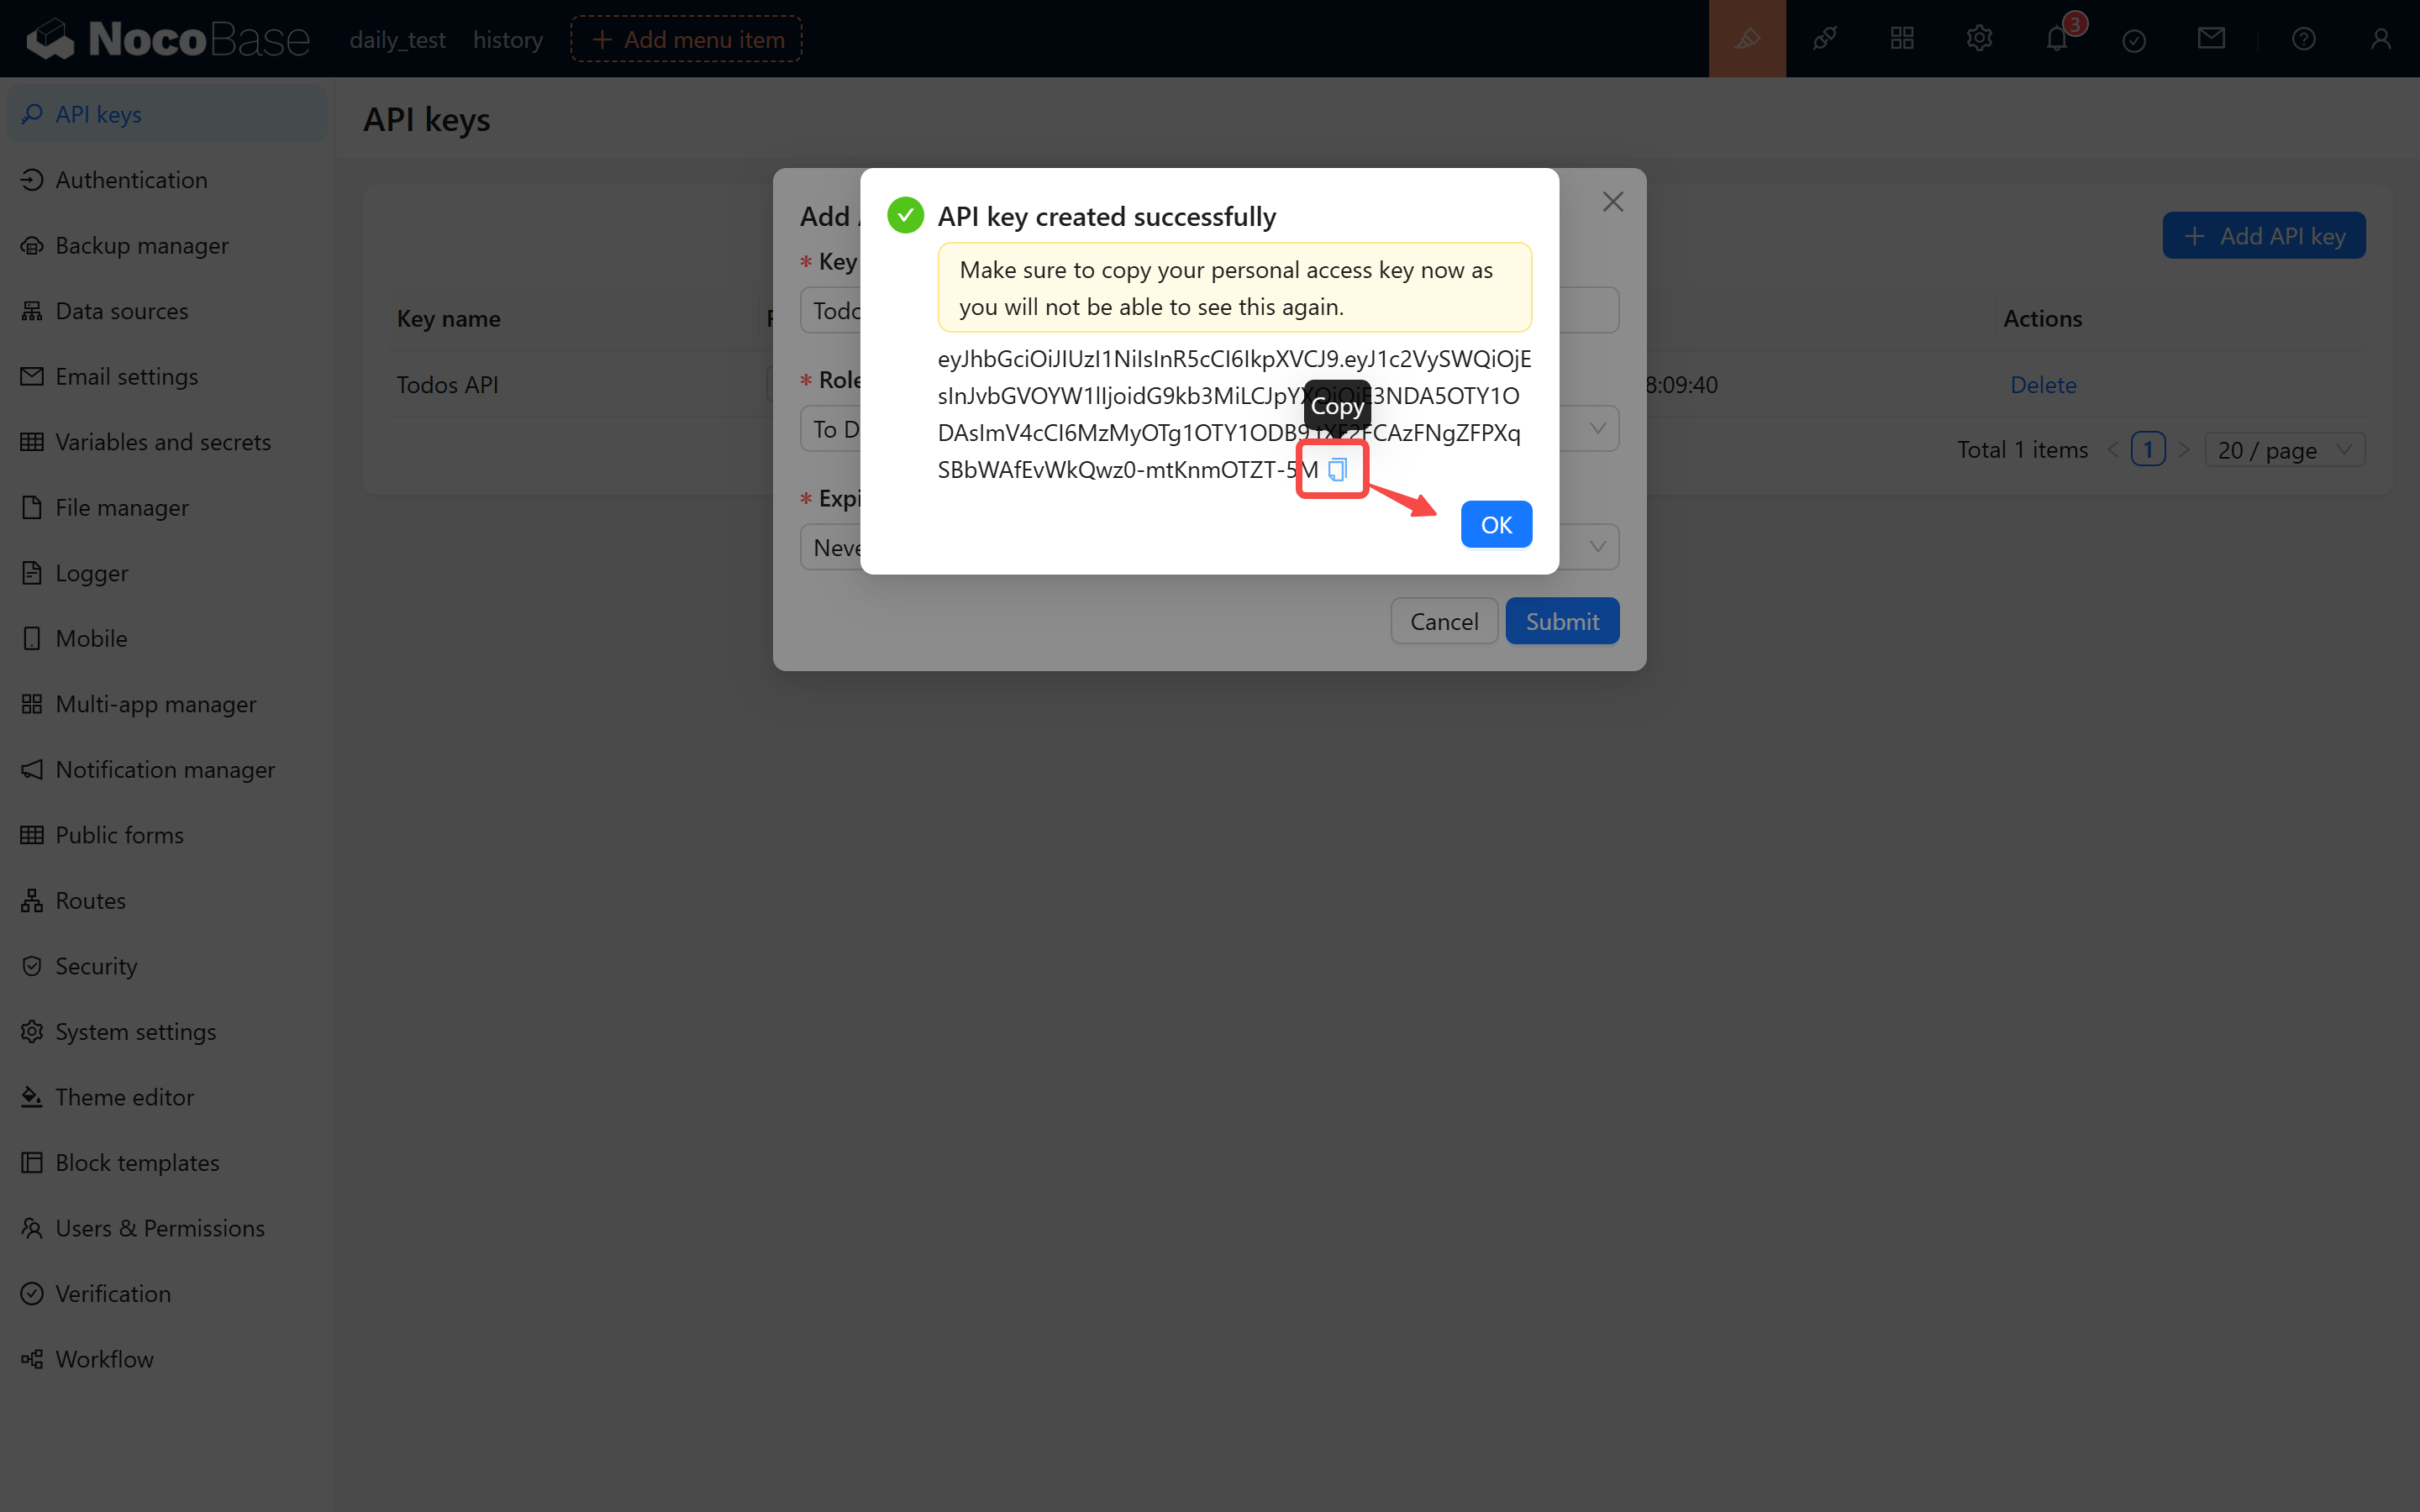
For example, you might receive an API key like this:
eyJhbGciOiJIUzI1NiIsInR5cCI6IkpXVCJ9.eyJ1c2VySWQiOjEsInJvbGVOYW1lIjoidG9kb3MiLCJpYXQiOjE3NDA5OTY1ODAsImV4cCI6MzMyOTg1OTY1ODB9.tXF2FCAzFNgZFPXqSBbWAfEvWkQwz0-mtKnmOTZT-5M
2.5 Notes
- The validity period of the API key depends on the duration you selected when applying.
- The generation and verification of the API key are closely tied to the
APP_KEYenvironment variable. Do not modify it arbitrarily, or all API keys in the system will become invalid.
3 Testing the API Key’s Validity
3.1 Using the API document Plugin
Open the API document plugin, where you can view the request method, URL, parameters, and header information for each API.
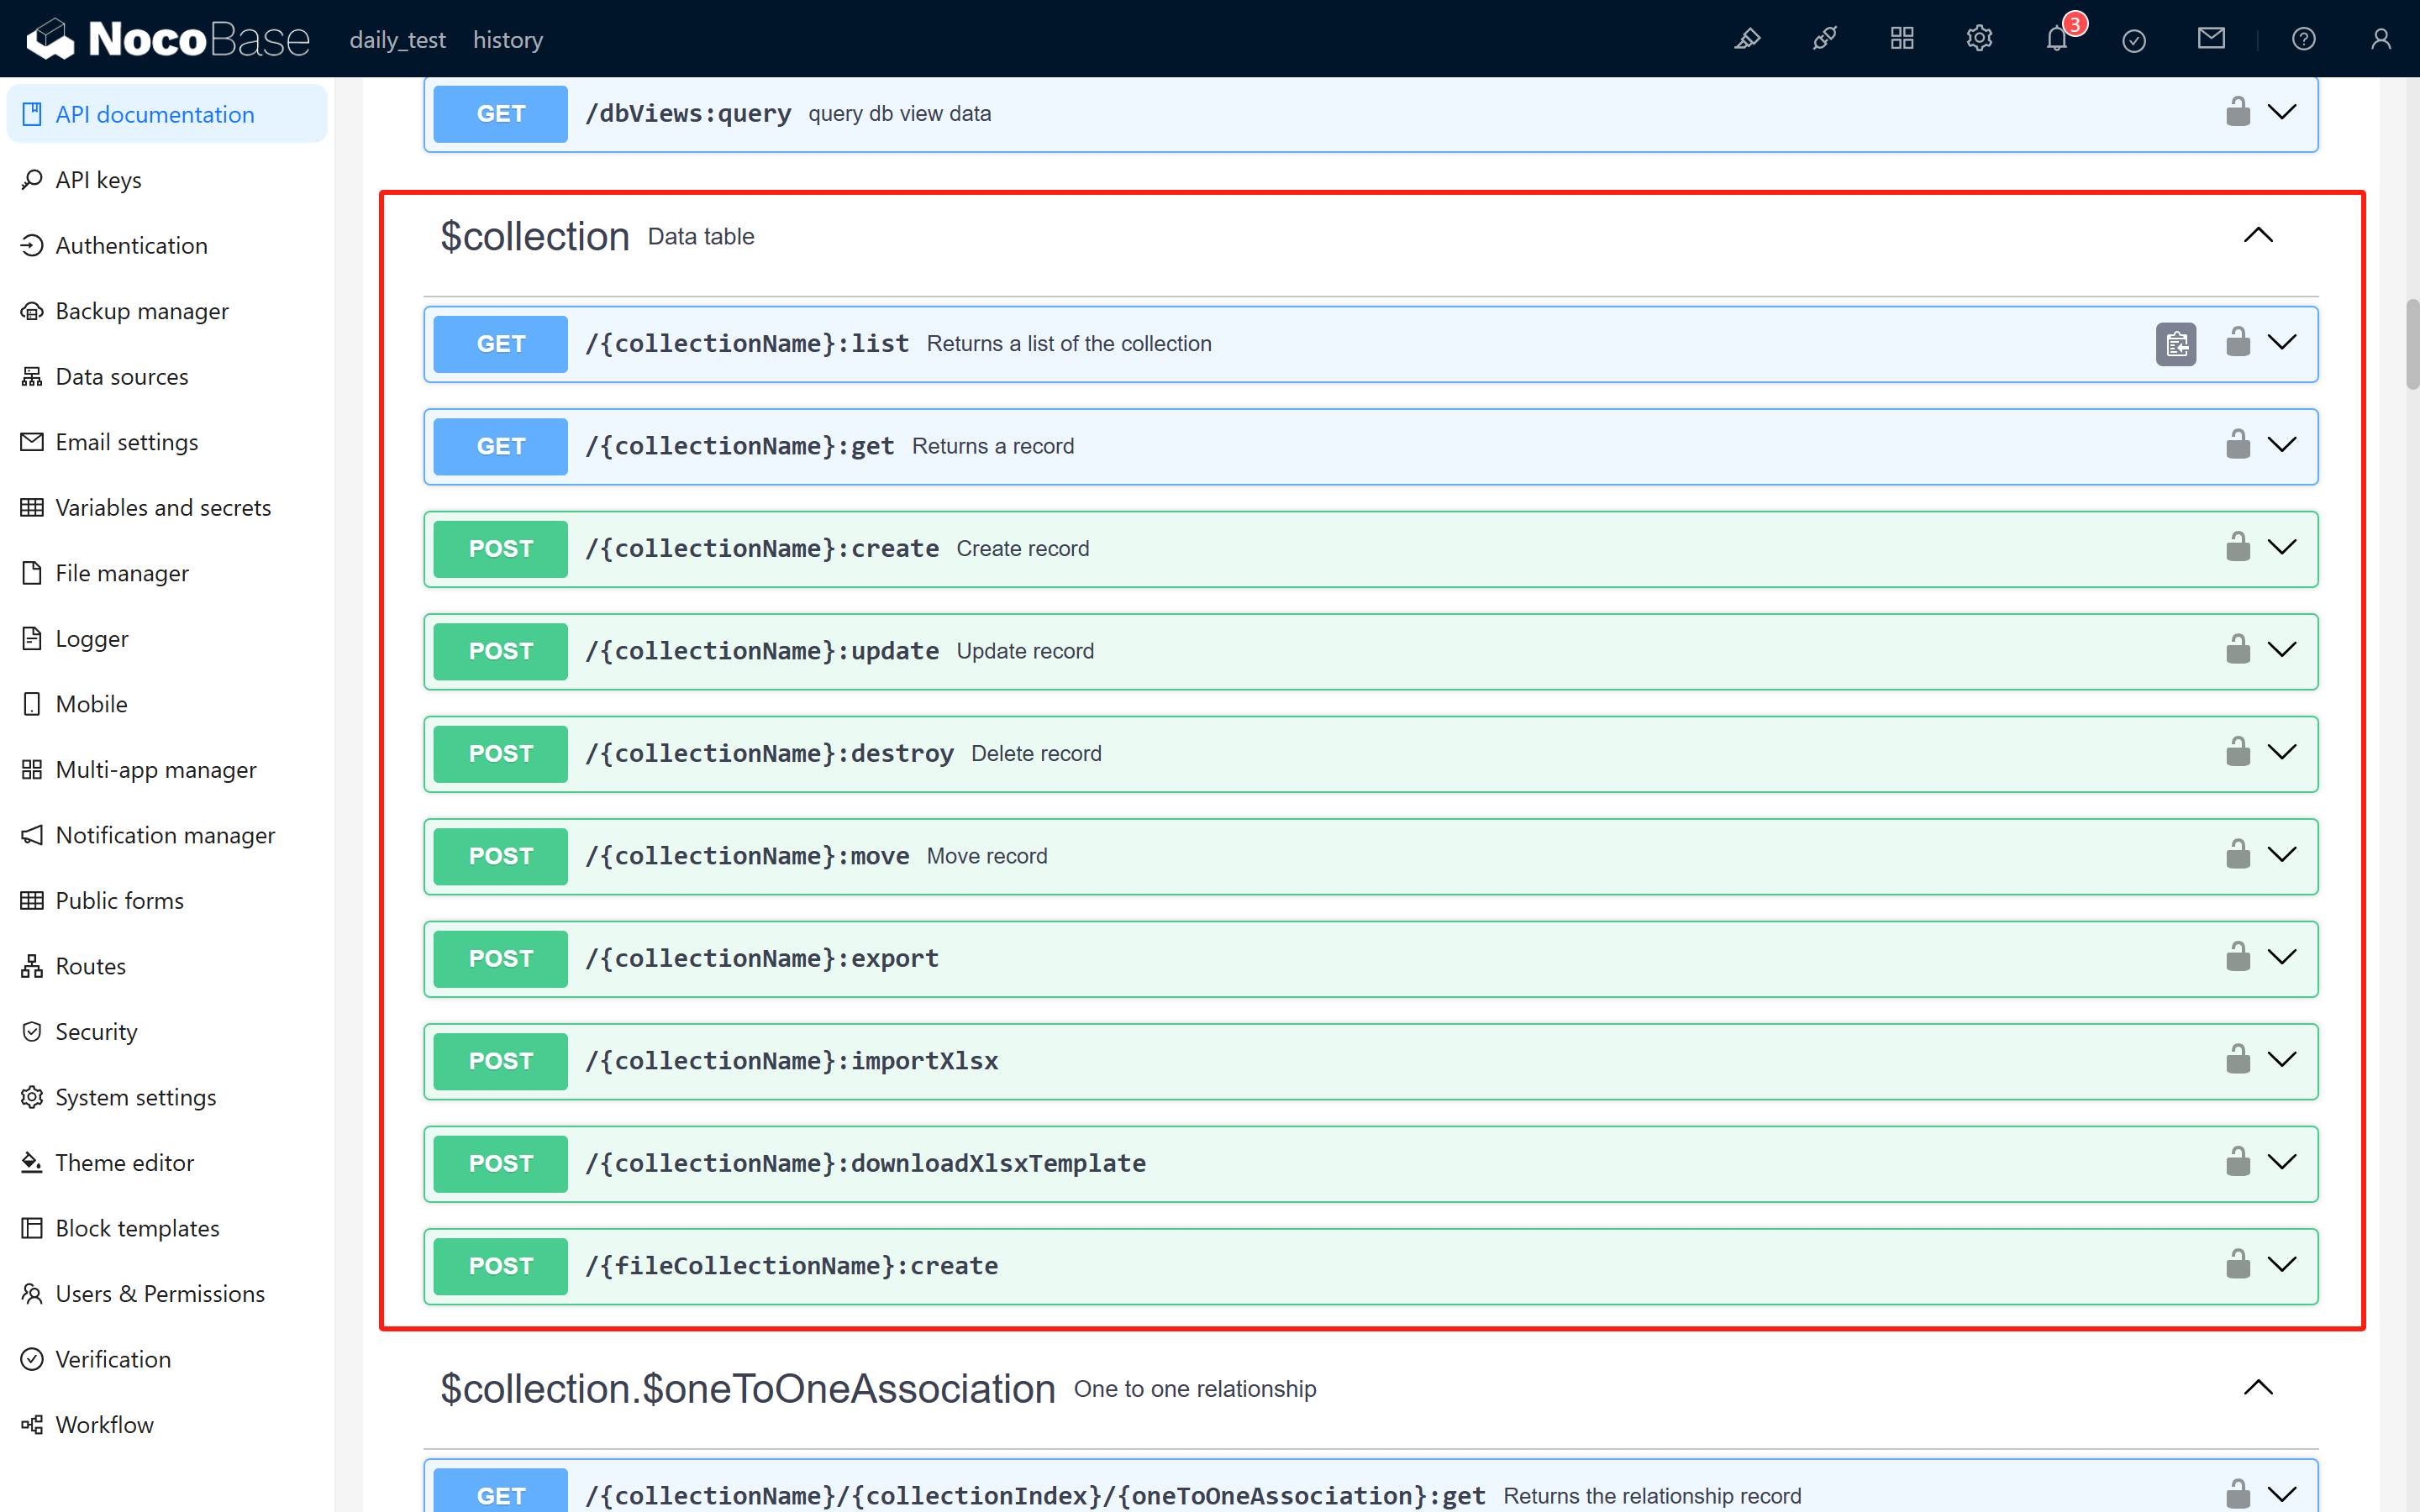
3.2 Understanding the Basic CRUD APIs
Below are some basic API examples provided by NocoBase:
-
List Query (list API):
GET {baseURL}/{collectionName}:list Request Header: - Authorization: Bearer <API key> -
Create Record (create API):
POST {baseURL}/{collectionName}:create Request Header: - Authorization: Bearer <API key> Request Body (in JSON format), for example: { "title": "123" } -
Update Record (update API):
POST {baseURL}/{collectionName}:update?filterByTk={id} Request Header: - Authorization: Bearer <API key> Request Body (in JSON format), for example: { "title": "123", "completed": true } -
Delete Record (delete API):
POST {baseURL}/{collectionName}:destroy?filterByTk={id}
Request Header:
- Authorization: Bearer <API key>
Here, {baseURL} is the URL of your NocoBase system and {collectionName} is the collection name. For example, when testing locally, if the address is localhost:13000 and the collection name is todos, the request URL would be:
http://localhost:13000/todos:list
3.3 Testing Using Postman (Example with the List API)
Open Postman, create a new GET request, enter the request URL above, and add the Authorization header with your API key as the value:
Bearer eyJhbGciOiJIUzI1NiIsInR5cCI6IkpXVCJ9.eyJ1c2VySWQiOjEsInJvbGVOYW1lIjoidG9kb3MiLCJpYXQiOjE3NDA5OTY1ODAsImV4cCI6MzMyOTg1OTY1ODB9.tXF2FCAzFNgZFPXqSBbWAfEvWkQwz0-mtKnmOTZT-5M
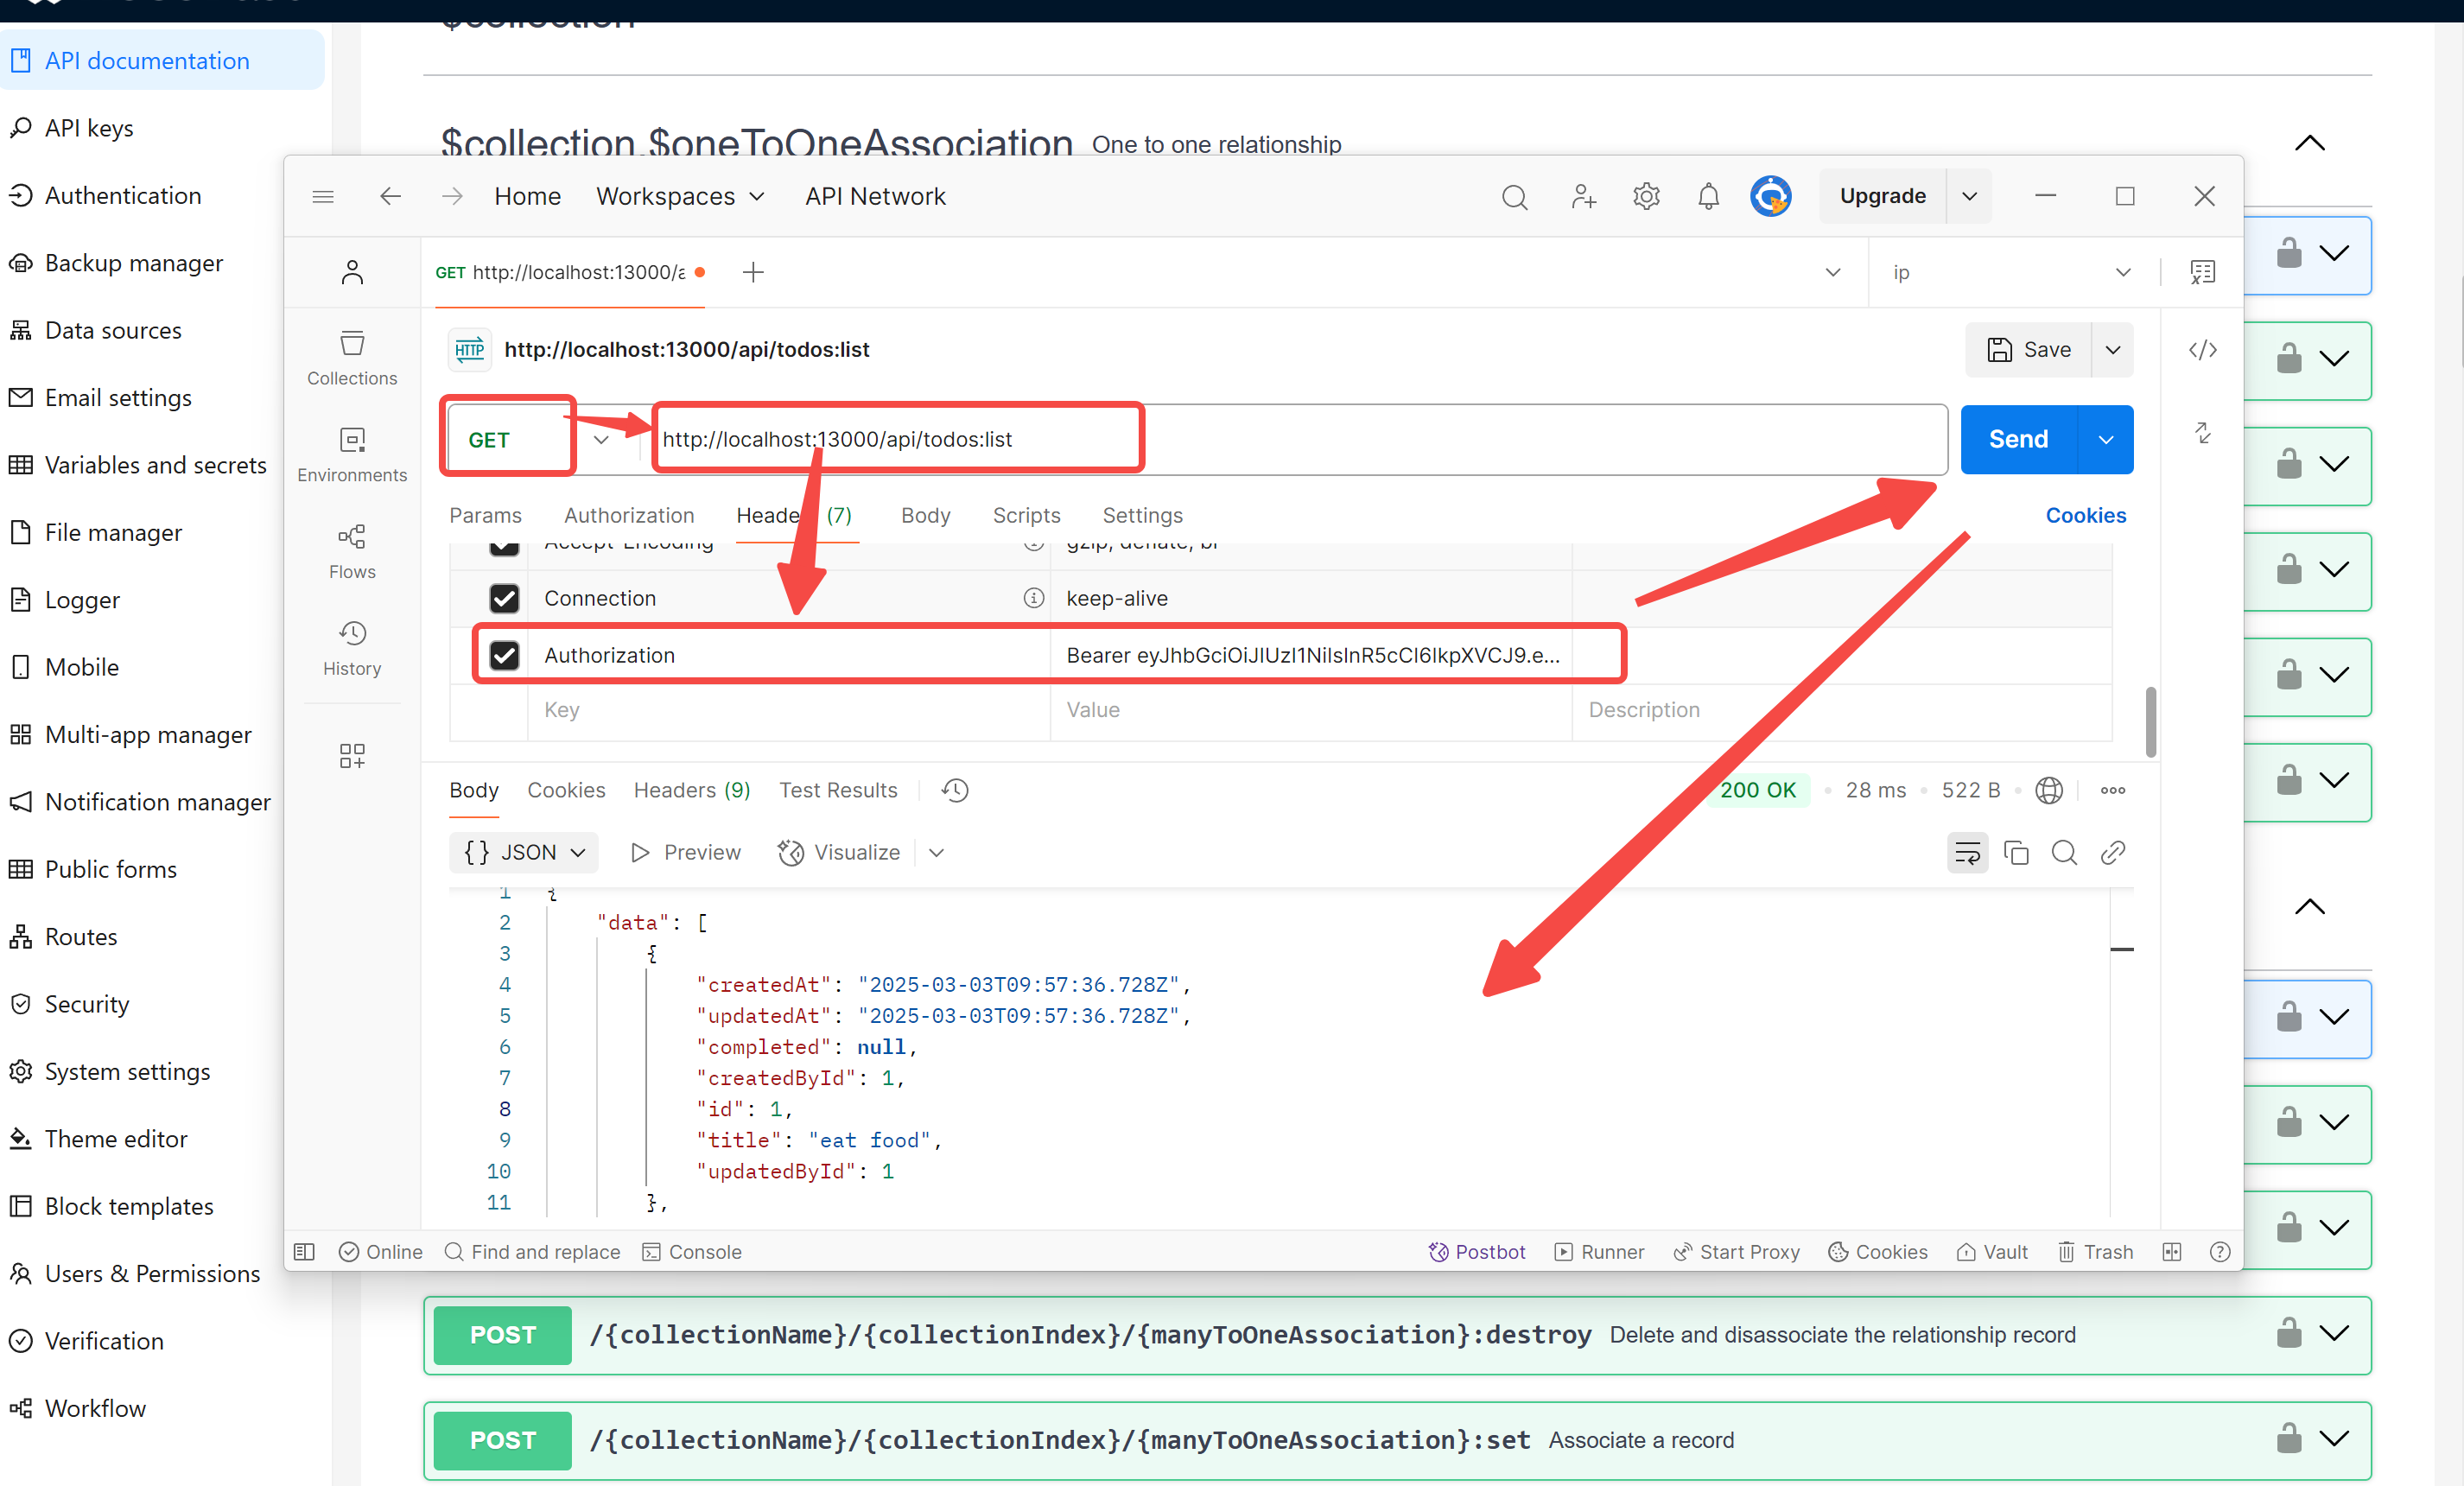 After sending the request, if everything is set up correctly, you should receive a response similar to the following:
{
    "data": [
        {
            "createdAt": "2025-03-03T09:57:36.728Z",
            "updatedAt": "2025-03-03T09:57:36.728Z",
            "completed": null,
            "createdById": 1,
            "id": 1,
            "title": "eat food",
            "updatedById": 1
        }
    ],
    "meta": {
        "count": 1,
        "page": 1,
        "pageSize": 20,
        "totalPage": 1
    }
}
If the API key is not correctly authorized, you might see an error message like:
{
    "errors": [
        {
            "message": "Your session has expired. Please sign in again.",
            "code": "INVALID_TOKEN"
        }
    ]
}
In such a case, please check the role permissions, API key binding, and ensure the key format is correct.
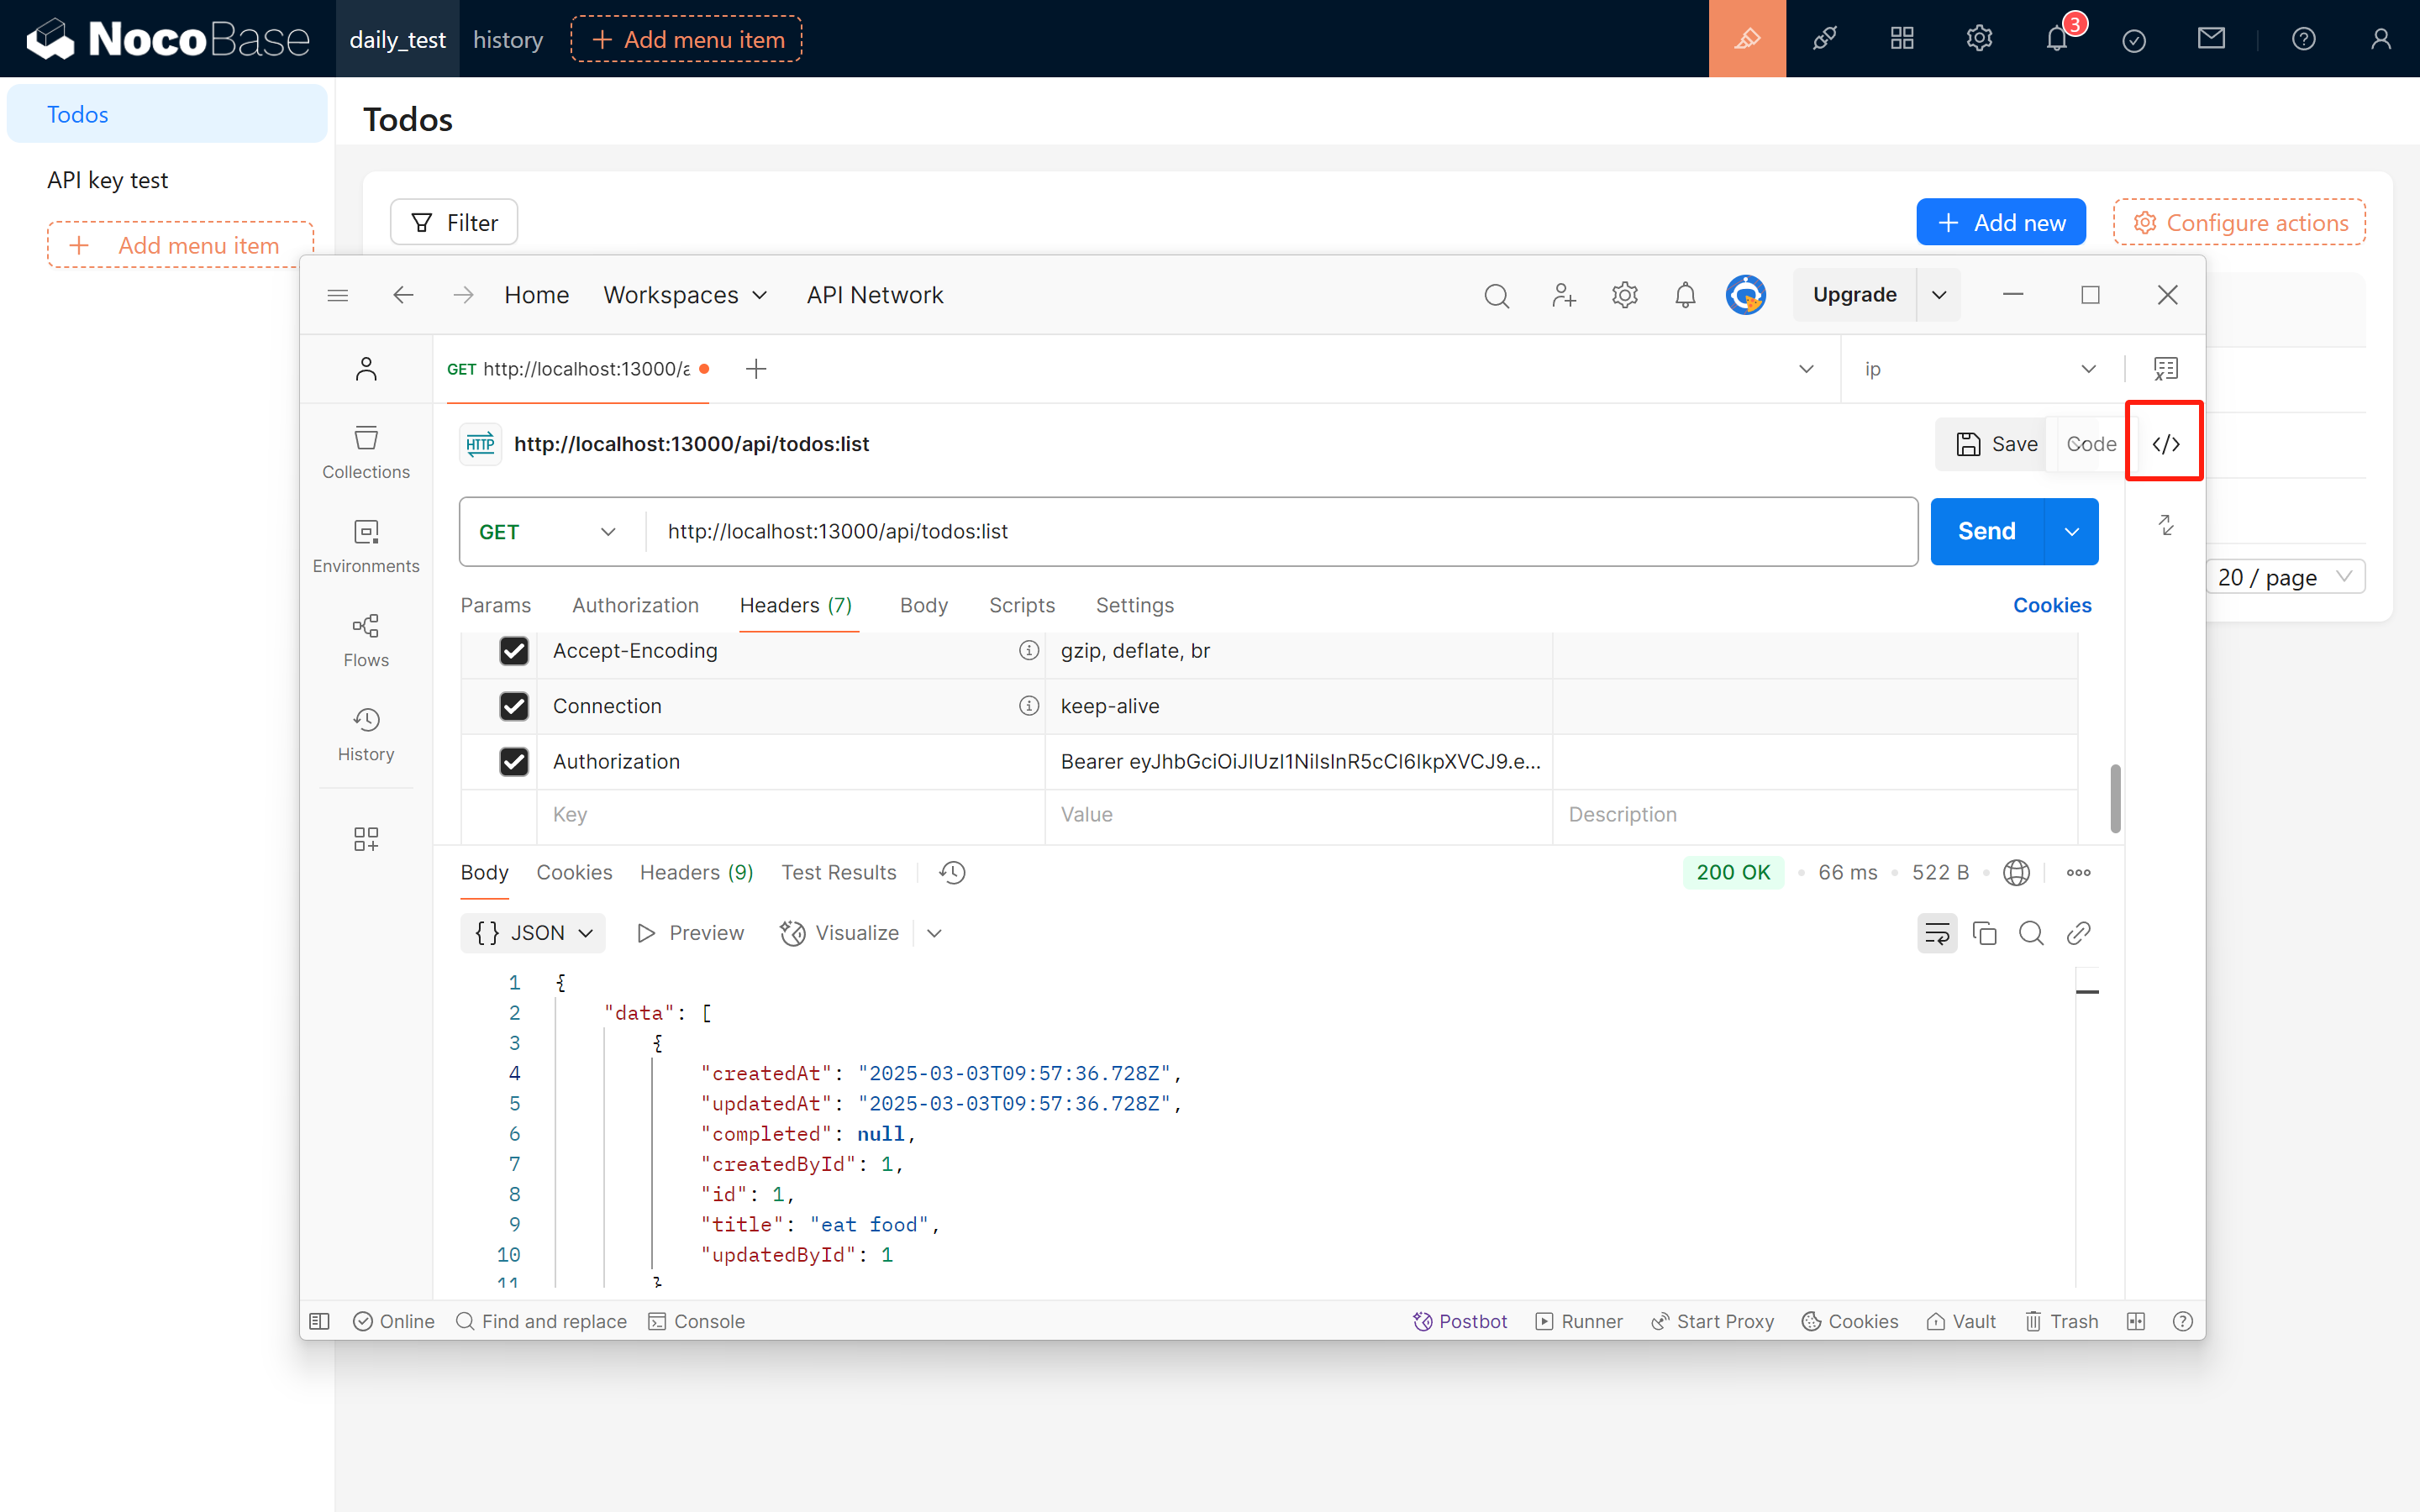
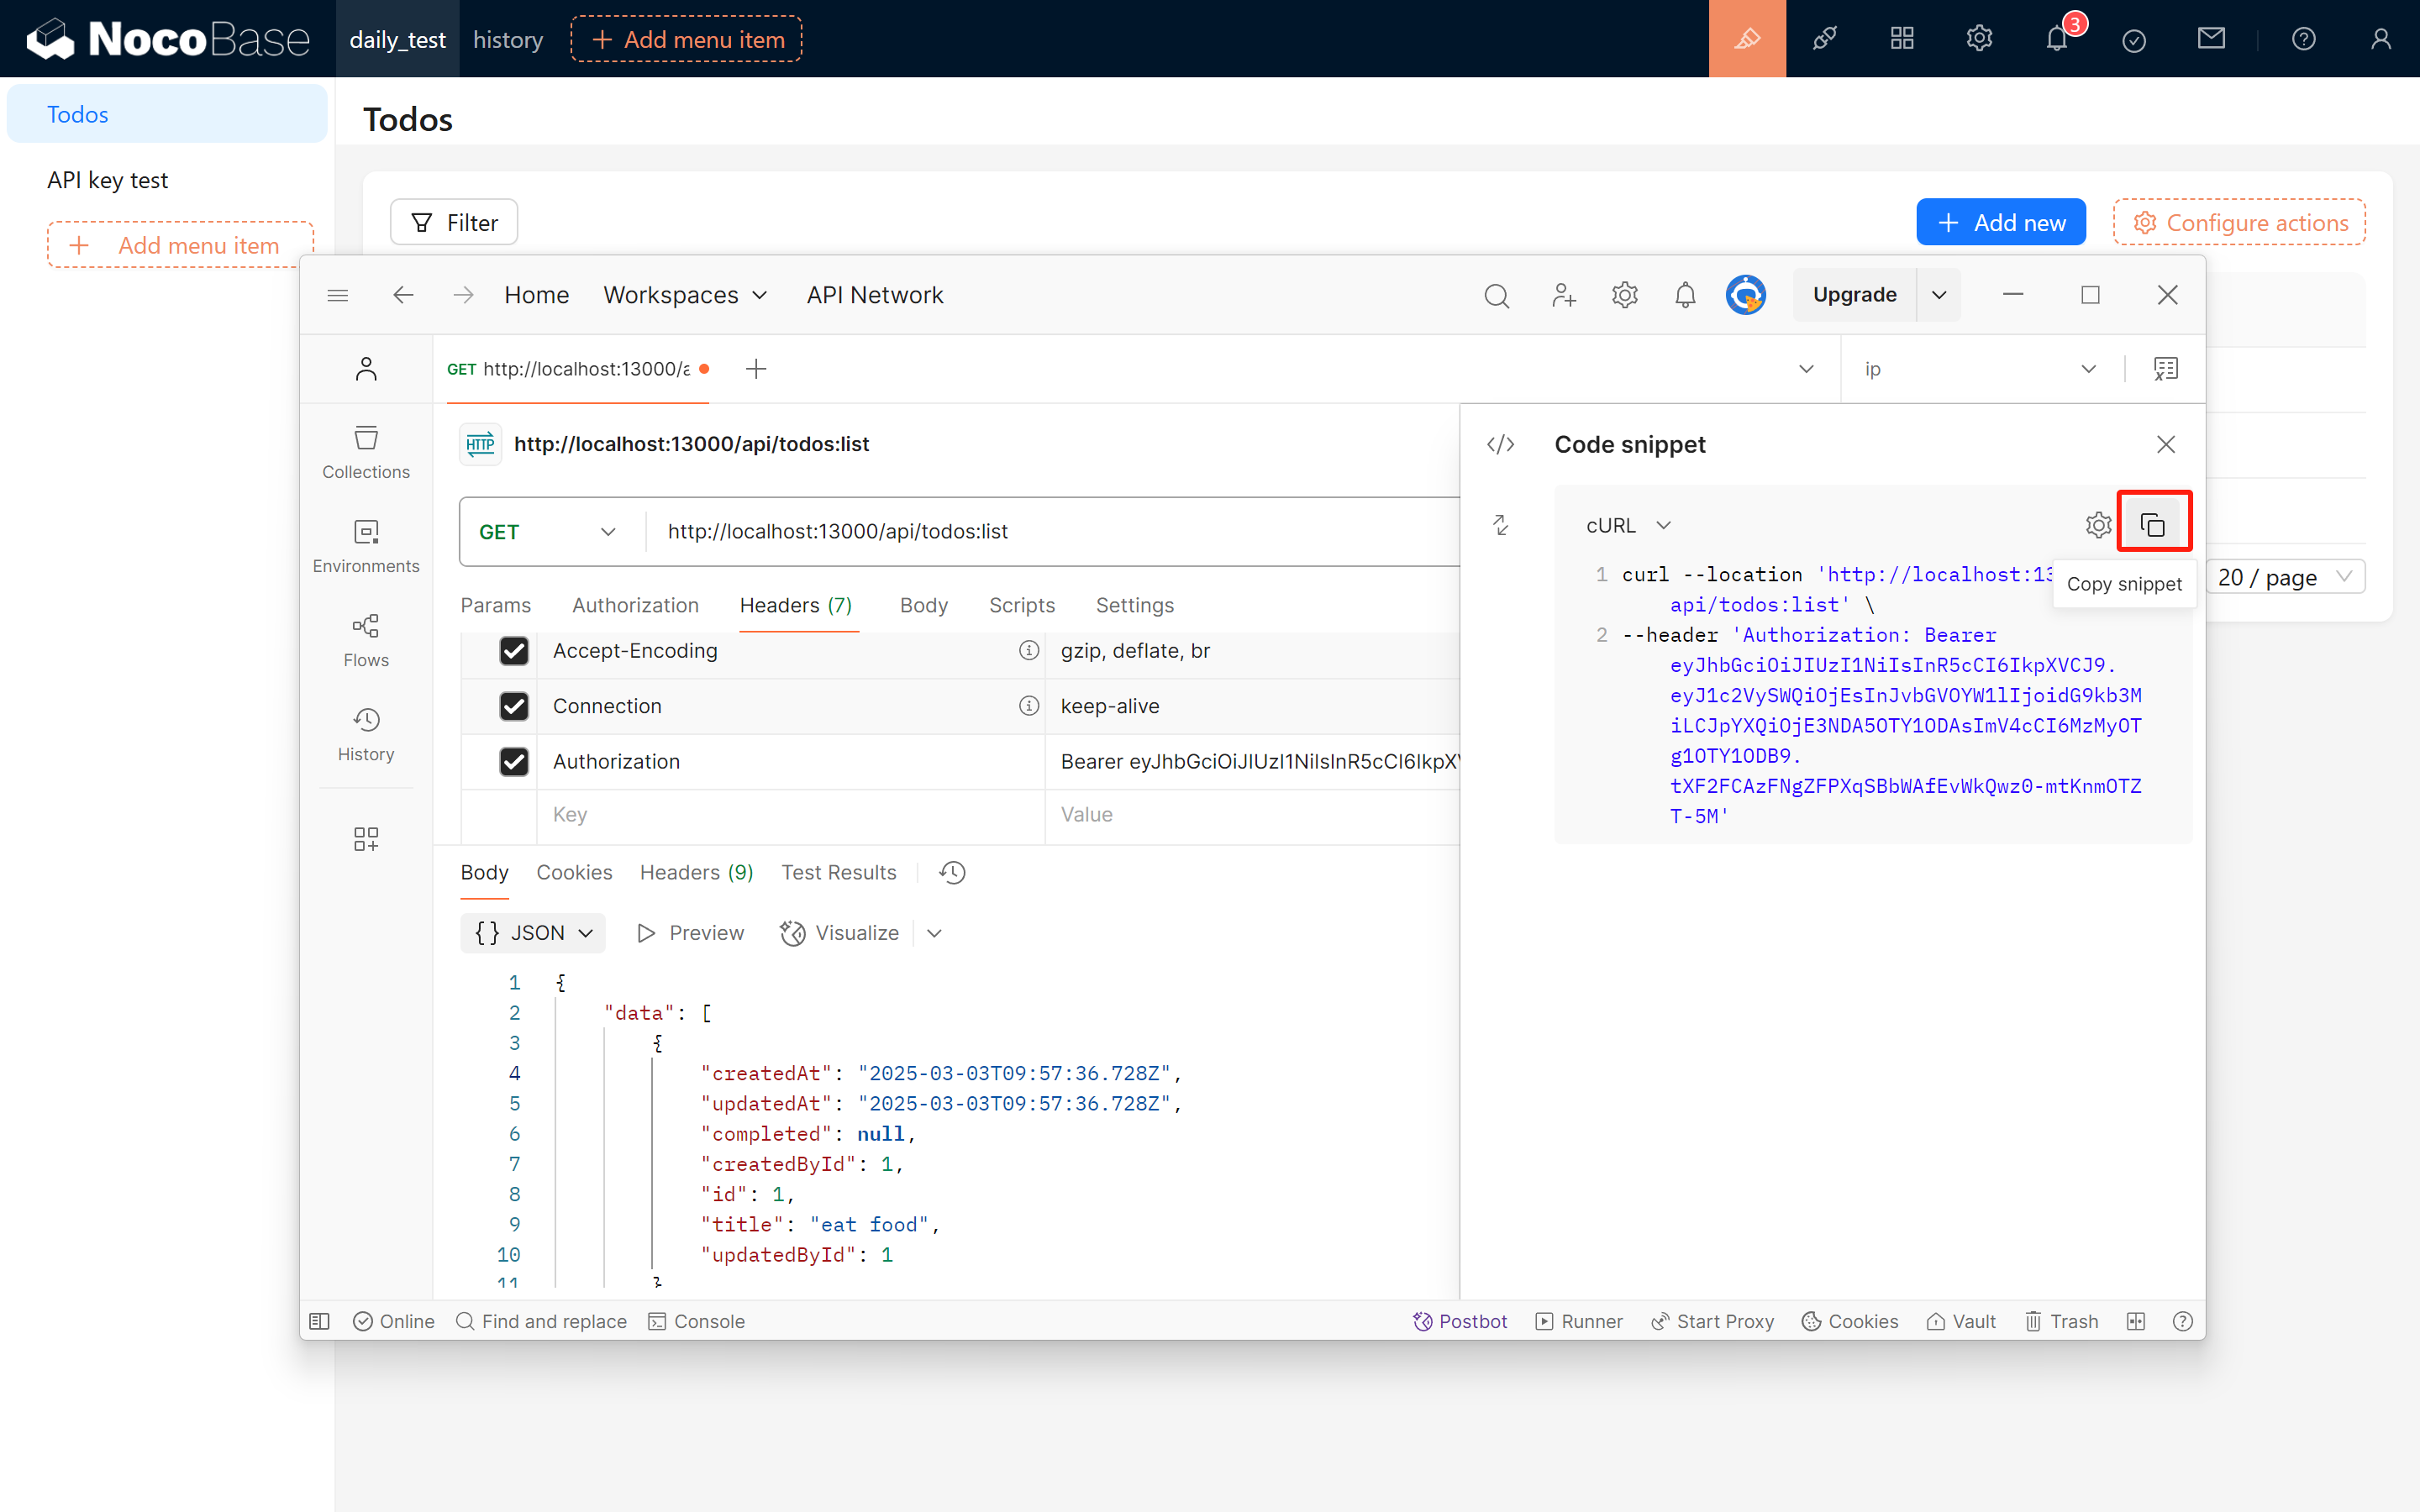
3.4 Copy the Request Code from Postman
Once the test is successful, you can copy the request code for the List API. For instance, the following curl request example is copied from Postman:
curl --location 'http://localhost:13000/api/todos:list' \
--header 'Authorization: Bearer eyJhbGciOiJIUzI1NiIsInR5cCI6IkpXVCJ9.eyJ1c2VySWQiOjEsInJvbGVOYW1lIjoidG9kb3MiLCJpYXQiOjE3NDA5OTY1ODAsImV4cCI6MzMyOTg1OTY1ODB9.tXF2FCAzFNgZFPXqSBbWAfEvWkQwz0-mtKnmOTZT-5M'
4 Displaying To Dos in an Iframe Block
To visually demonstrate the effect of API requests, we can use an Iframe Block to display the list of To Dos fetched from NocoBase. Refer to the sample code below:
<!DOCTYPE html>
<html lang="en">
<head>
    <meta charset="UTF-8">
    <meta name="viewport" content="width=device-width, initial-scale=1.0">
    <title>Todo List</title>
</head>
<body>
    <h1>Todo List</h1>
    <pre id="result"></pre>

    <script>
        fetch('http://localhost:13000/api/todos:list', {
            method: 'GET',
            headers: {
                'Authorization': 'Bearer eyJhbGciOiJIUzI1NiIsInR5cCI6IkpXVCJ9.eyJ1c2VySWQiOjEsInJvbGVOYW1lIjoidG9kb3MiLCJpYXQiOjE3NDA5OTY1ODAsImV4cCI6MzMyOTg1OTY1ODB9.tXF2FCAzFNgZFPXqSBbWAfEvWkQwz0-mtKnmOTZT-5M'
            }
        })
        .then(response => response.json())
        .then(data => {
            document.getElementById('result').textContent = JSON.stringify(data, null, 2);
        })
        .catch(error => {
            console.error('Error:', error);
        });
    </script>
</body>
</html>
The above code embeds an Iframe Block that displays a simple “Todo List”. Upon loading, it calls the API to retrieve the To Dos and shows the response (as formatted JSON) within the iframe.
Additionally, the following animation demonstrates the dynamic process of the request:
5 Conclusion
Through the above steps, we have explained in detail how to create and use API keys in NocoBase. From activating the plugin, creating a collection, and binding a role, to testing the API and displaying data in an Iframe Block—each step is crucial. Finally, with the help of DeepSeek, a simple To Dos page was created. Feel free to modify and extend the code as needed.
The code for this example is available in our community post. We welcome your feedback and discussion. We hope this document provides you with clear guidance, and we wish you happy learning and smooth operations!