This blog was produced by Leandro Martins and was originally published at Build Application Catalog with NocoBase.
The goal is to demonstrate the potential and ease of NocoBase for developing web applications without coding. As a case study, I will create an application catalog to assist with architecture governance. This case will involve modeling, installation, table creation, menus, forms, charts, and workflows using NocoBase features.
For this article, we will use the following technologies: NocoBase, Postgres, and Docker.
What is NocoBase?
NocoBase is an open-source platform written in JavaScript, using NodeJS, TypeScript, and AntDesign, designed to create custom applications without the need for coding. It is a low-code backend solution that enables the visual creation of tables, custom forms, workflow automation, and tailored interfaces.
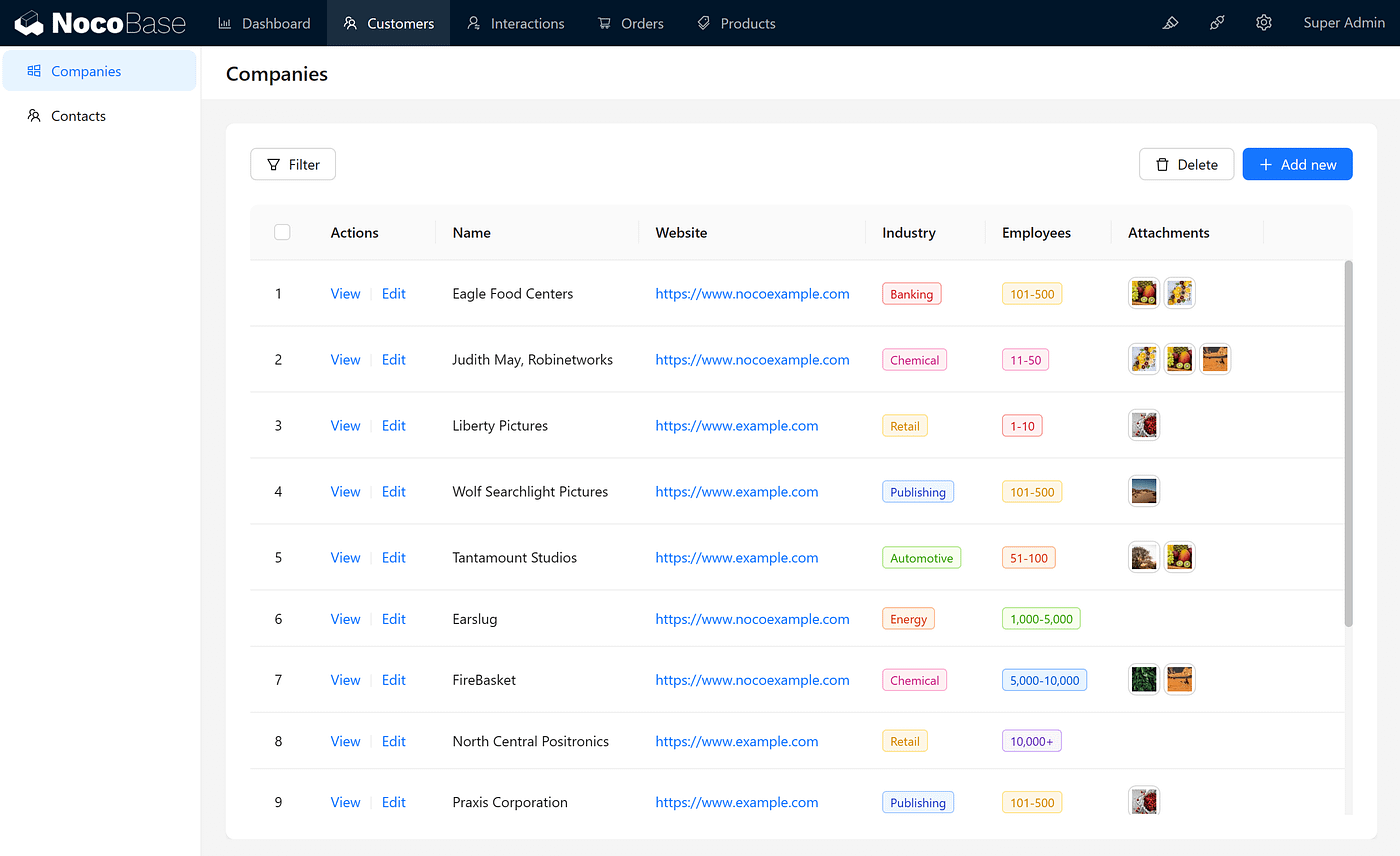
Key Highlights of NocoBase:
- Active community: A highly active forum to support plugin development and troubleshooting.
- Constantly reviewed code: Frequent updates with contributions on GitHub, boasting over 13k stars.
- Database compatibility: Supports major relational databases like Postgres and MySQL.
- Visual data modeling: Define tables and data visually using the Main Database plugin.
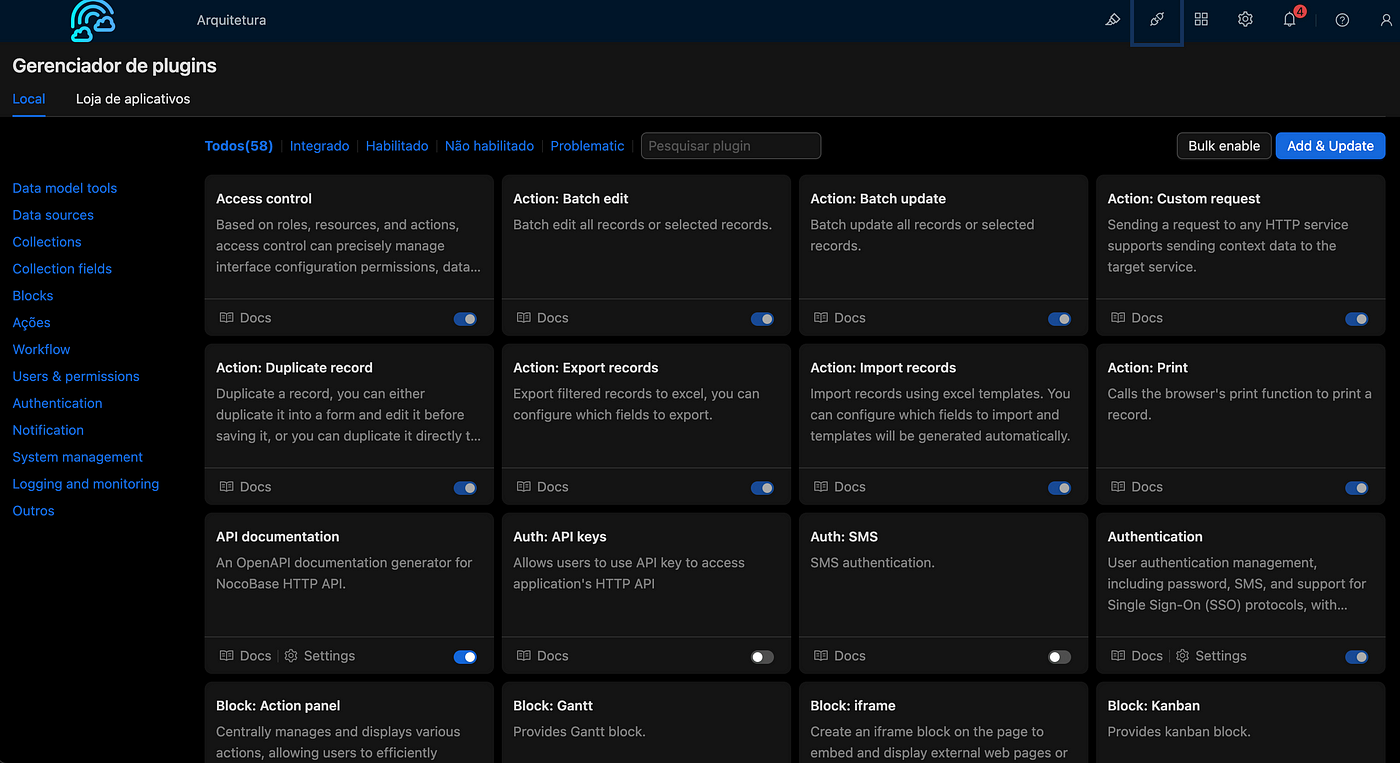
- Extensive plugin library: Offers a wide range of free and paid plugins, with the ability to develop custom plugins.
Case Study Overview
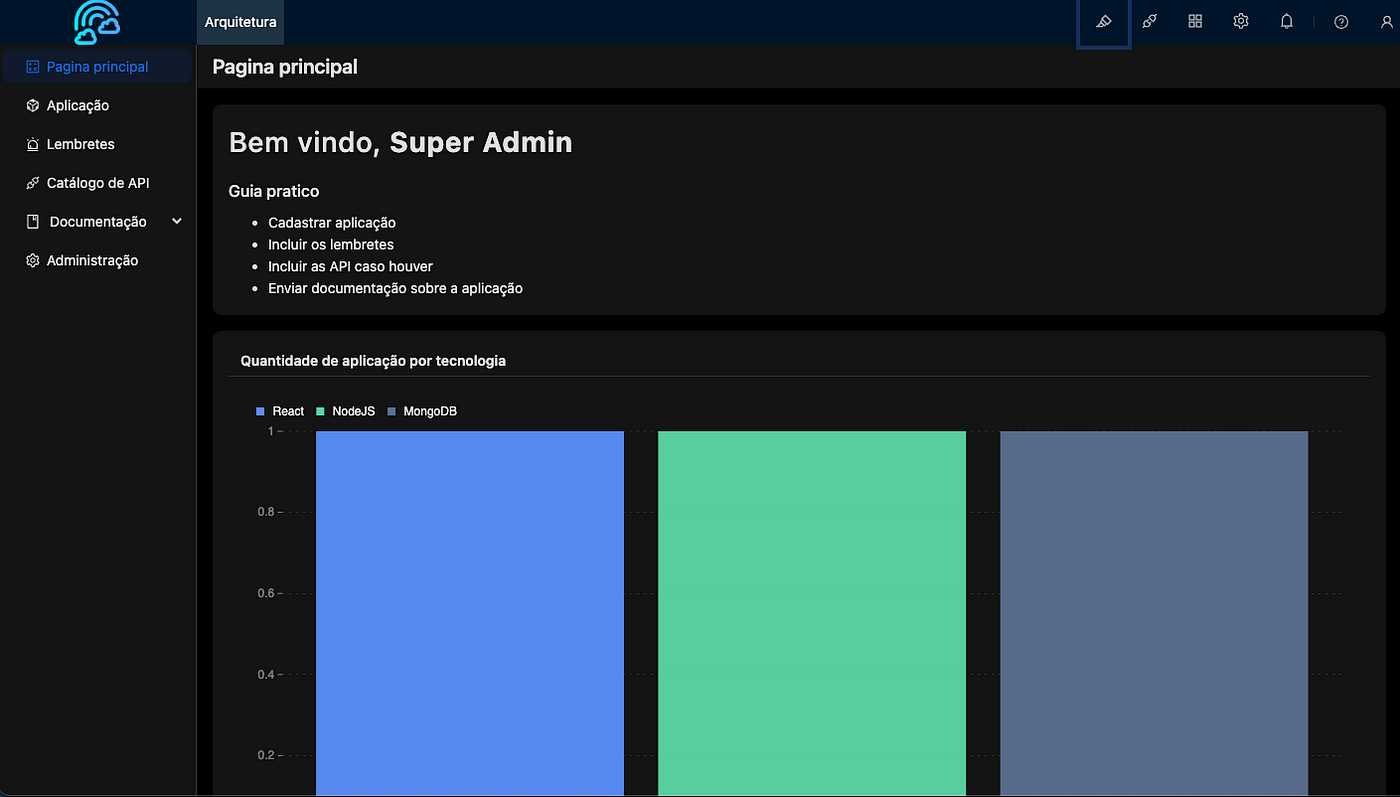
To showcase some of NocoBase’s features, we’ll create a case study called Architecture Portal. This portal is designed to organize data about an organization’s applications, featuring the following functionalities:
- Application catalog.
- Reminders for updates, such as version upgrades and certificate renewals.
- API catalog for the organization’s systems.
- Charts for insightful data visualization.
Development Stages
Modeling the Data
The first step is to map and define the fields we’ll include in the Architecture Portal. Below is an example:
1. Application Catalog

Applications:
id: Unique identifier.
name: Application name.
description: Detailed description of the application.
stack: Technologies used.
owner: Responsible person or team.
created_at: Creation date.
last_updated: Last update date.

Reminders (Linked to Applications):
id: Unique identifier.
application_id: Reference to the application.
type: Reminder type (e.g., version update, certificate renewal).
description: Reminder description.
scheduled_date: Scheduled date for the reminder.
status: Status (e.g., Pending, Completed).

2. API Catalog

APIs:
id: Unique identifier.
Application_id: Reference to the corresponding system.
name: API name.
description: Functional description of the API.
documentation_url: Link to the official documentation.
last_updated: Last update date.
version: Current version.
Installing NocoBase
For installation and configuration, I opted to use the Docker version locally. Other installation options include npm or Git source.
Below is the YAML code for Docker Compose. After installing Docker, navigate to the YAML file directory and run the following command:
docker compose up -d
This will launch NocoBase on your machine at port 13000. Open http://localhost:13000 in your web browser. The default credentials are admin@nocobase.com and admin123.
version: '3'

networks:
  nocobase:
    driver: bridge

services:
  app:
    image: nocobase/nocobase:beta
    networks:
      - nocobase
    depends_on:
      - postgres
    environment:
      # The application's secret key, used to generate user tokens, etc.
      # If APP_KEY is changed, old tokens will also become invalid.
      # It can be any random string, and make sure it is not exposed.
      - APP_KEY=your-secret-key
      # Database type, supports postgres, mysql, mariadb
      - DB_DIALECT=postgres
      # Database host, can be replaced with the IP of an existing database server
      - DB_HOST=postgres
      # Database name
      - DB_DATABASE=nocobase
      # Database user
      - DB_USER=nocobase
      # Database password
      - DB_PASSWORD=nocobase
      # Timezone
      - TZ=Asia/Shanghai
    volumes:
      - ./storage:/app/nocobase/storage
    ports:
      - '13000:80'
    # init: true

  # If using an existing database server, postgres service can be omitted
  postgres:
    image: postgres:16
    restart: always
    command: postgres -c wal_level=logical
    environment:
      POSTGRES_USER: nocobase
      POSTGRES_DB: nocobase
      POSTGRES_PASSWORD: nocobase
    volumes:
      - ./storage/db/postgres:/var/lib/postgresql/data
    networks:
      - nocobase
Creating Tables and Data
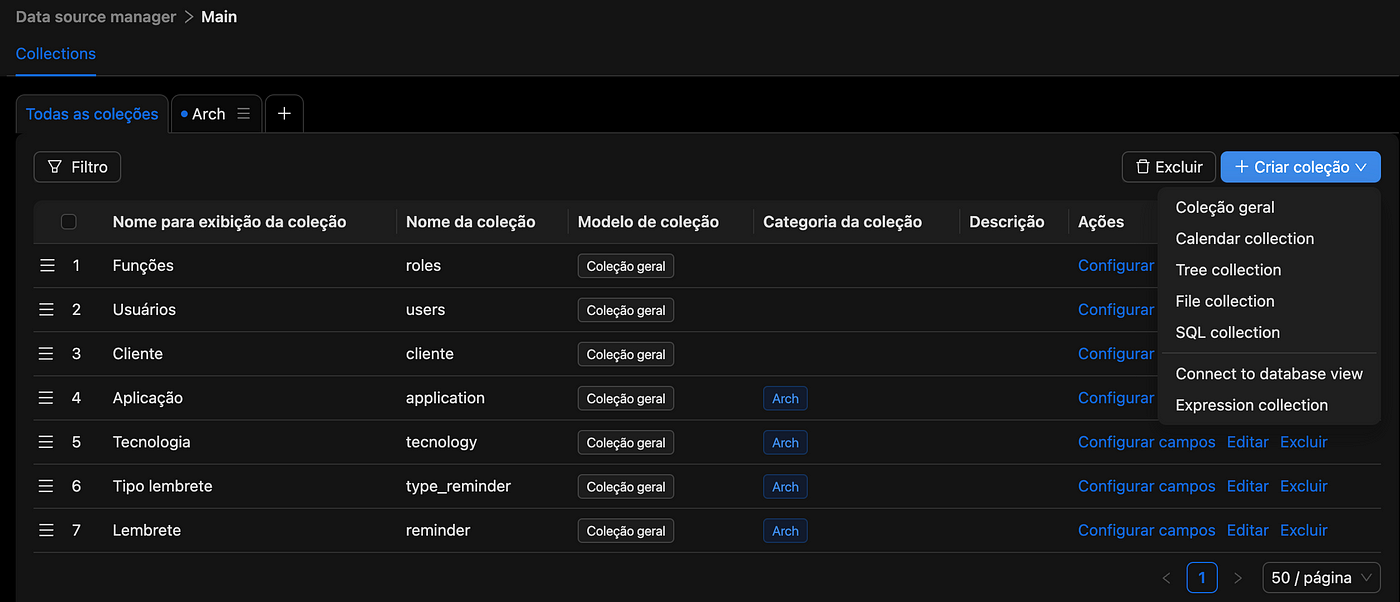
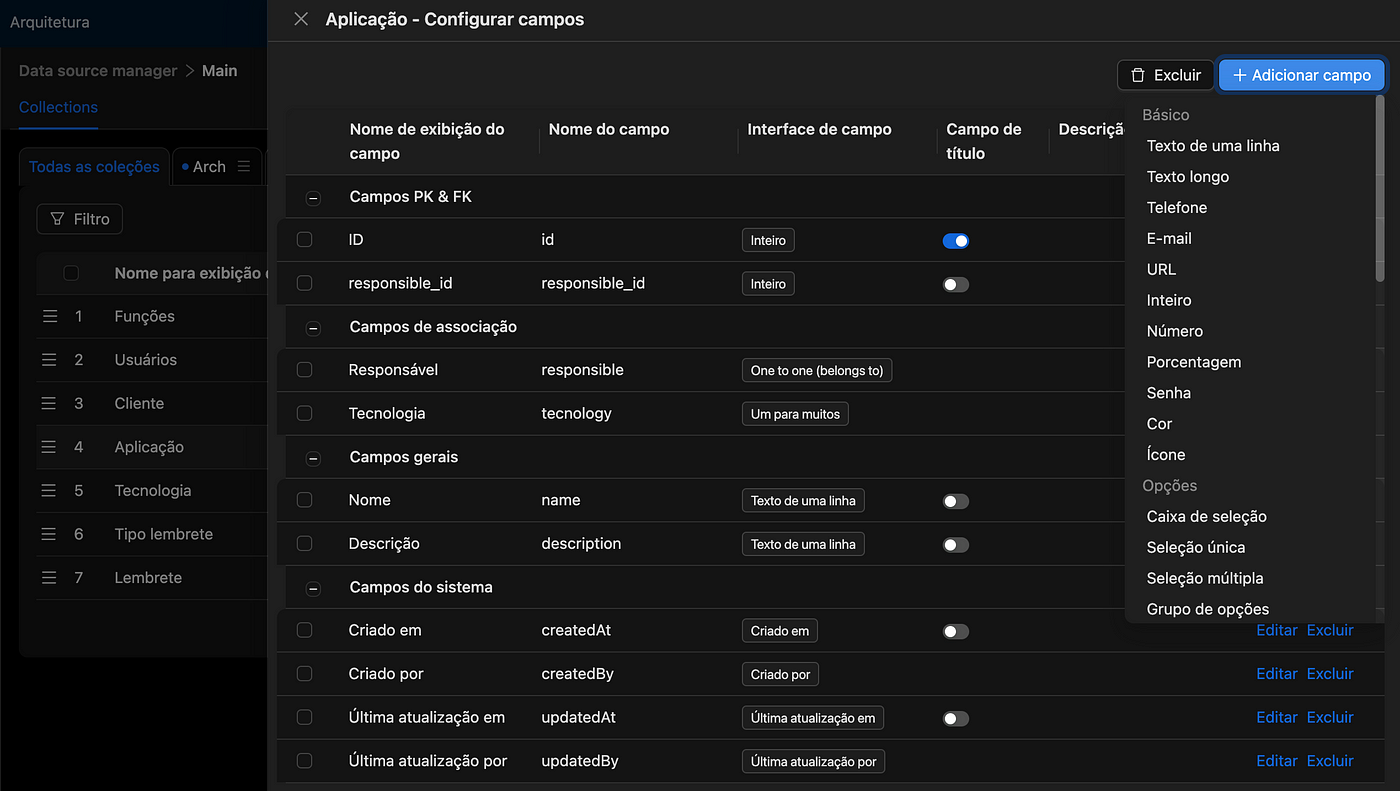
Using the Data Source Manager plugin, we can create collections (tables) and define fields. The process is simple and follows the model outlined above. Below are some references and links for more details on the plugin here).
Creating Menus
By clicking the pencil-like icon on the right side of the screen, you can create top and side menus, as shown in the image. Let’s replicate it as demonstrated in the image.

Creating Forms
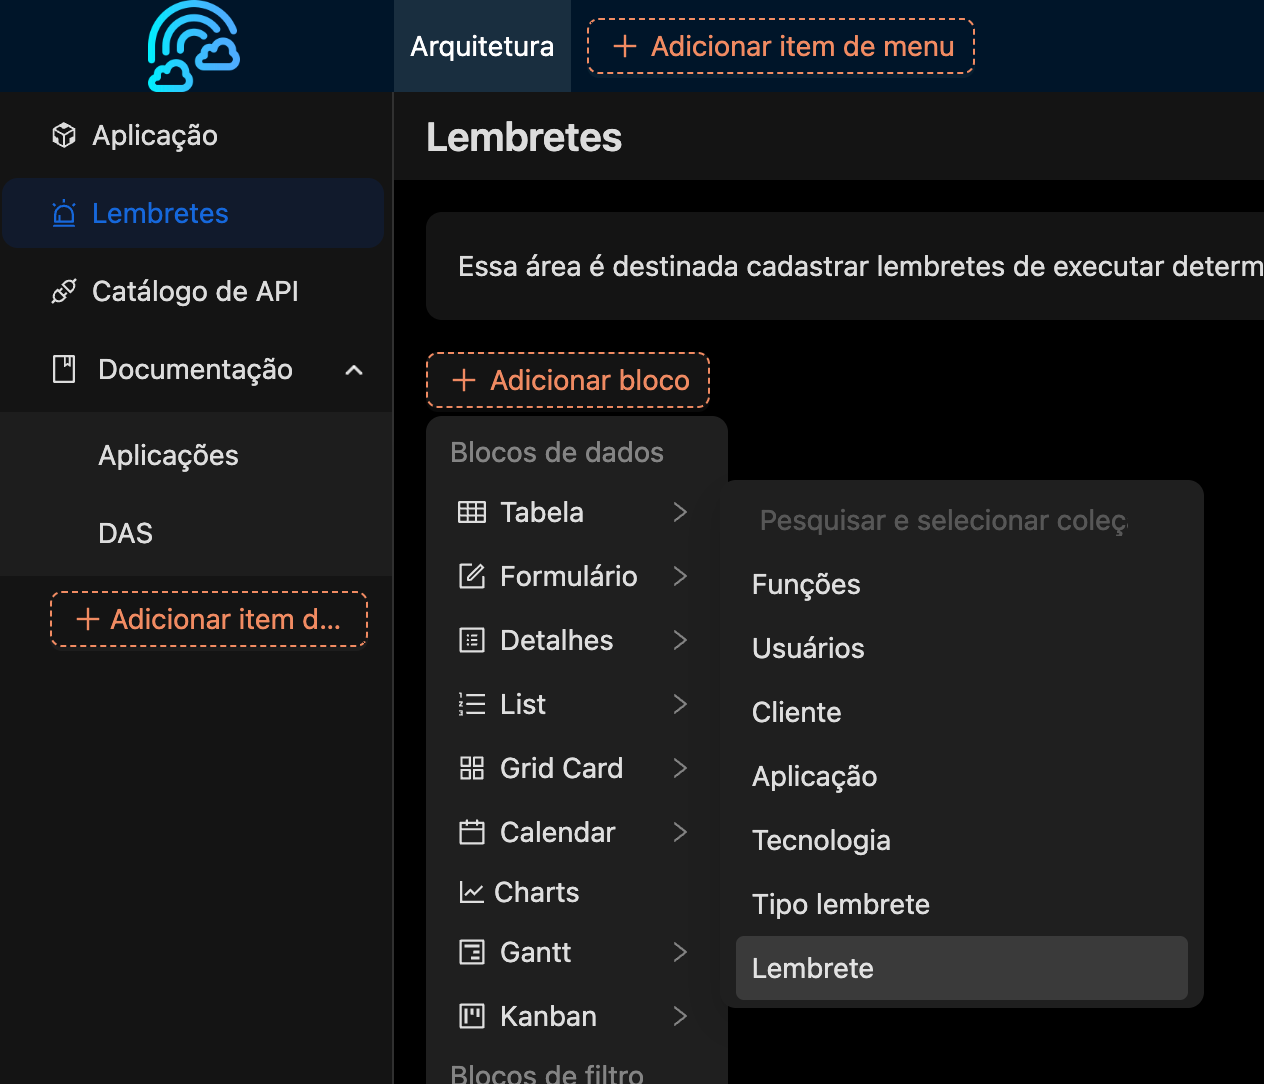
Creating forms (CRUD) is also very straightforward. NocoBase uses blocks to create tables, forms, details, lists, charts, cards, and more. After selecting the type of block, simply choose which collection (table) you want to link to this block, and the component (block) linked to the collection magically appears. Each block has its own customization settings. For more details about blocks, check here.
Creating Charts
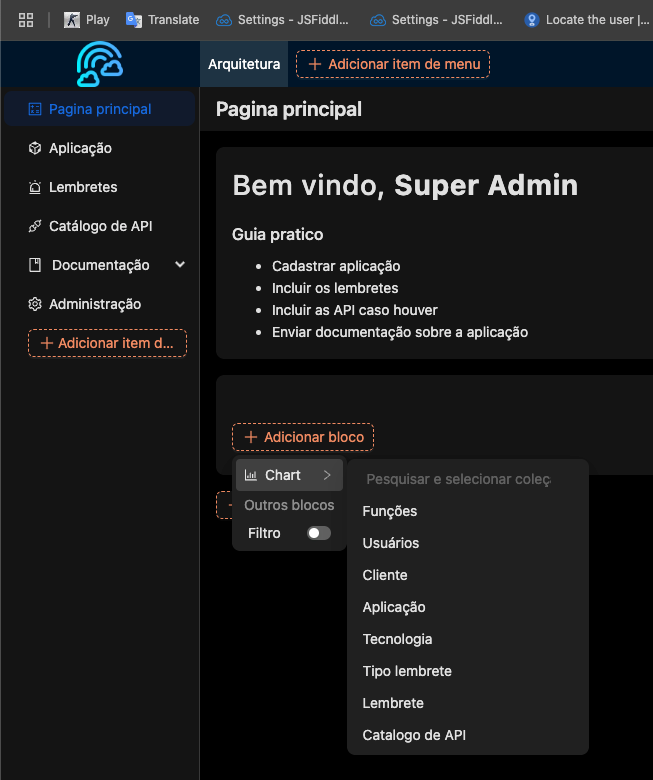
Building charts is also simple. Just add a block called Chart and select the collection you want to use as the data source, as shown in the image below.
Once the block is selected, you can configure the chart properties. The image below shows the chart configuration options, allowing you to define indicators, grouping, filters, various chart types, and titles, among other available properties. Here, you can explore all the configuration possibilities.

Creating a Scheduled Workflow for Reminders
NocoBase allows you to create automated workflows to perform various types of tasks through events. The three types of triggers are: Collection Event, Scheduled Event and Post-Action Event. Using these triggers, you can create actions within the system, such as sending notifications, inserting data into other tables, or making requests to an external API. Below is an example workflow for sending notifications within the application.
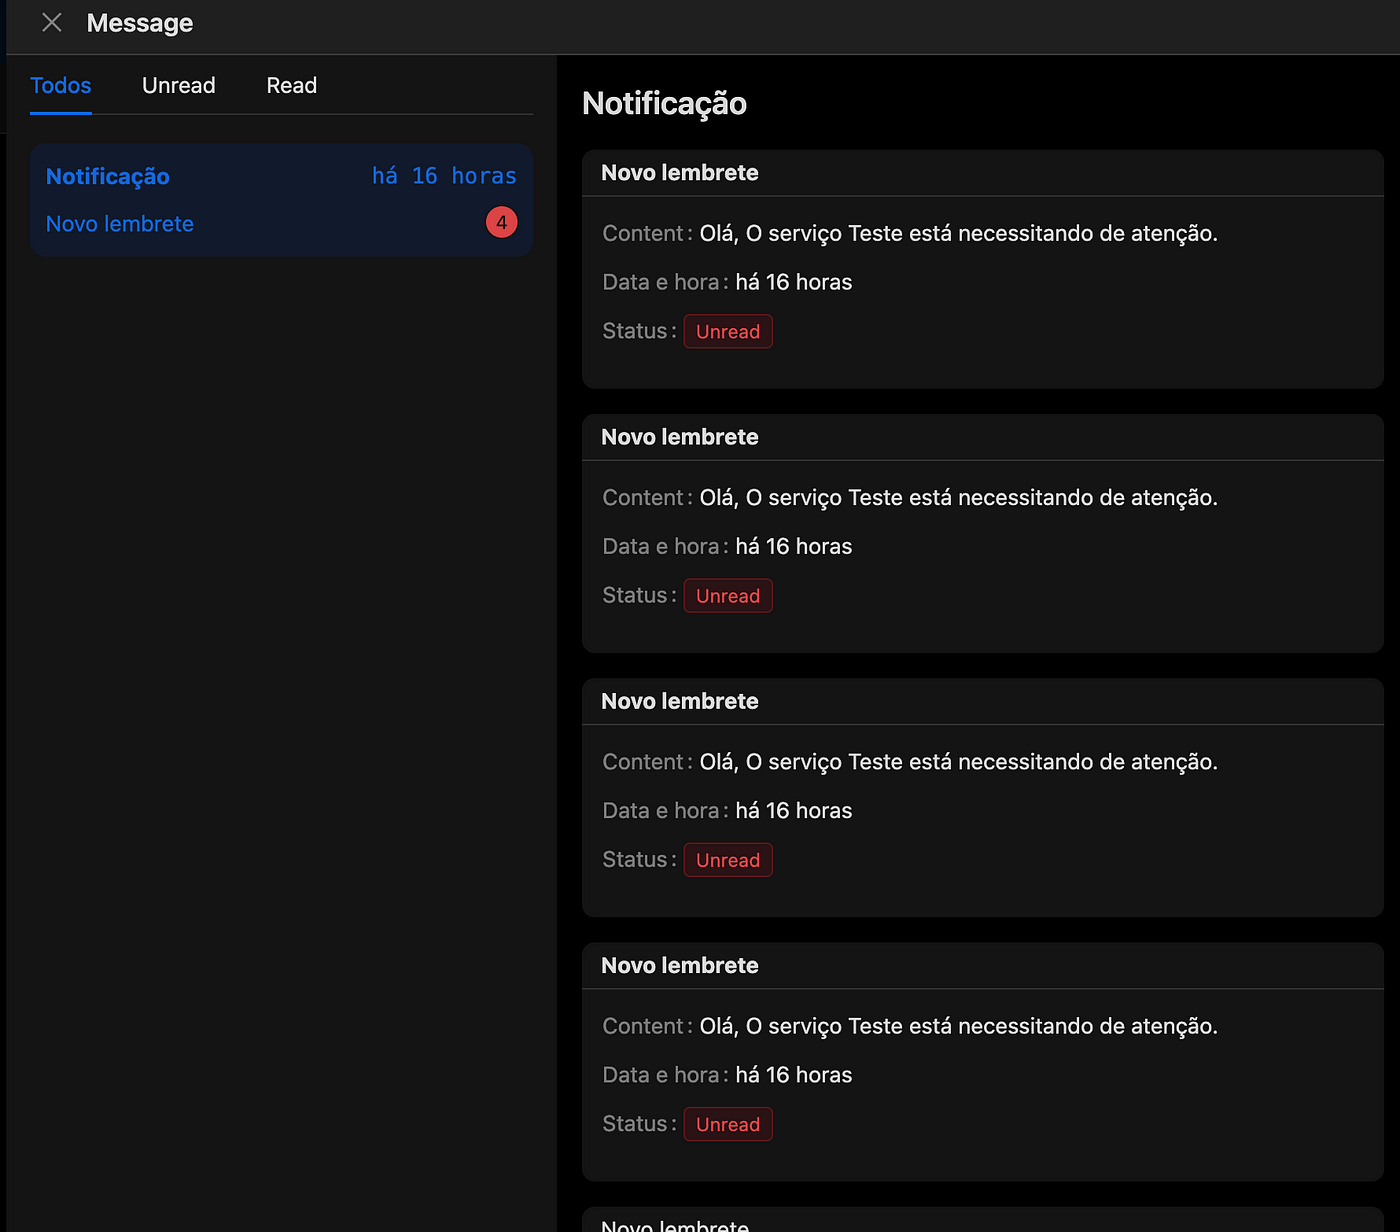
In our case, we will create a workflow to send a notification on the day a reminder is scheduled. This will be a Scheduled Event to run every day at a specific time, as shown in the images below.
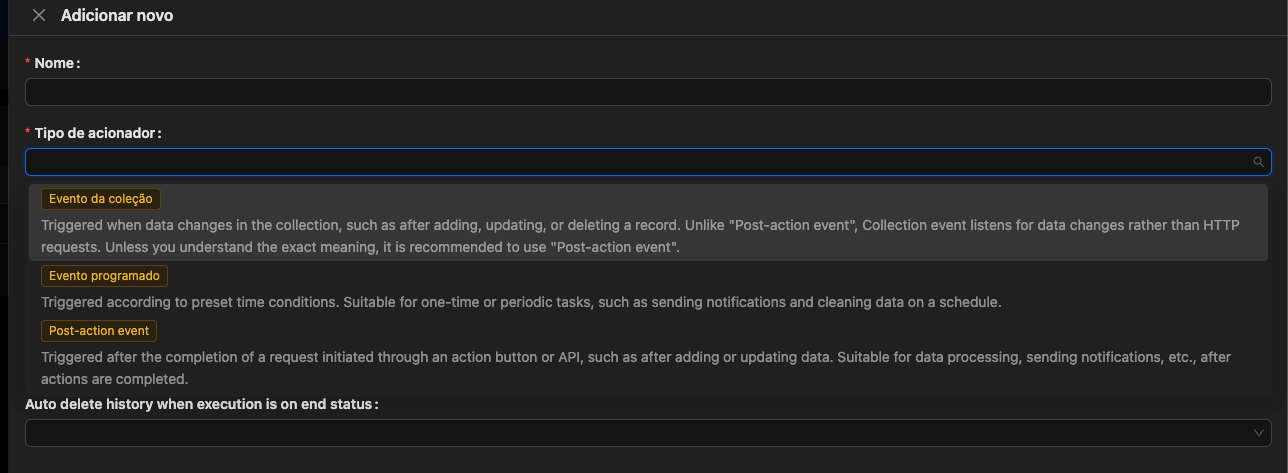
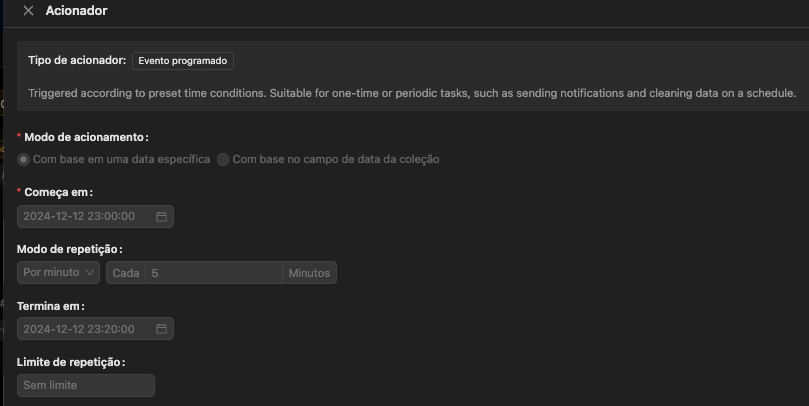
In addition to configuring the schedule, you need to set up the workflow to query the Reminders collection, fetch reminders for the day, loop through each one, and send notifications for each reminder, as shown in the image below. The process is simple: just add these actions by clicking the ”+” button and configuring them.
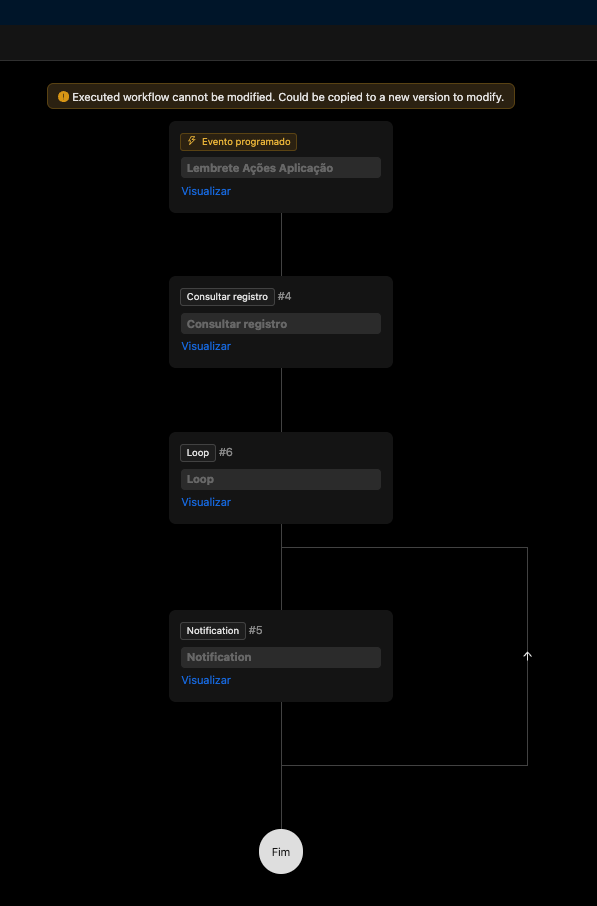
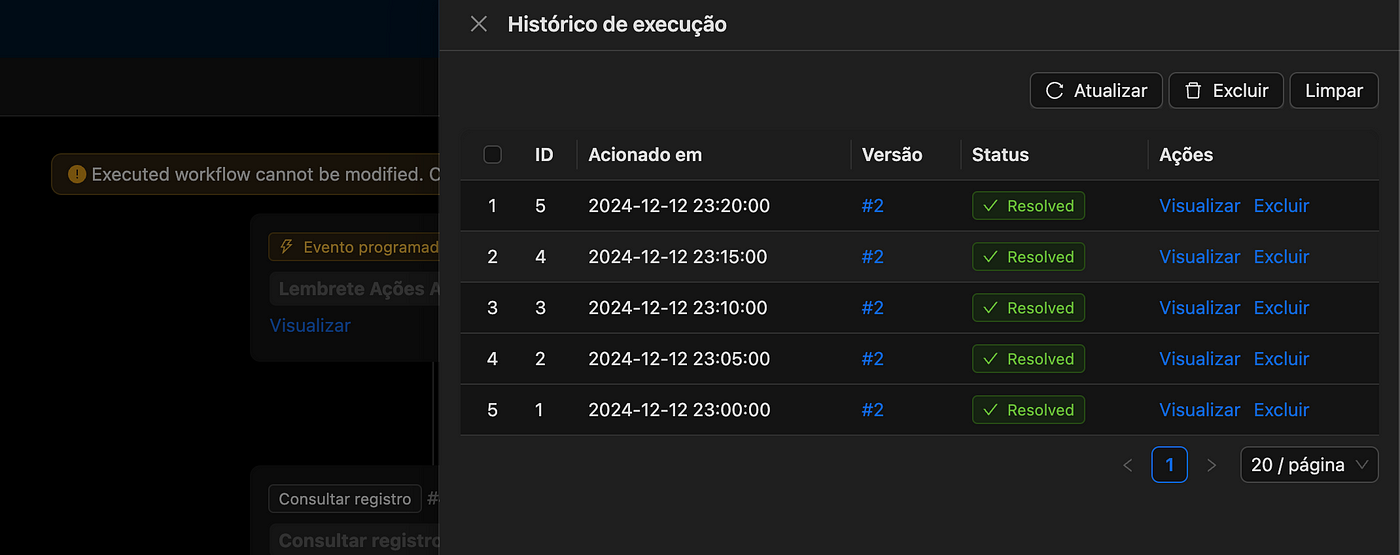
After completing the configuration, simply activate the workflow by clicking the “On” button in the upper right corner. To view the execution results, click on the ”…” in the upper right corner and select Execution History, as shown in the image below.
Conclusion
As demonstrated, NocoBase offers numerous features to expedite application development. Depending on the scale and requirements, it provides flexibility for building applications, with additional capabilities such as file management, internationalization, mobile support, and theme editing. You can even develop your own plugins or purchase commercial ones available in the marketplace.
Related reading: