This blog was produced by Don Freeman from Freeman Tech Consulting and was originally published on nocodefounders.com. Freeman Tech Consulting is a full-service Software Engineering Firm that can help with No Code deployments, web app development, cloud infrastructure design/build, GRC Management, data analytics, and much more.
🌟What is NocoBase?
NocoBase is a No-Code platform for easily building data-driven apps. You define a data model and then build your application around that. They provide paid versions where the NocoBase logo is removed. It is open source, so if you want to contribute to it, you can easily on GitHub. They provide a plugin system to extend the platform’s functionality where needed.
🚀 Deploy NocoBase Locally
What is needed to run NocoBase locally?
- Docker
- Docker compose
- A PostgreSQL DB In this blog we will run one with docker compose but in a real production environment you would want to have a dedicated PostgreSQL DB
Run NocoBase Locally
- There are steps to run NocoBase locally on their website here
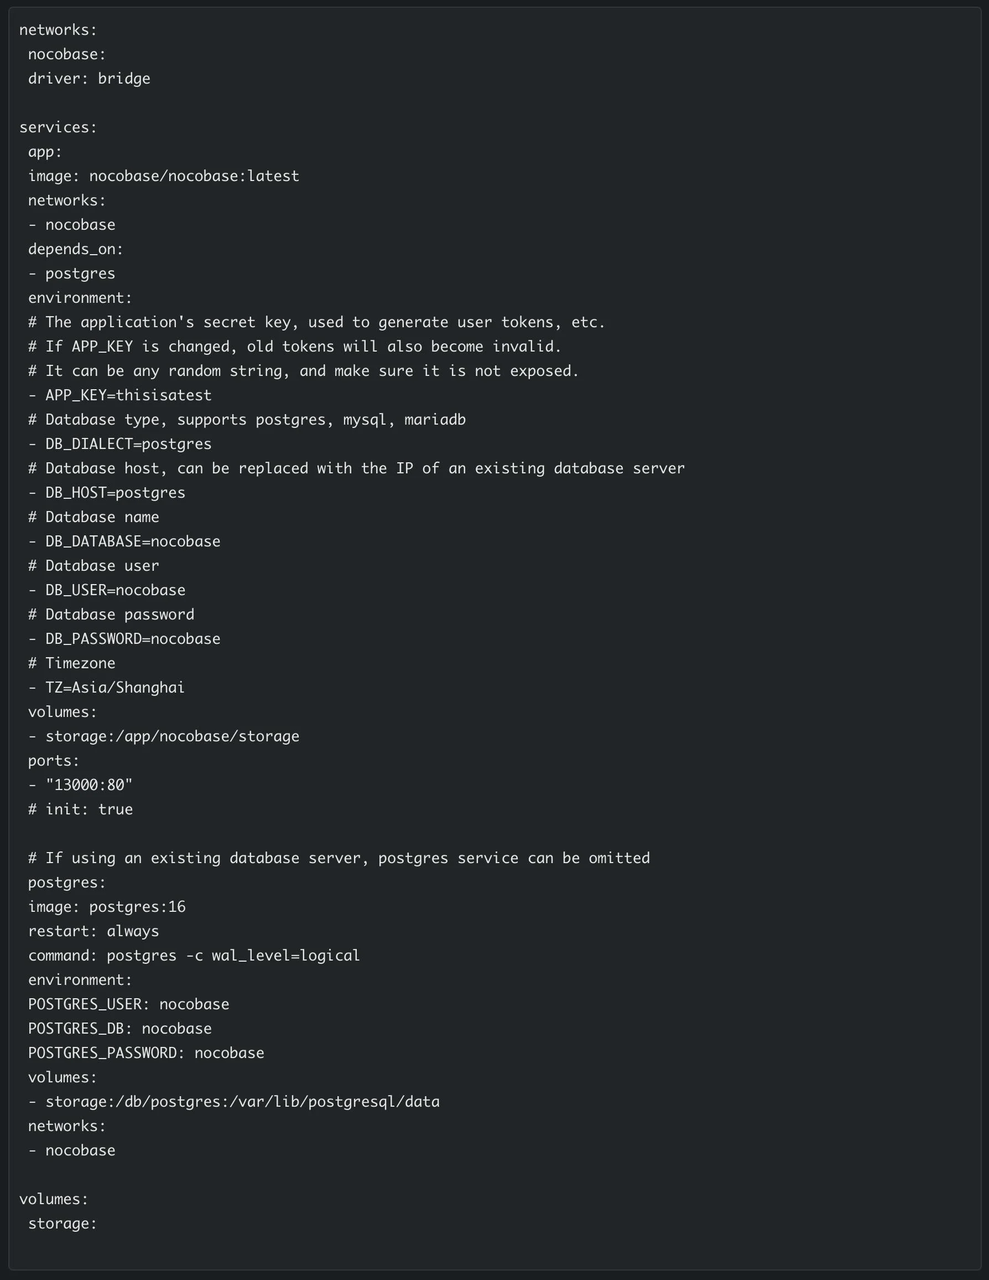
First, create a directory where you will be working. In your terminal switch into that directory. After that, you need to create a docker compose file. I used the one from the above references getting started on the NocoBase website and slightly modified it.
The below docker compose shows running a PostgreSQL DB locally but it is suggested to have a dedicated DB in a real production environment.

After creating this in the local directory run the following command to pull the needed images.

Now run the following command to start the containers in the background.

Now you can access NocoBase at http://localhost:13000
🐶 Building the NocoBase App: Pet Tracking Application

In this example, we will build a pet tracking application 🐕 🐈! This application will track Pet owners and what their pet’s information is. First we need to define the data model for our application. This is super easy in NocoBase.
NocoBase Data Model
🔍 Find the Data Model Editor
In the NocoBase UI you can click on the little gear ⚙️ in the top right corner and then click on Data Sources. This will open the data model editor. Once there you will see the default data source that should be called main. Click on Configure for the main data source.
Create Collections
Now we can create collections within the main data source. These collections will hold the data for our application. For this example, we will create two collections. One for the pet owners and one for the pets.
Pet Owner Collection
On the Collection screen click the New Collection button. Then give the collection a Collection Display Name of Pet Owner and a Collection Name of petowner.
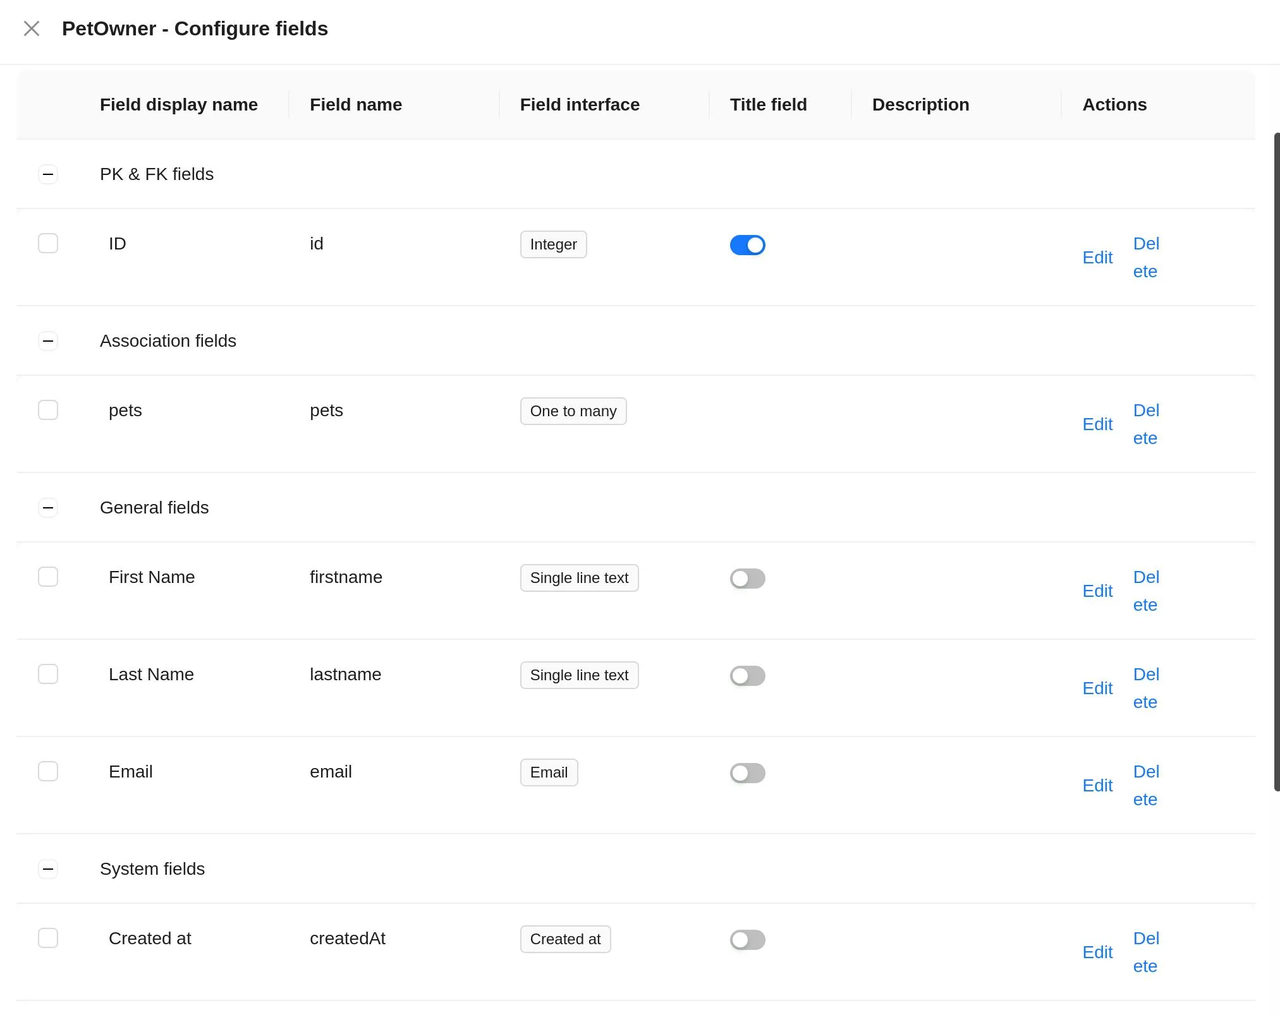
Now let’s add the fields we need to the pet owner collection. From the collection screen click Configure Fields next to the Pet Owner collection. With the Add Field button, you can add the fields we need to the collection. The pet owner collection will have the following fields.
- First Name Single Line Text Field Interface
- Last Name Single Line Text Field Interface
- Email Email Field Interface
Pet Collection
Now we can repeat these same steps for the pet collection. The pet collection will have the following fields.
- Name Single Line Text Field Interface
- Pet Type Multiple Select Field Interface
- Birthdate Datetime Field Interface
🔗 Link Pet Owner Collection to Pet Collection
To link the Pet Owner collection to the Pet collection go back to the Pet collection and click the Add Field button under the collection configuration screen. Find the One to Many Interface Type. Give the relationship a display name, select pet as the Target Collection, and then ID as the Target Key.
🥳 Data model is done!!!
That is it for the data model setup. Here is my example for the pet data model.

Building the NocoBase UI
🏠 Create the Home Page
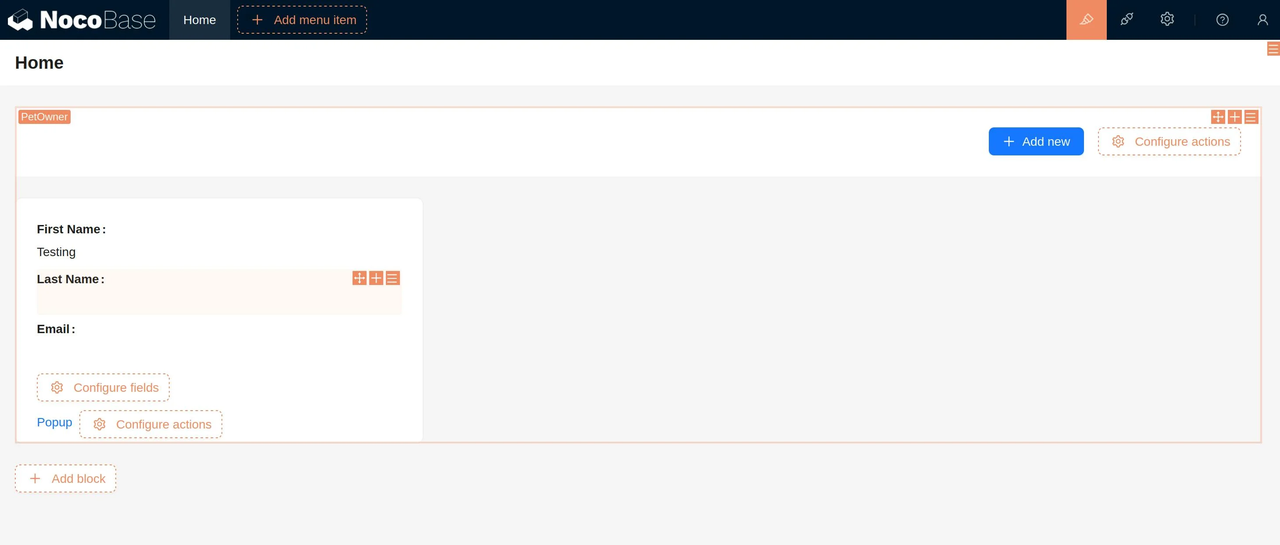
Now that we have our data model complete we can quickly build a UI to interact with that data model. Go back to the main page of the application and you should see Add New Menu item at the top of the page. Click on it and then click page. Give the page a name of Home then you should see something similar to this.

📜 Create List of Pet Owners
Now we will add a list of cards to allow us to interact with our pet owners’ collection. Click on Add Block → Grid Card → PetOwner. This allows us to display our pet owners in a grid of cards. Click Configure Fields to add the First Name, Last Name, and Email fields.
➕ Add Pet Owners
Now we need to be able to create pet owners. Click on Configure Action in the top right corner of the block (not the Configure Action in the Card). Then click Add New. This creates a button that says Add New. Click on that button to configure what can be done when adding a pet owner.
🍿 Add New Pet Owner popup
Inside of the popup click Add Block → Form → Current Collection. Click on Configure Fields and add First Name, Last Name, and Email. This allows you to populate these values when creating a new pet owner. Finally, click Configure Action → Submit. Click out of the popup to close it.
➕ Add New Pet
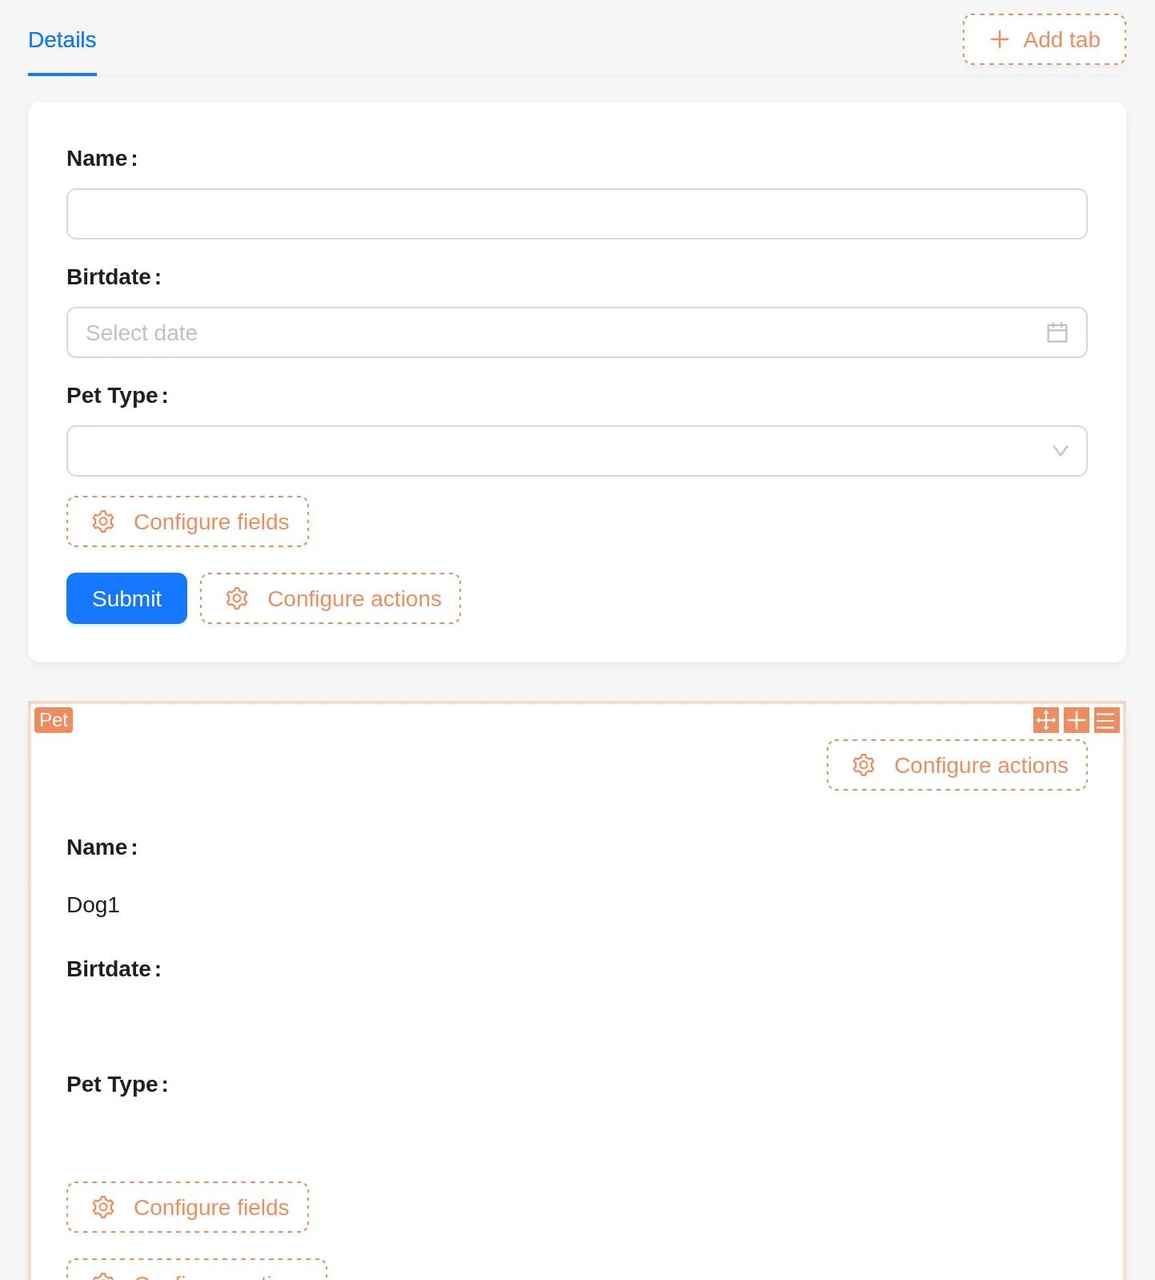
Now that we have the ability to view and create new pet owners we need to be able to add their pets. now back on the Home Page click on the Configure Actioninside of the card and click popup. This will create a link in the card called popup, click it. Inside of the popup click Add Block → Form (add new) → Associated Records → Pets. Inside this new block click Configure Fields and add Name, Pet Type, Birthdate. This allows you to populate these values when creating a new pet. Finally. click Configure Action → Submit.
📜 List Existing Pets
Now just below this new block click Add Block → List → Associated Records → Pets. Inside this new block click Configure Fields and add Name, Pet Type, and Birthdate. The popup should look something like this. I already had one pet in my database so it may look slightly different.

Click out of the popup to close it. Now we have the ability to create and view pets. Your UI should now look something like this.

🧪 Test it Out
Now click on the orange UI Editor button to leave the UI Editor. You can play around with the UI and create Pets and Pet Owners.
This blog was missing many pieces including Authenticating Users, more complex UIs, deploying a production environment, etc. I may cover these in later blogs.
💡 Read More: