
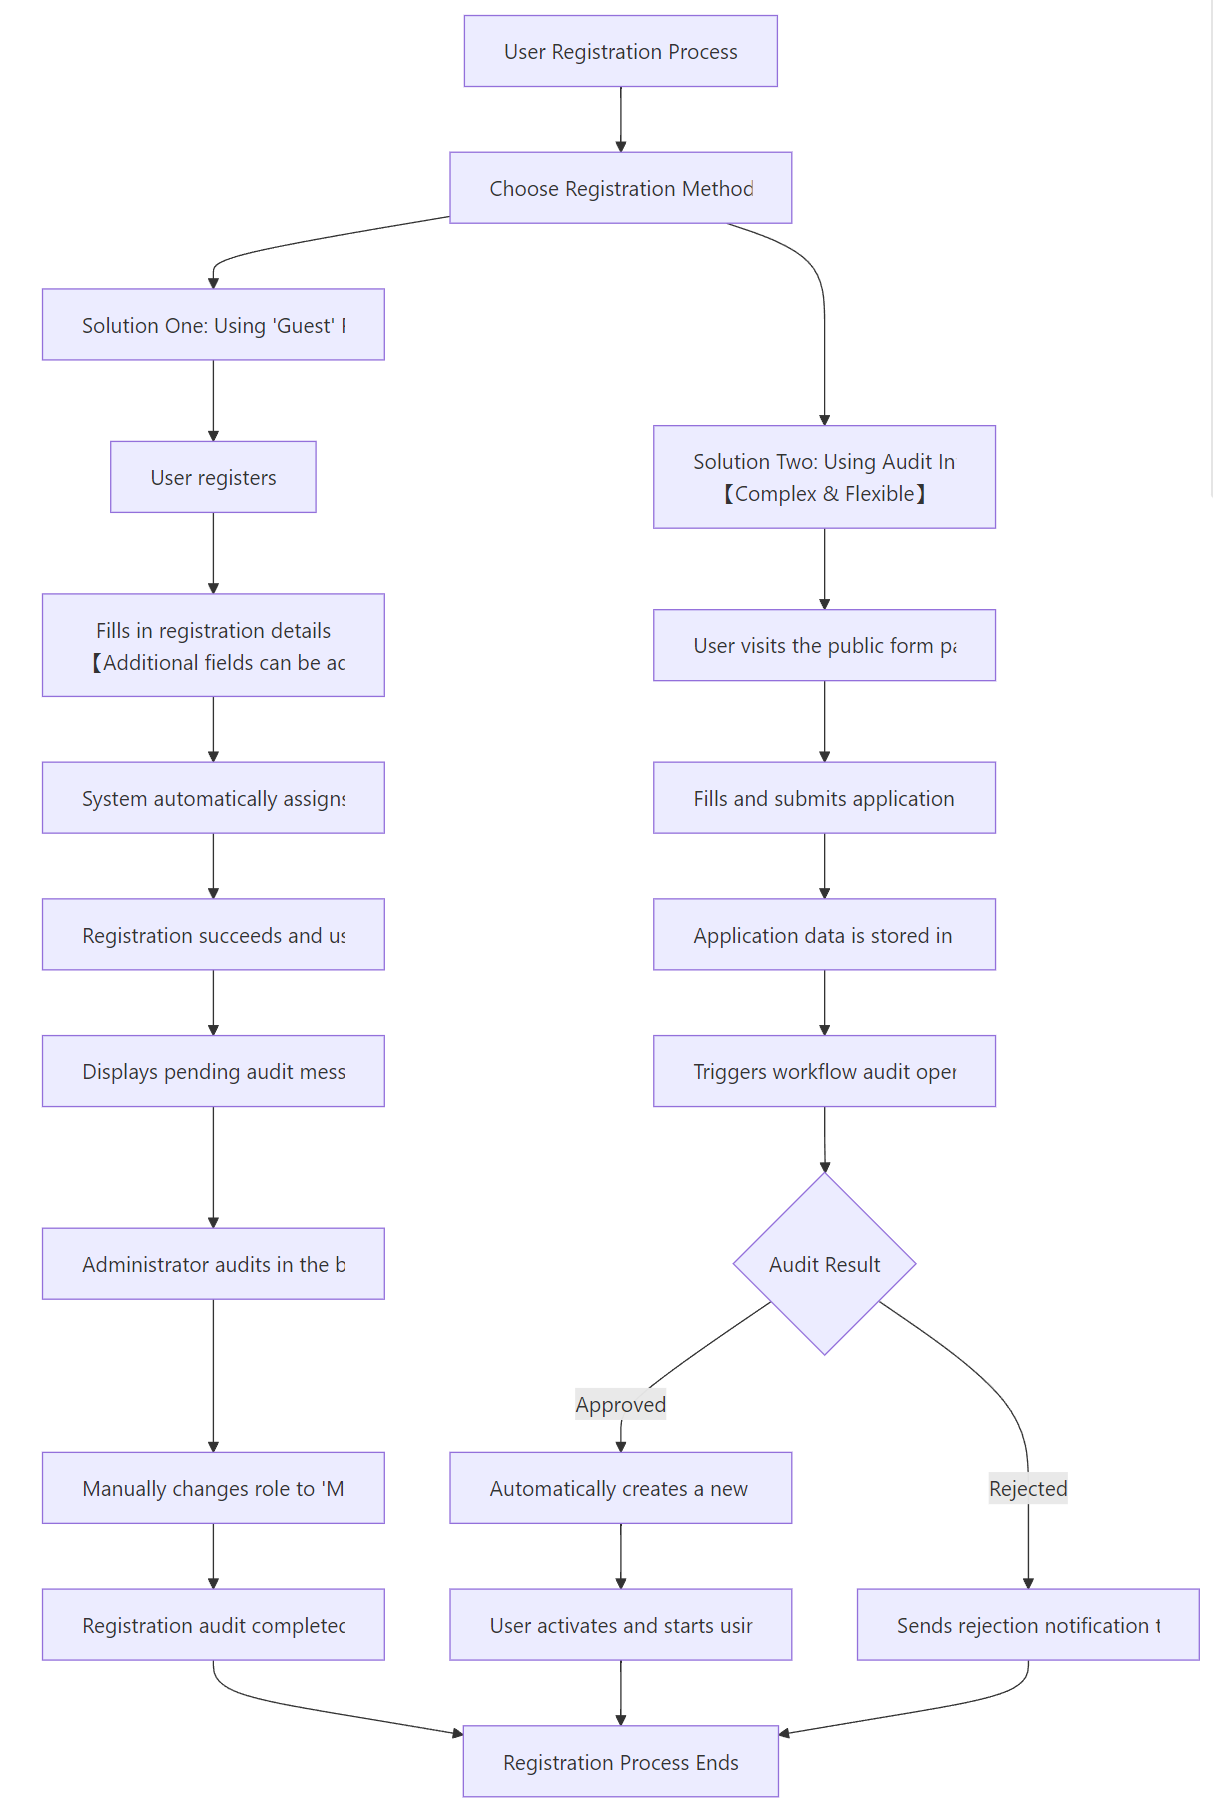
This document provides two solutions for implementing user registration auditing, designed for different business scenarios:
- Solution One: Suitable for scenarios that require a simple and quick registration audit process. This solution leverages the system’s default new user registration functionality by assigning every new user a “Guest” role with no permissions, which is later manually audited and updated by an administrator.
- Solution Two: Suitable for scenarios requiring a flexible, customizable registration audit process. By designing a dedicated application information collection, configuring an audit workflow, and activating the Public Form plugin, the entire process—from registration application submission to automatic creation of new users—is managed.
1. Solution One: Using a No-Permission “Guest” Role
1.0 Applicable Scenario
This is applicable when the registration audit requirements are simple and the built-in registration feature is used, with the user being manually audited in the backend.
1.1 Enable Password Authentication and Allow User Registration
1.1.1 Access the User Authentication Page
First, verify whether the user registration feature is enabled. In the system settings, navigate to the User Authentication page, which manages all identity authentication channels such as “Account Password Login”, “Google Login”, etc. (expandable via plugins).
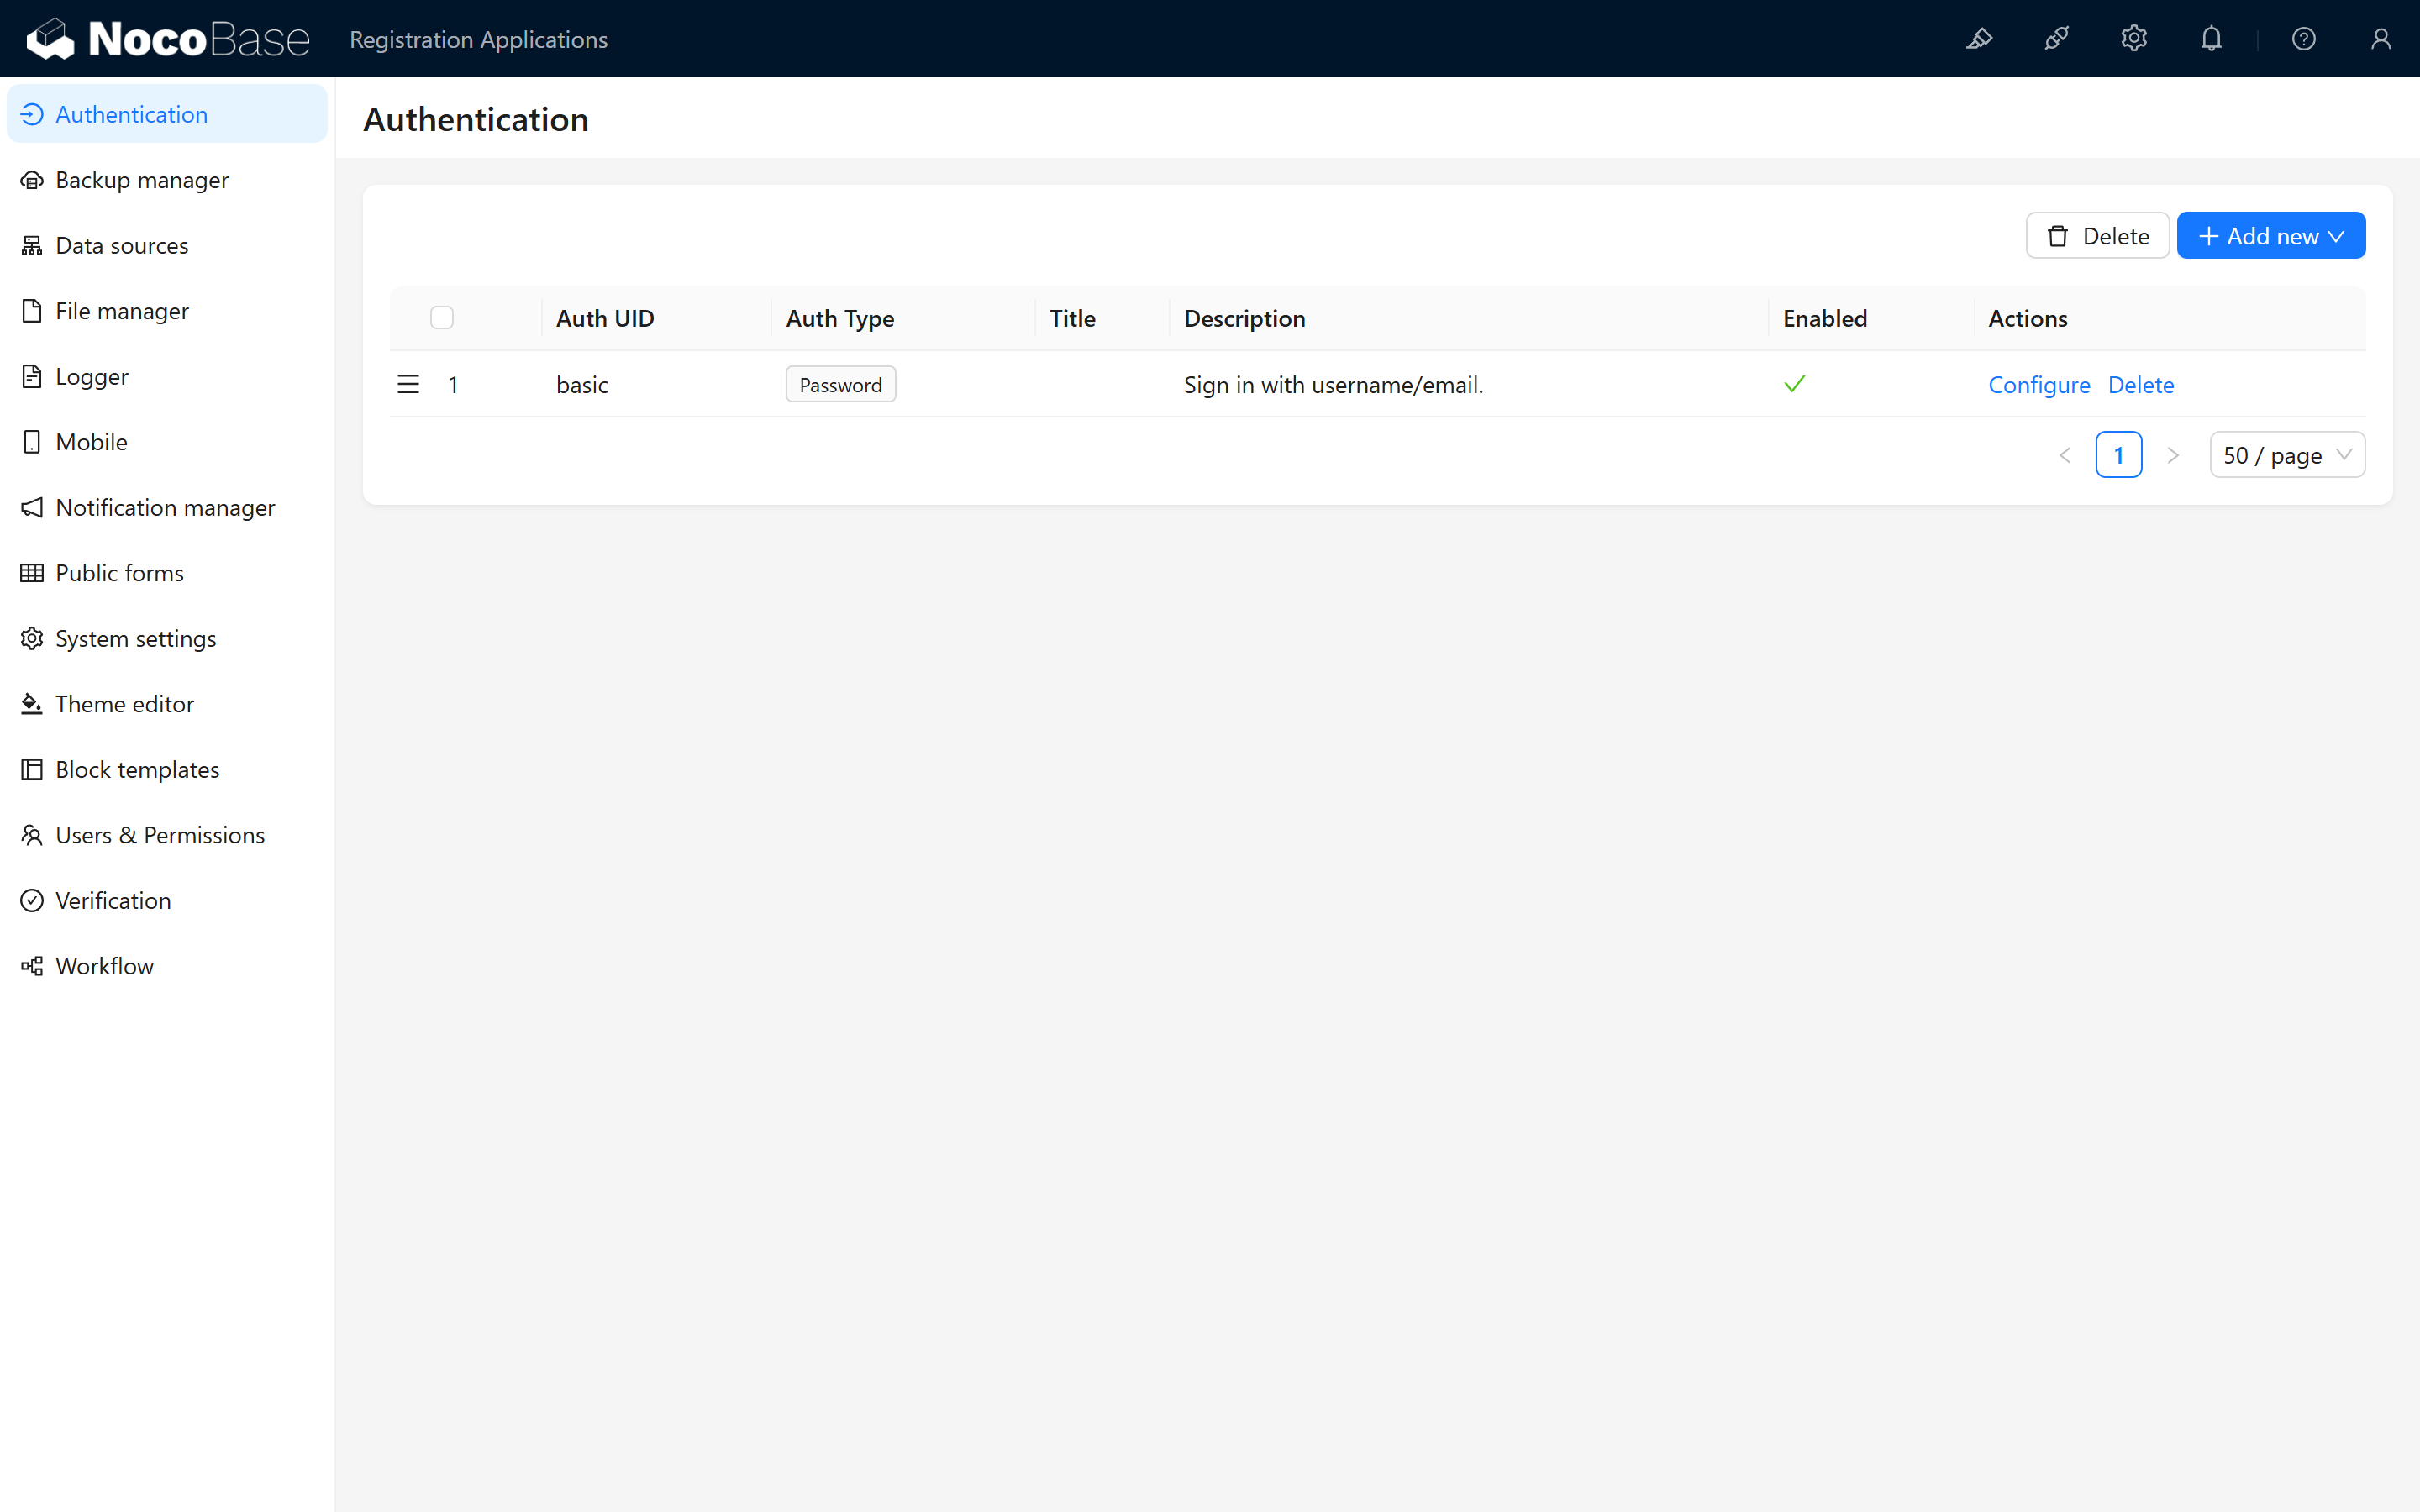
The registration feature toggle is located here: 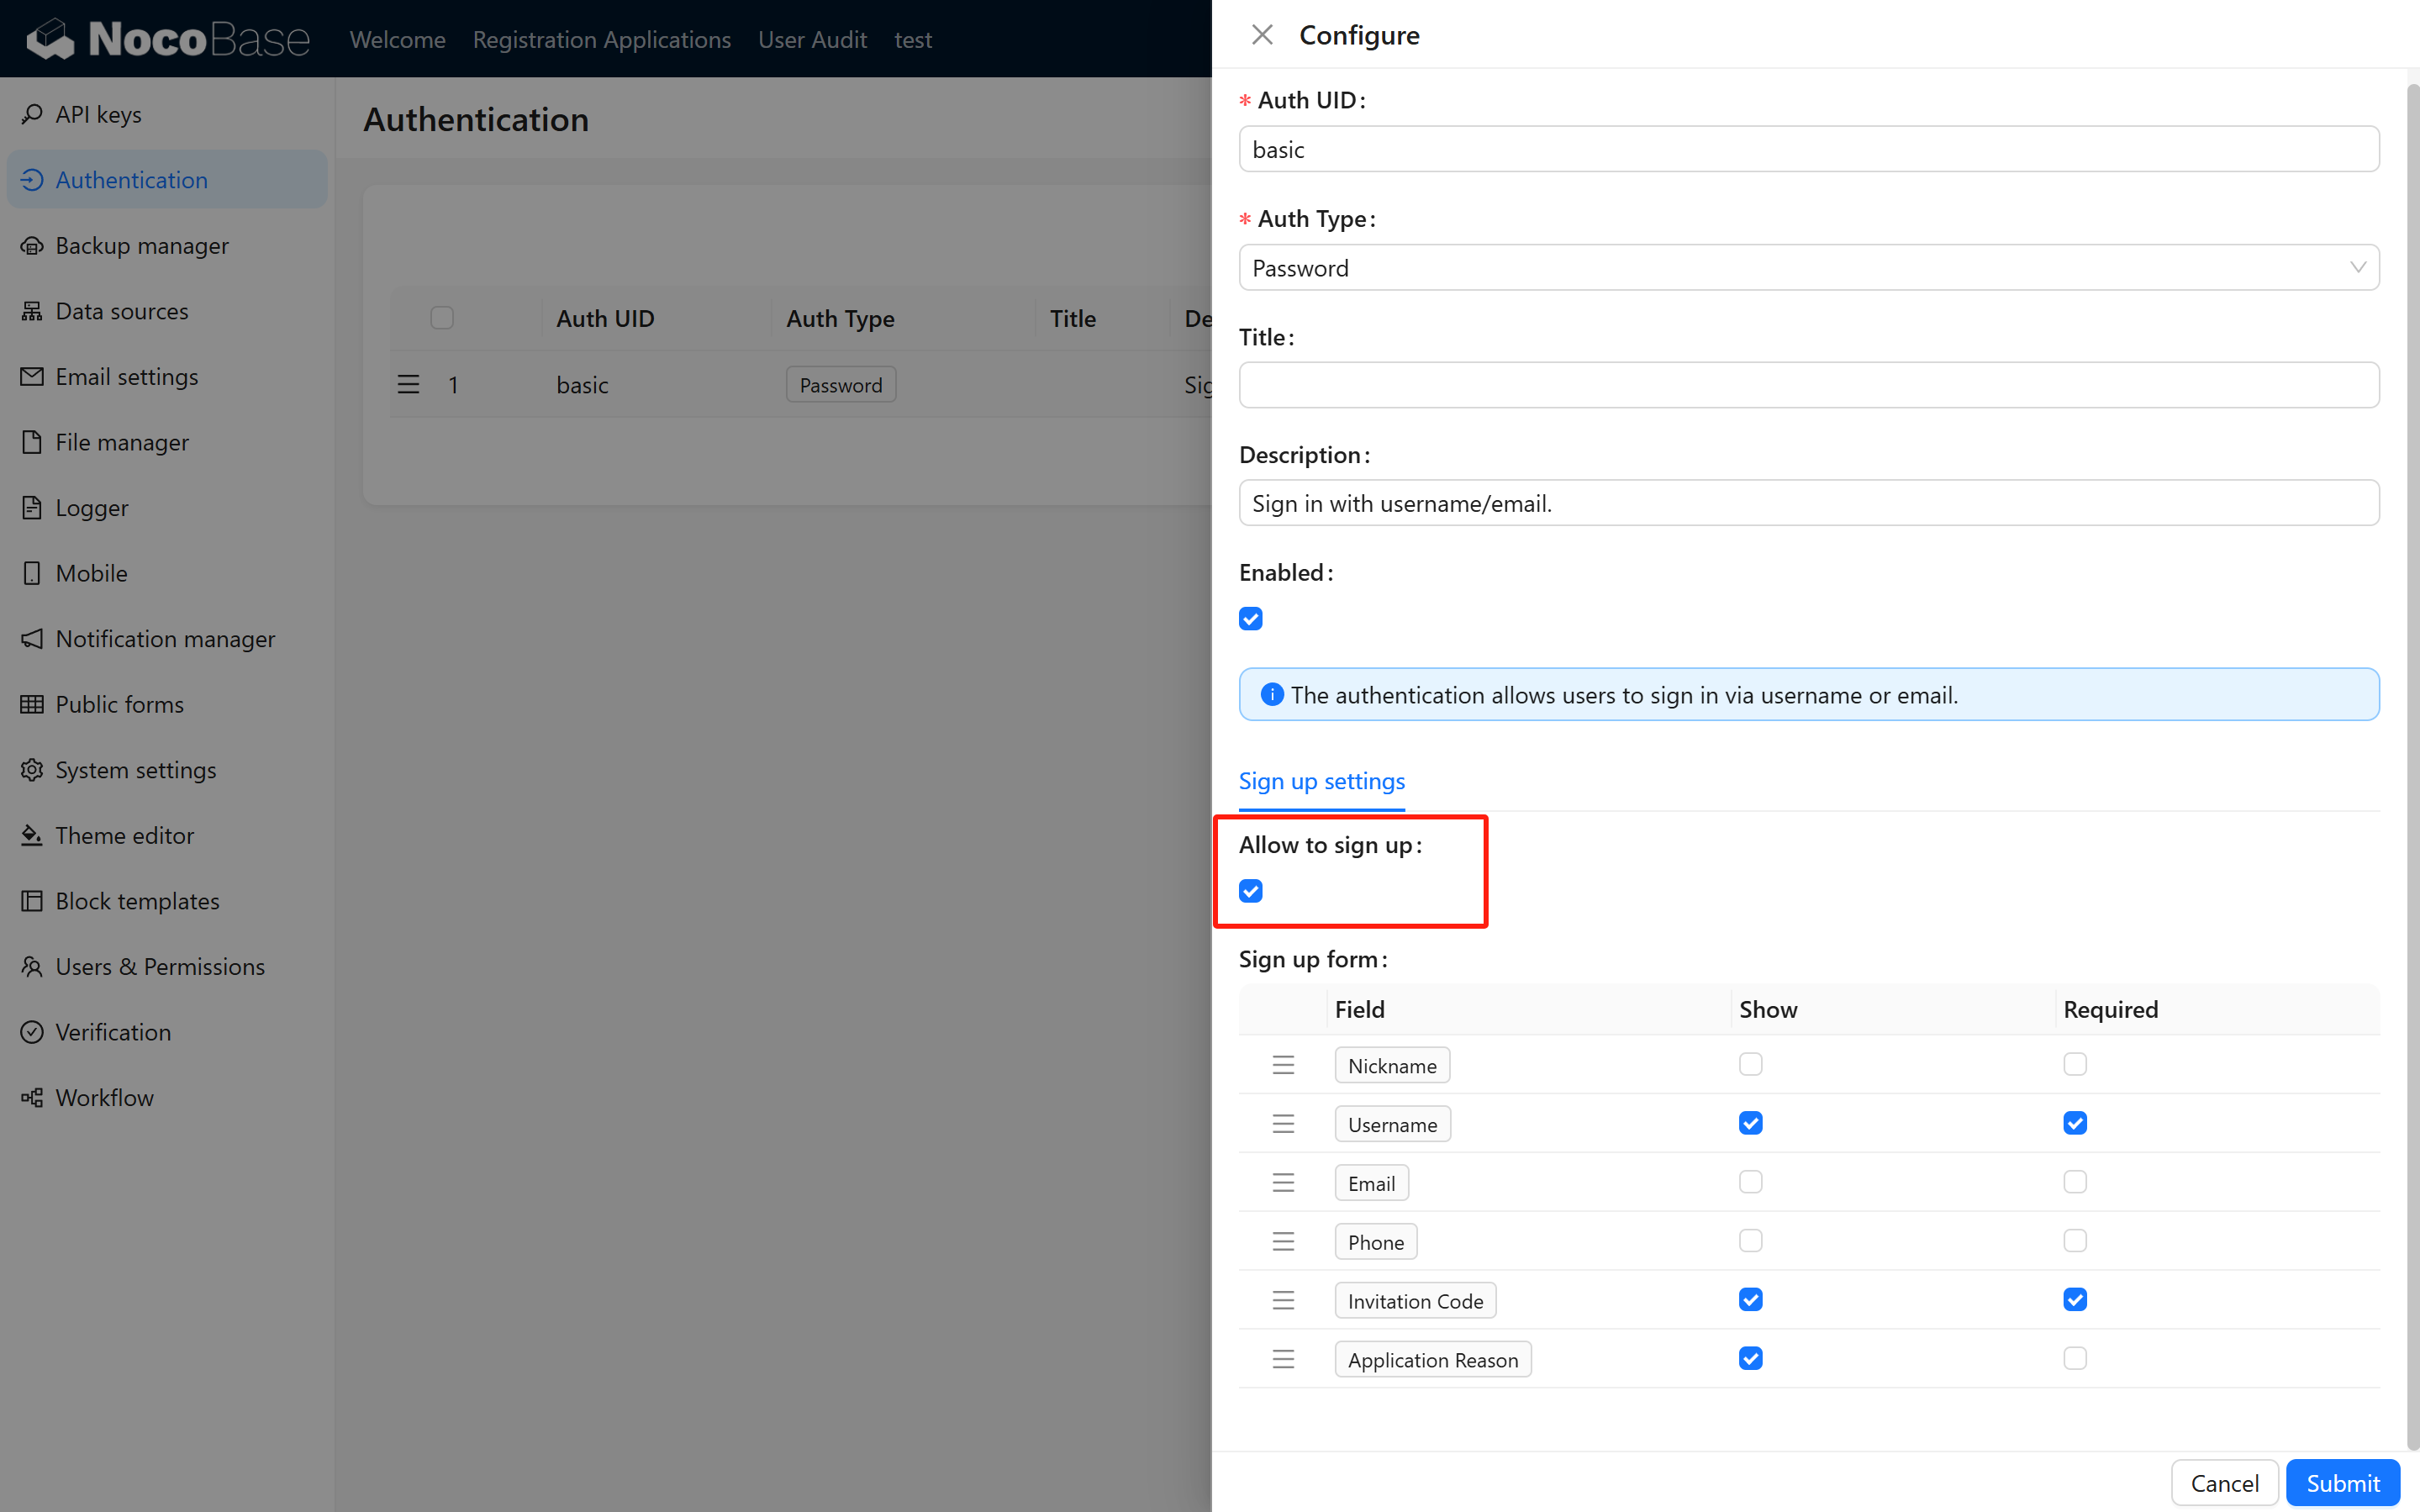
1.2 Set the Default Role (Core)
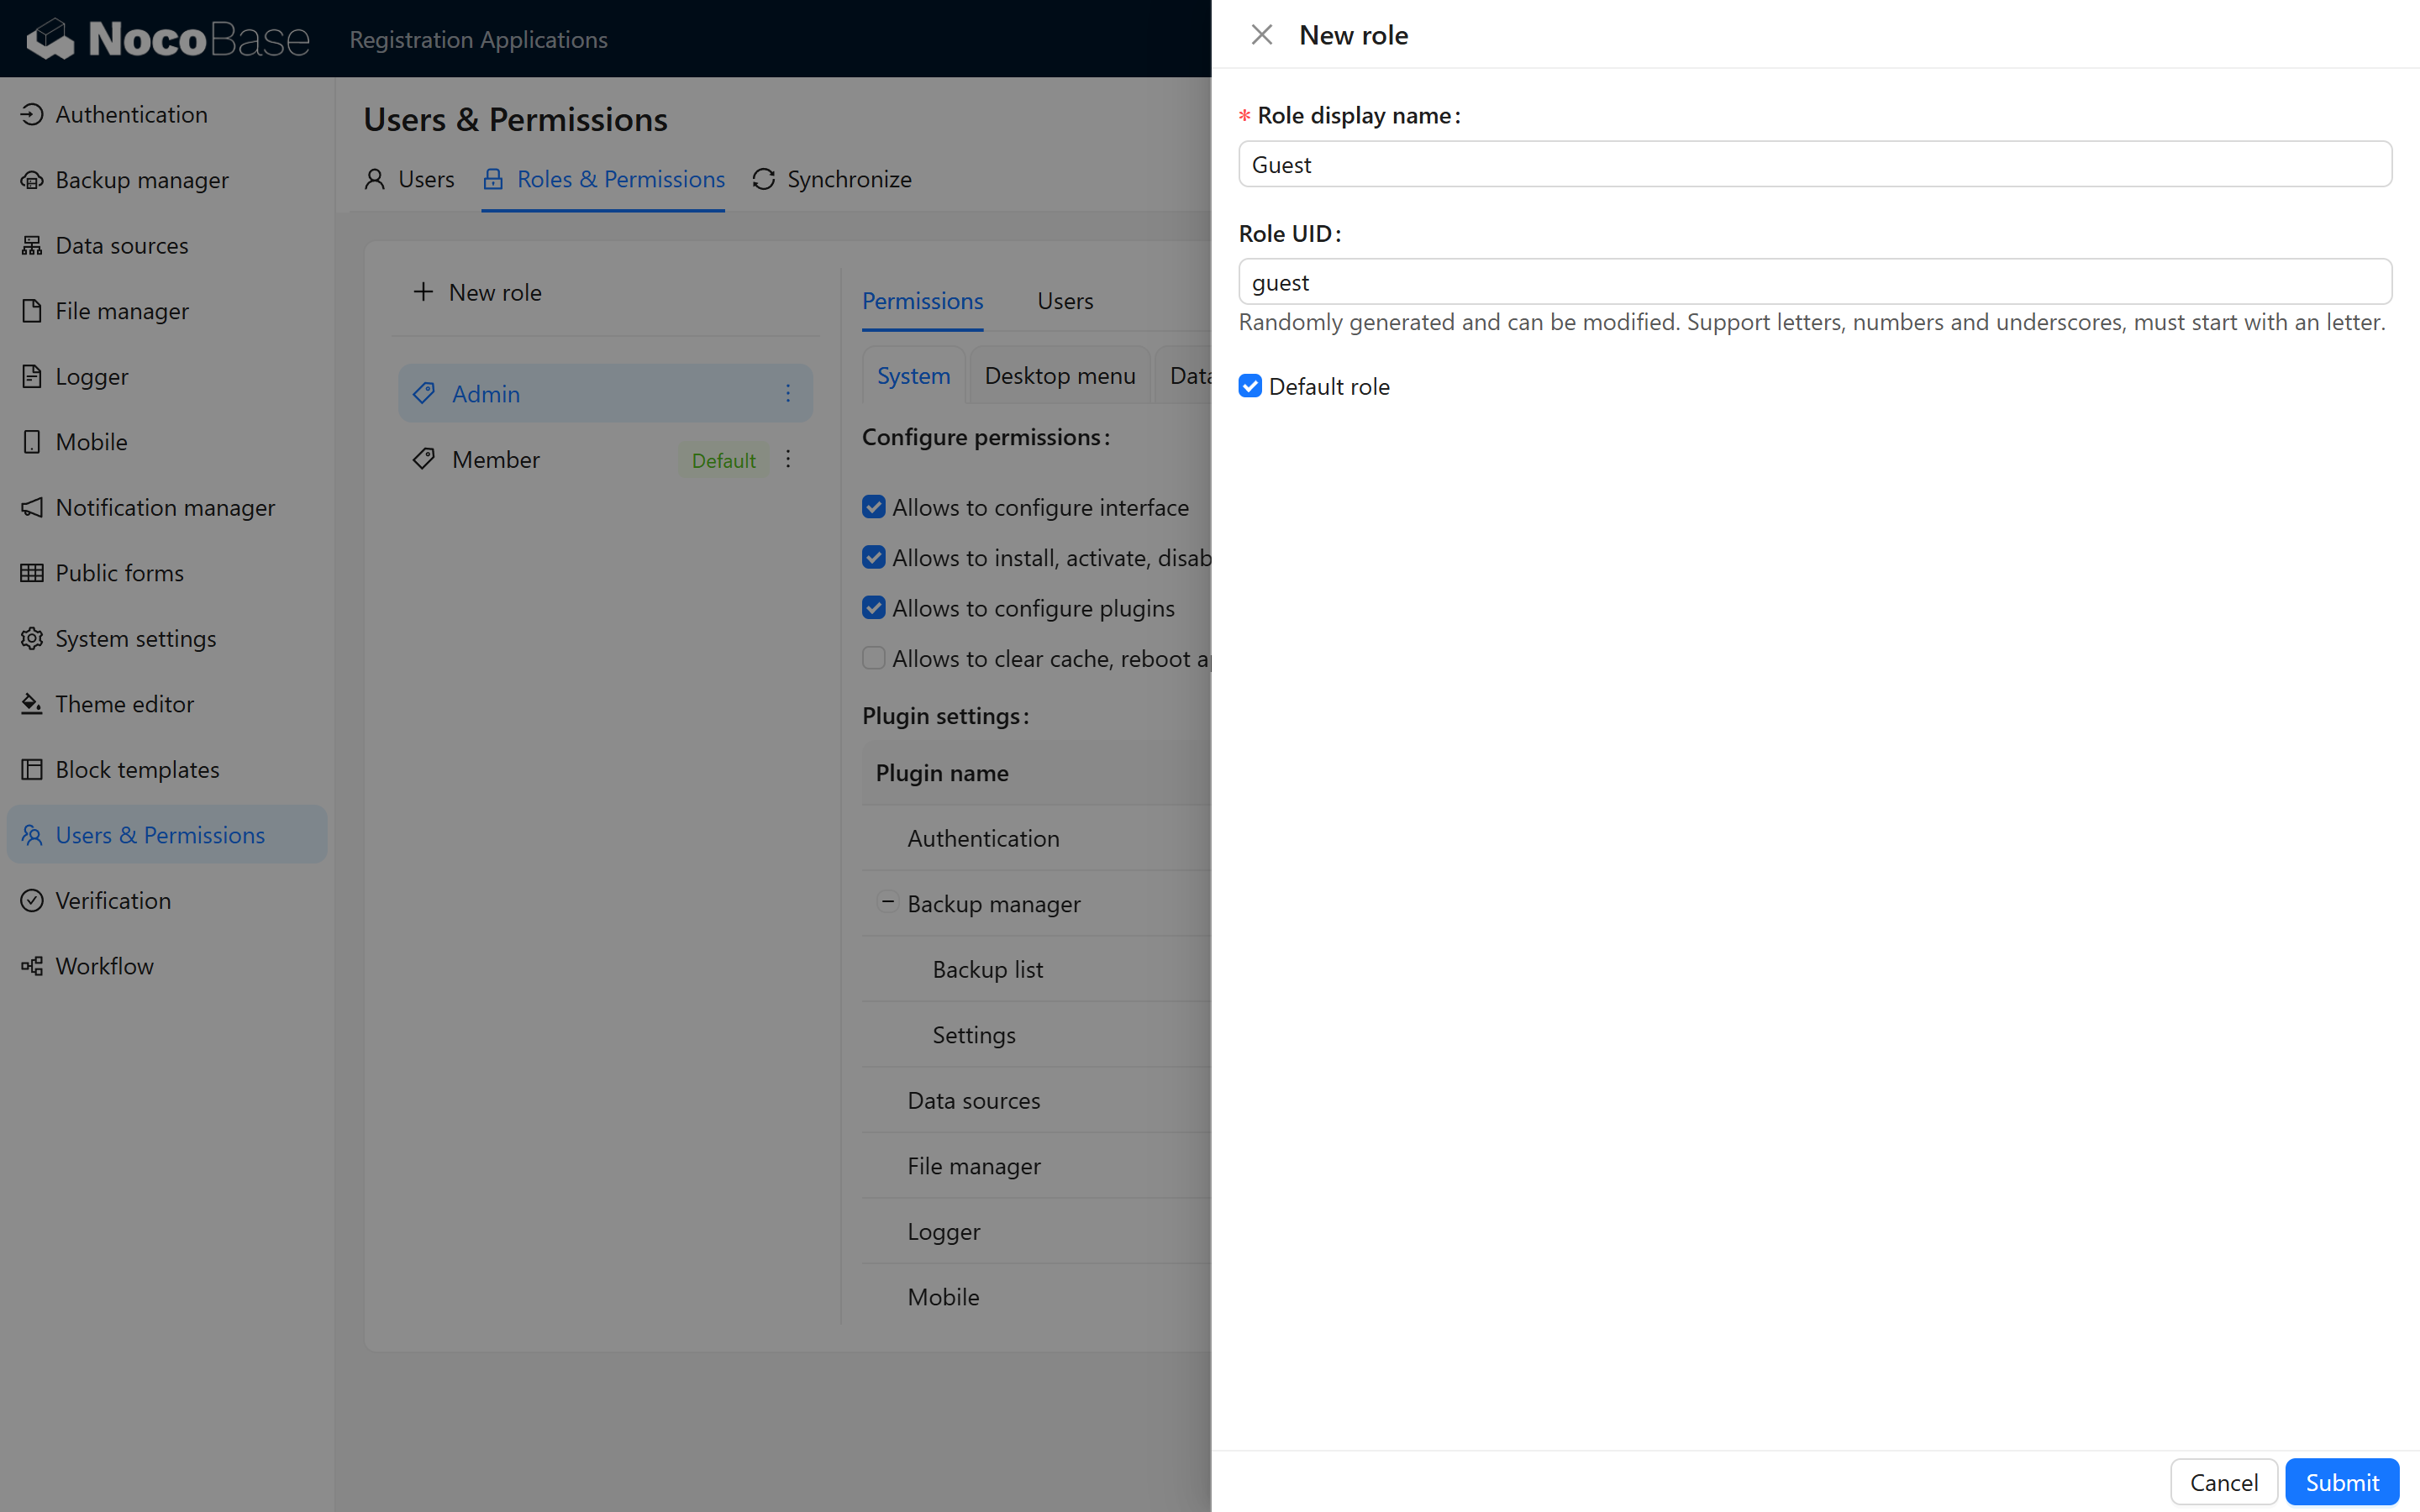
1.2.1 Create a “Guest” Role
The system’s registration feature is enabled by default, but the default role might not meet your requirements.
Therefore, first create a “Guest” role in the Role List to be used as the default role. All new registered users will automatically be assigned this role and will have no permissions.
1.3 Configure the Registration Audit Interface (Core)
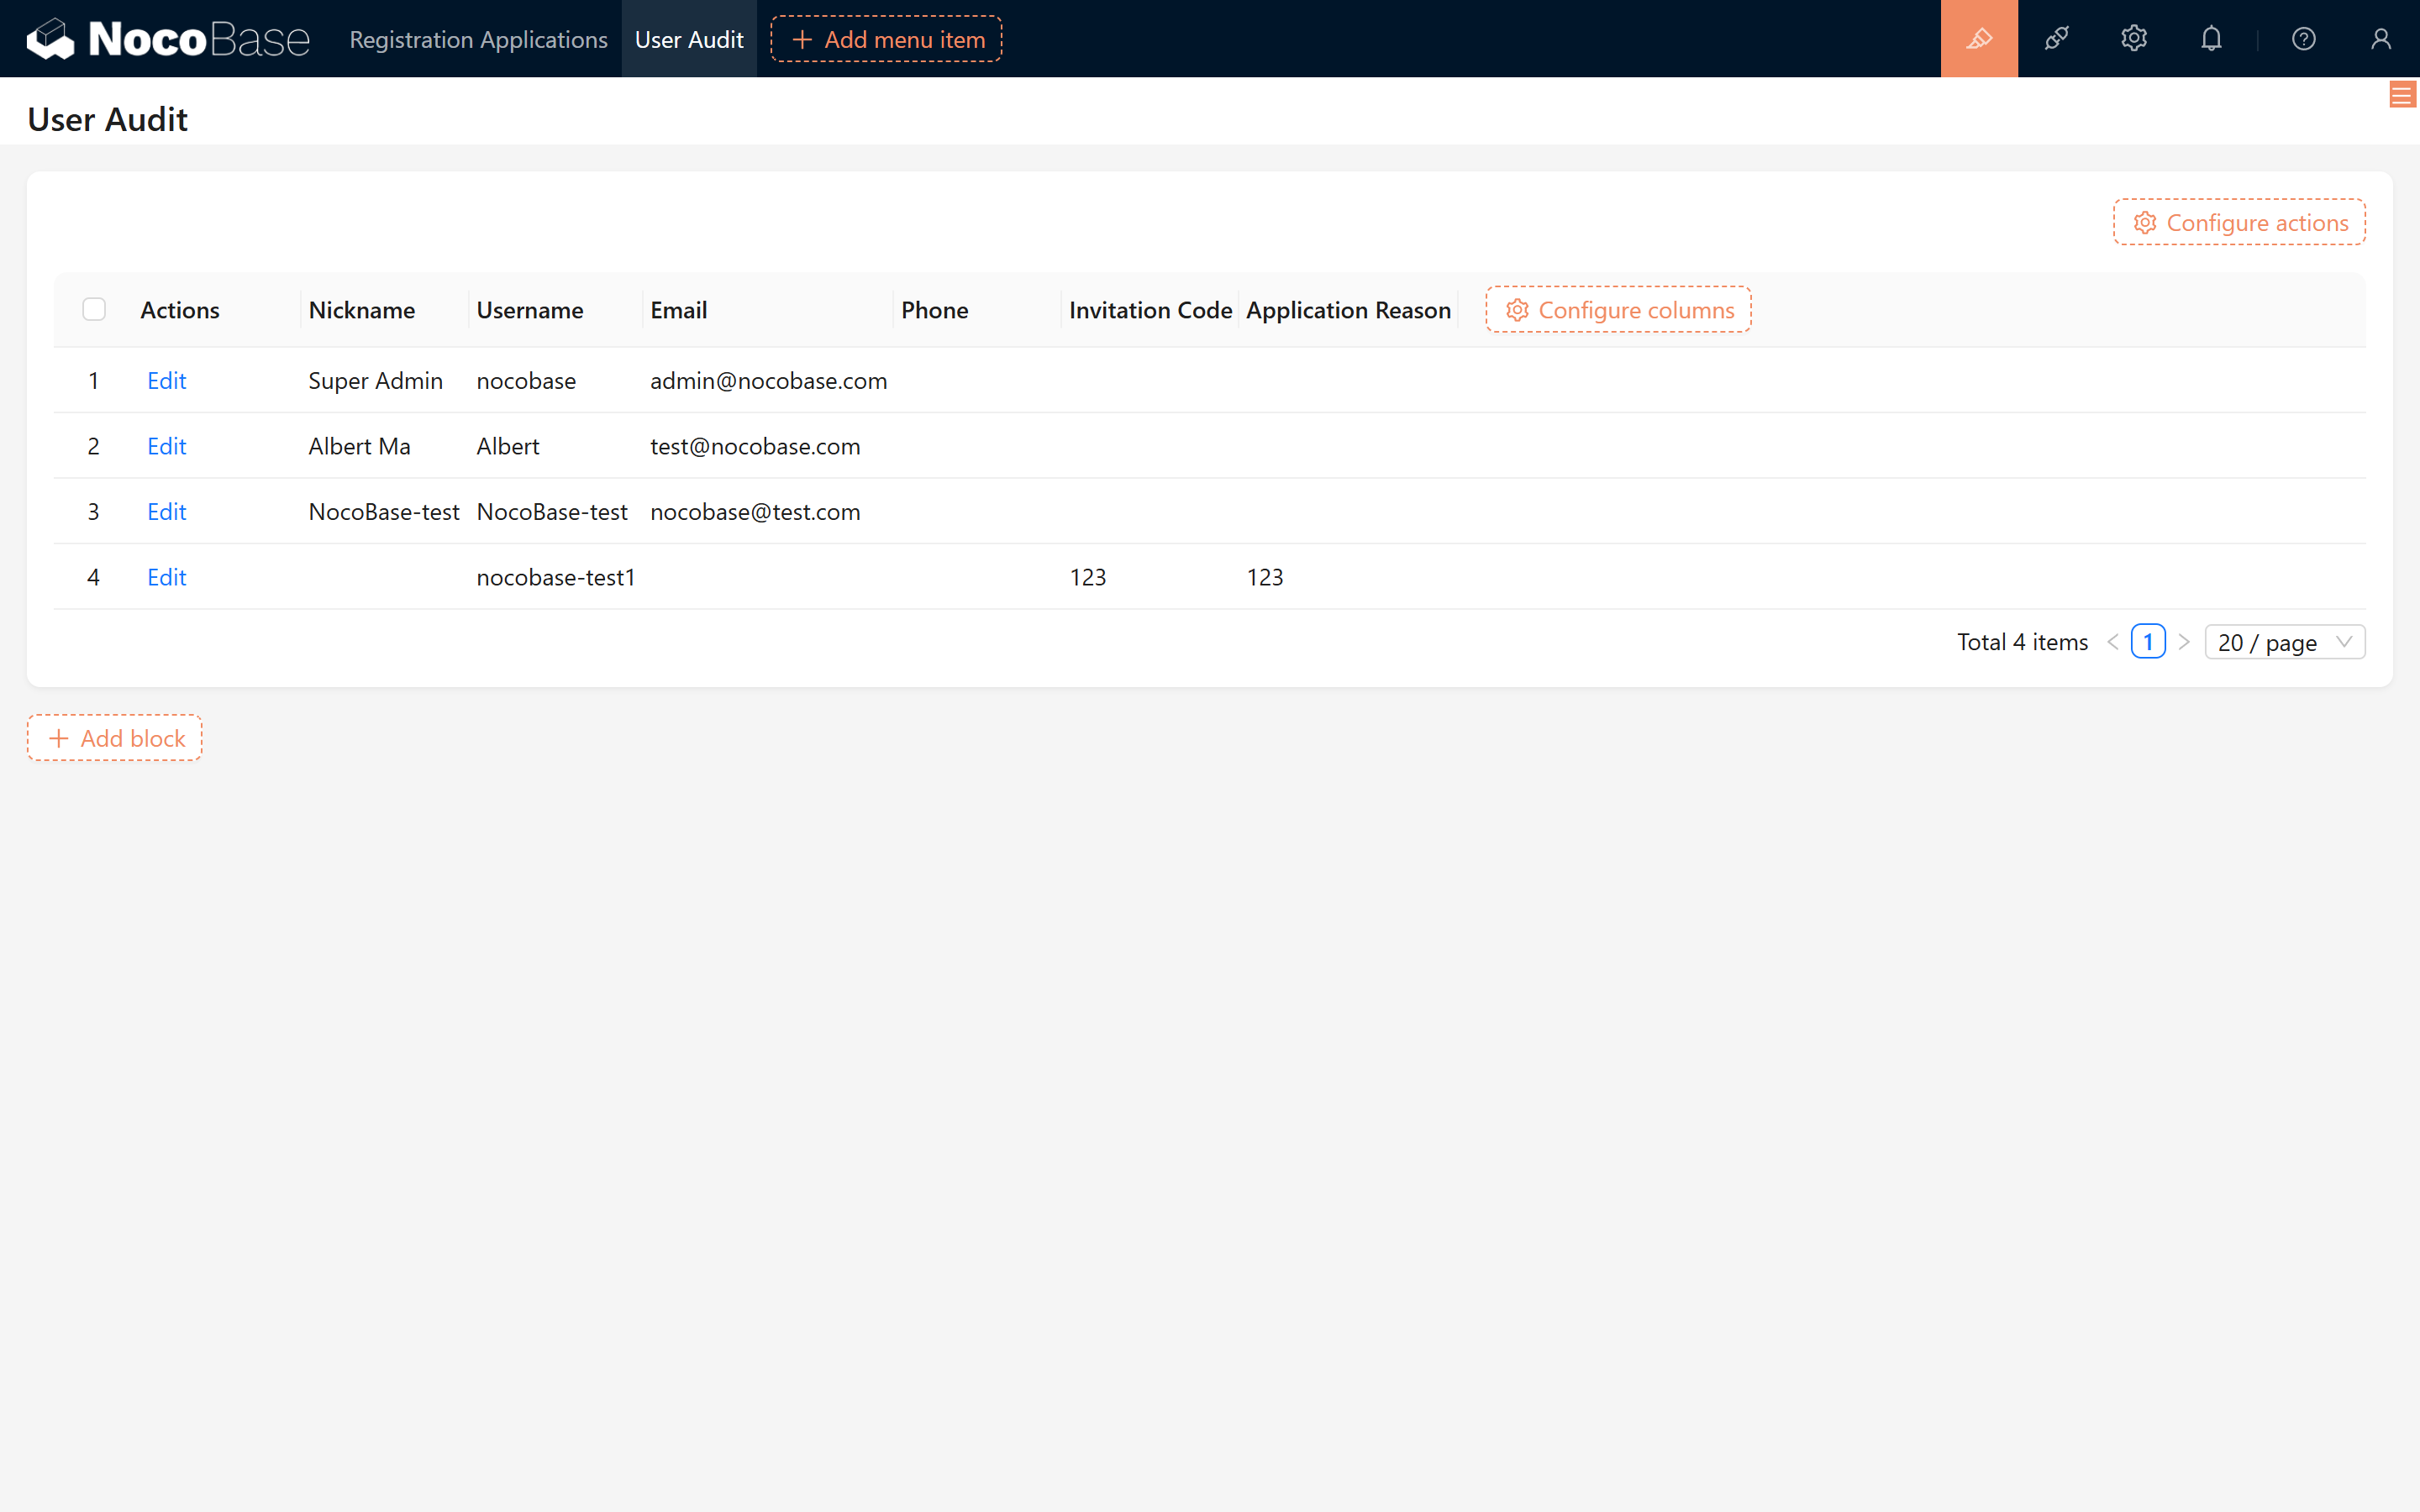
Switch to edit mode in the backend and configure a simple table block. Select the User collection to display and manage registered users.
1.4 Test the Registration Audit Process and Manually Update Roles
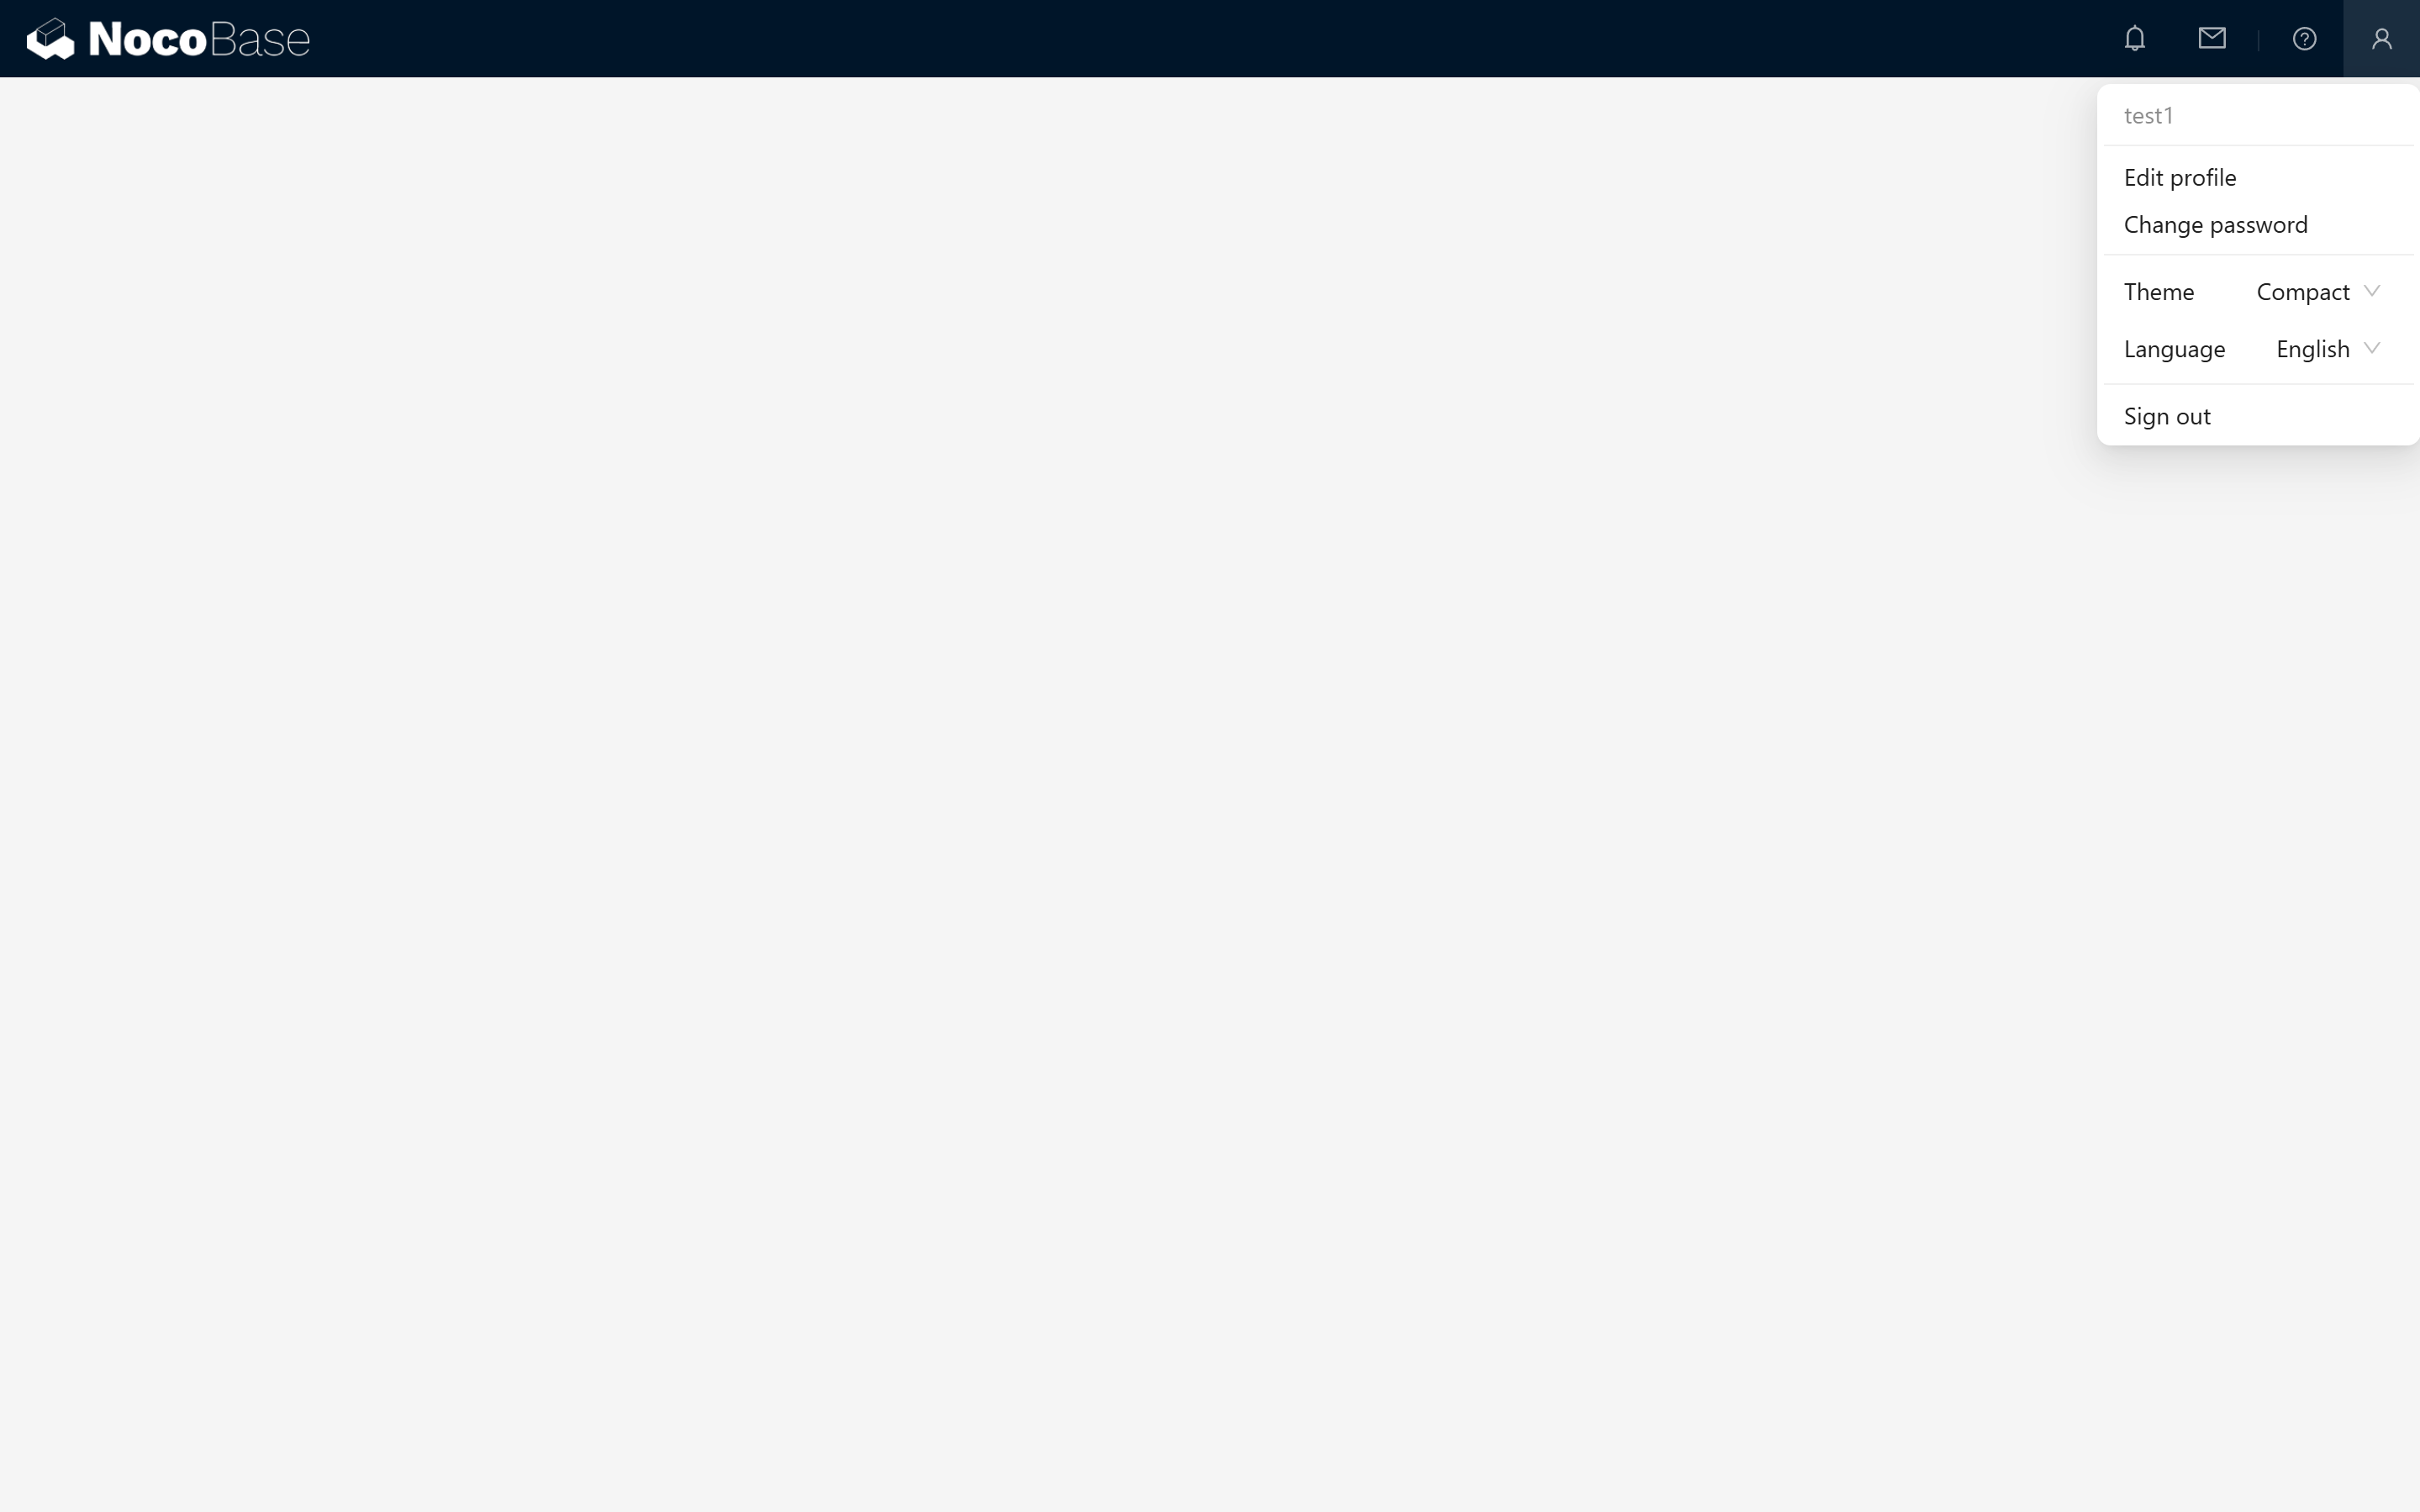
- After a new user registers, the page initially shows blank:
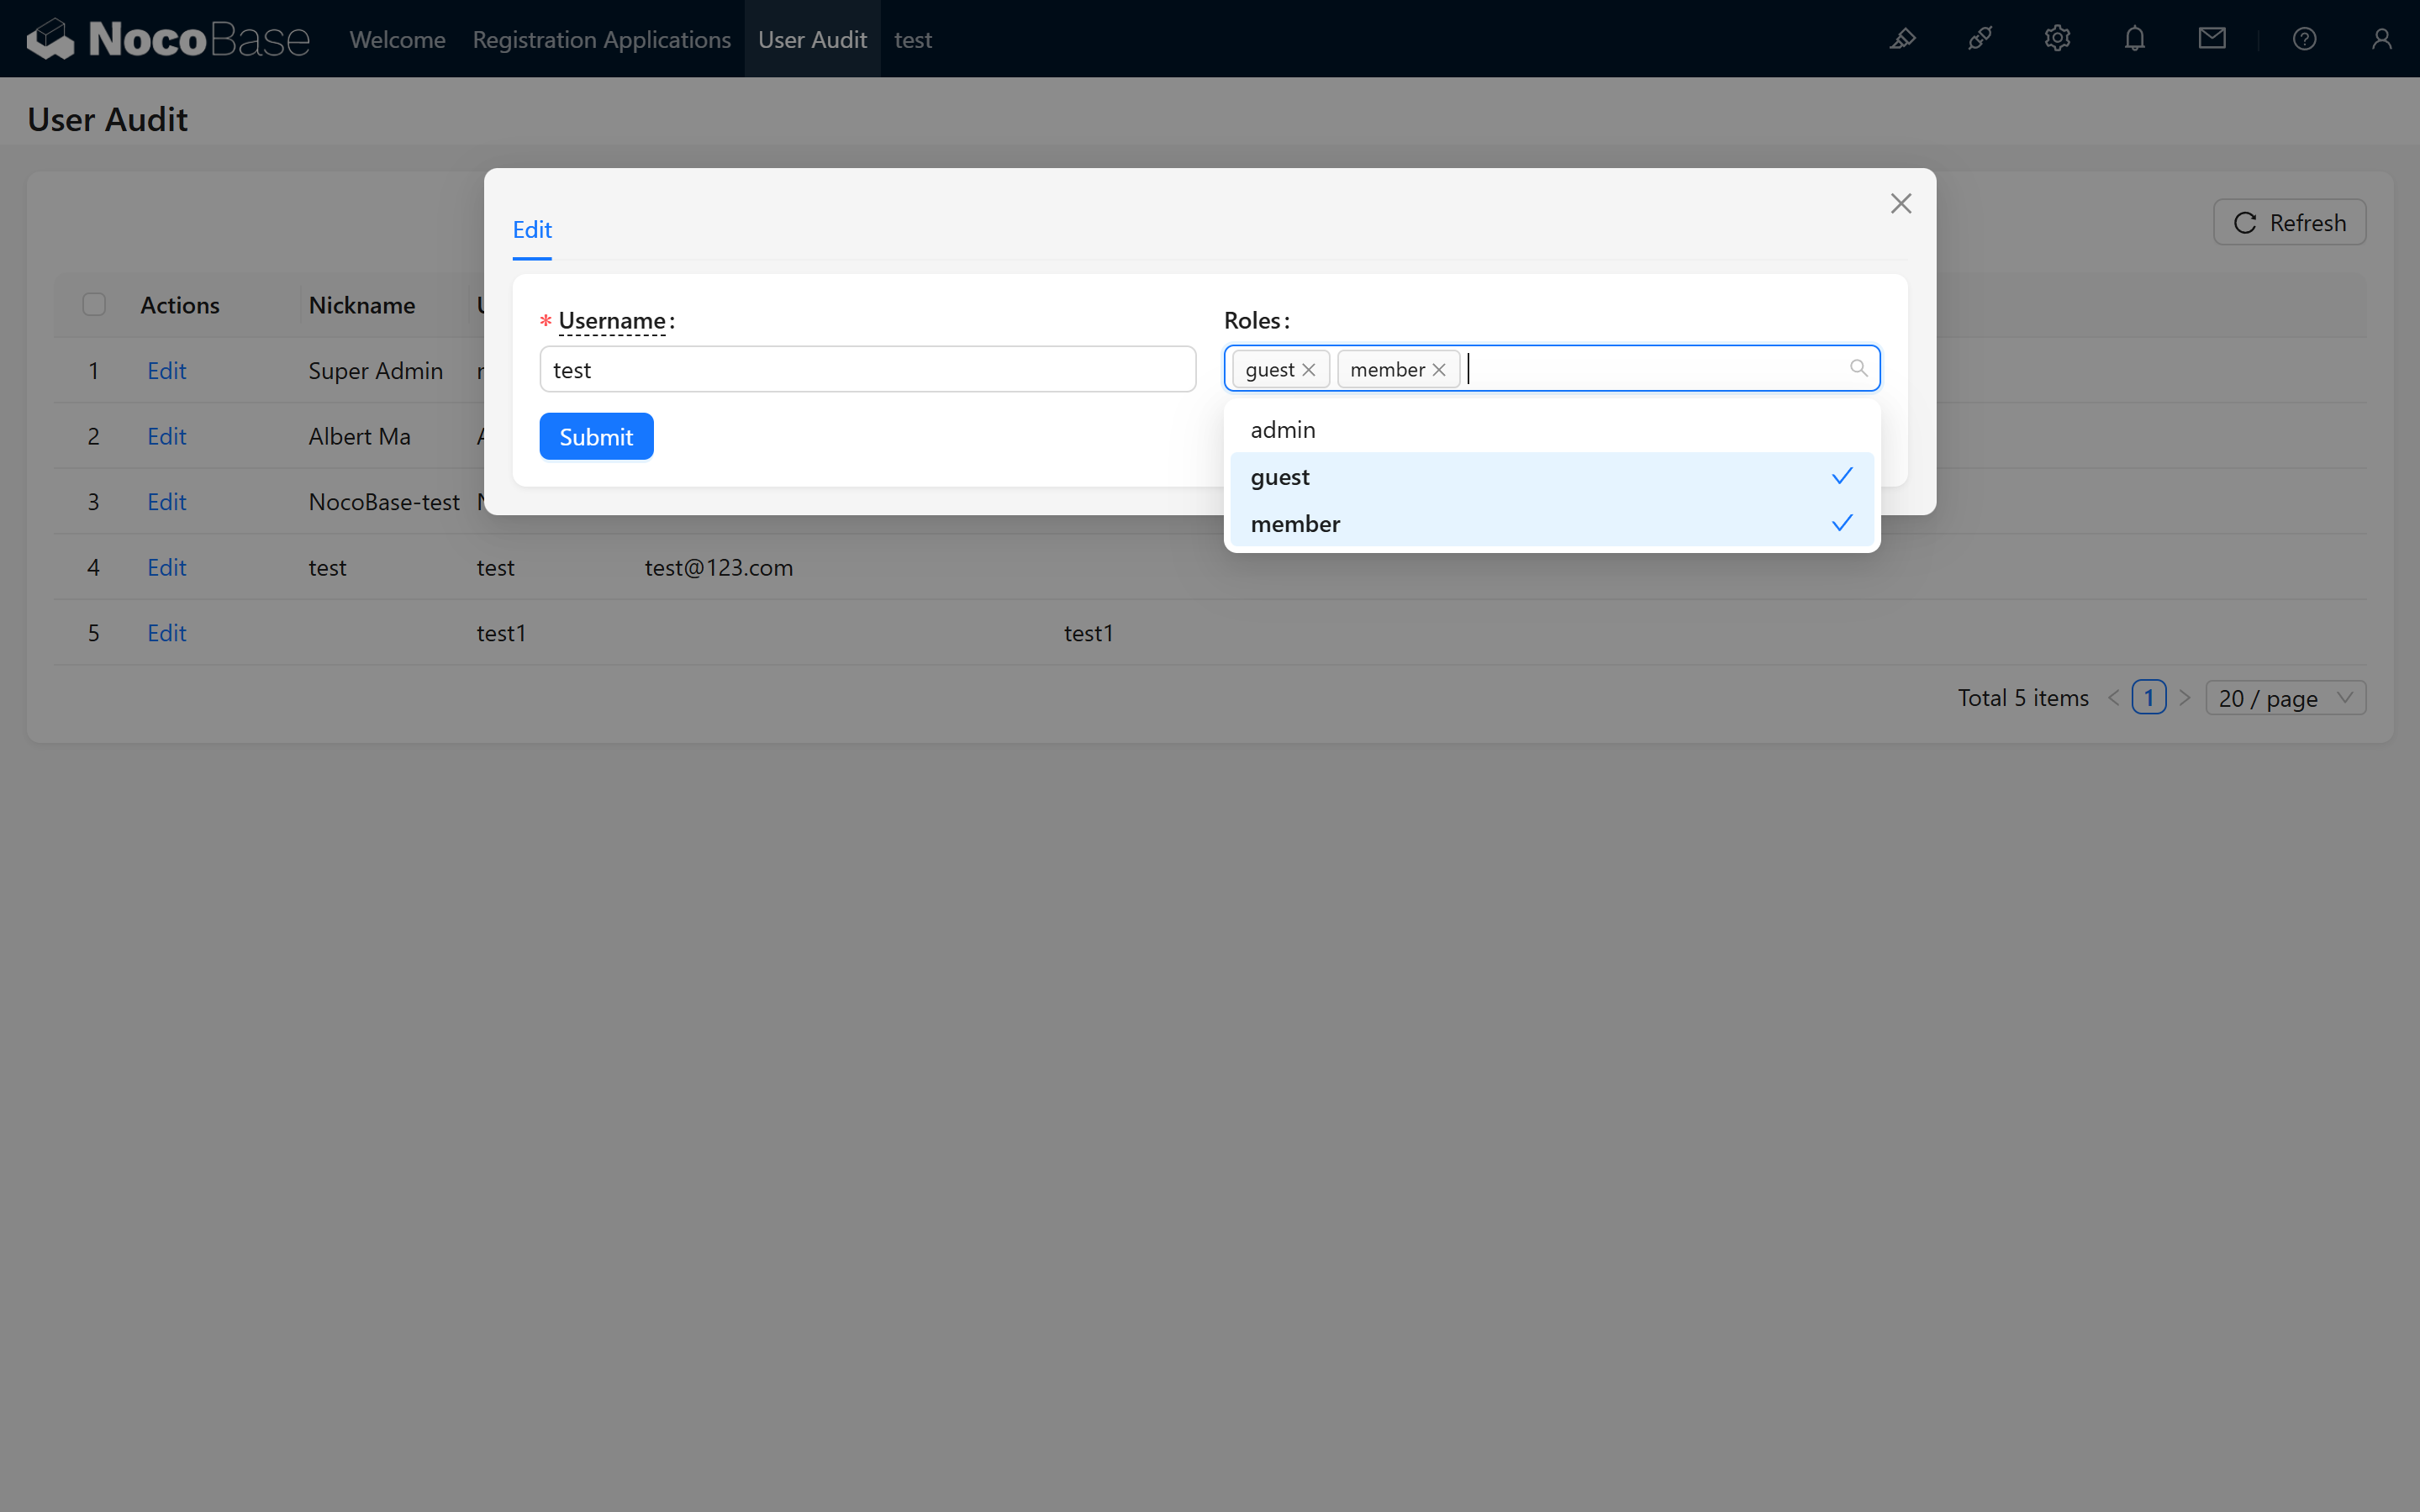
- In the management interface, for users whose application information is correct, manually change their role to the designated role to complete the audit.
1.5 Configure the Prompt Page (Optional)
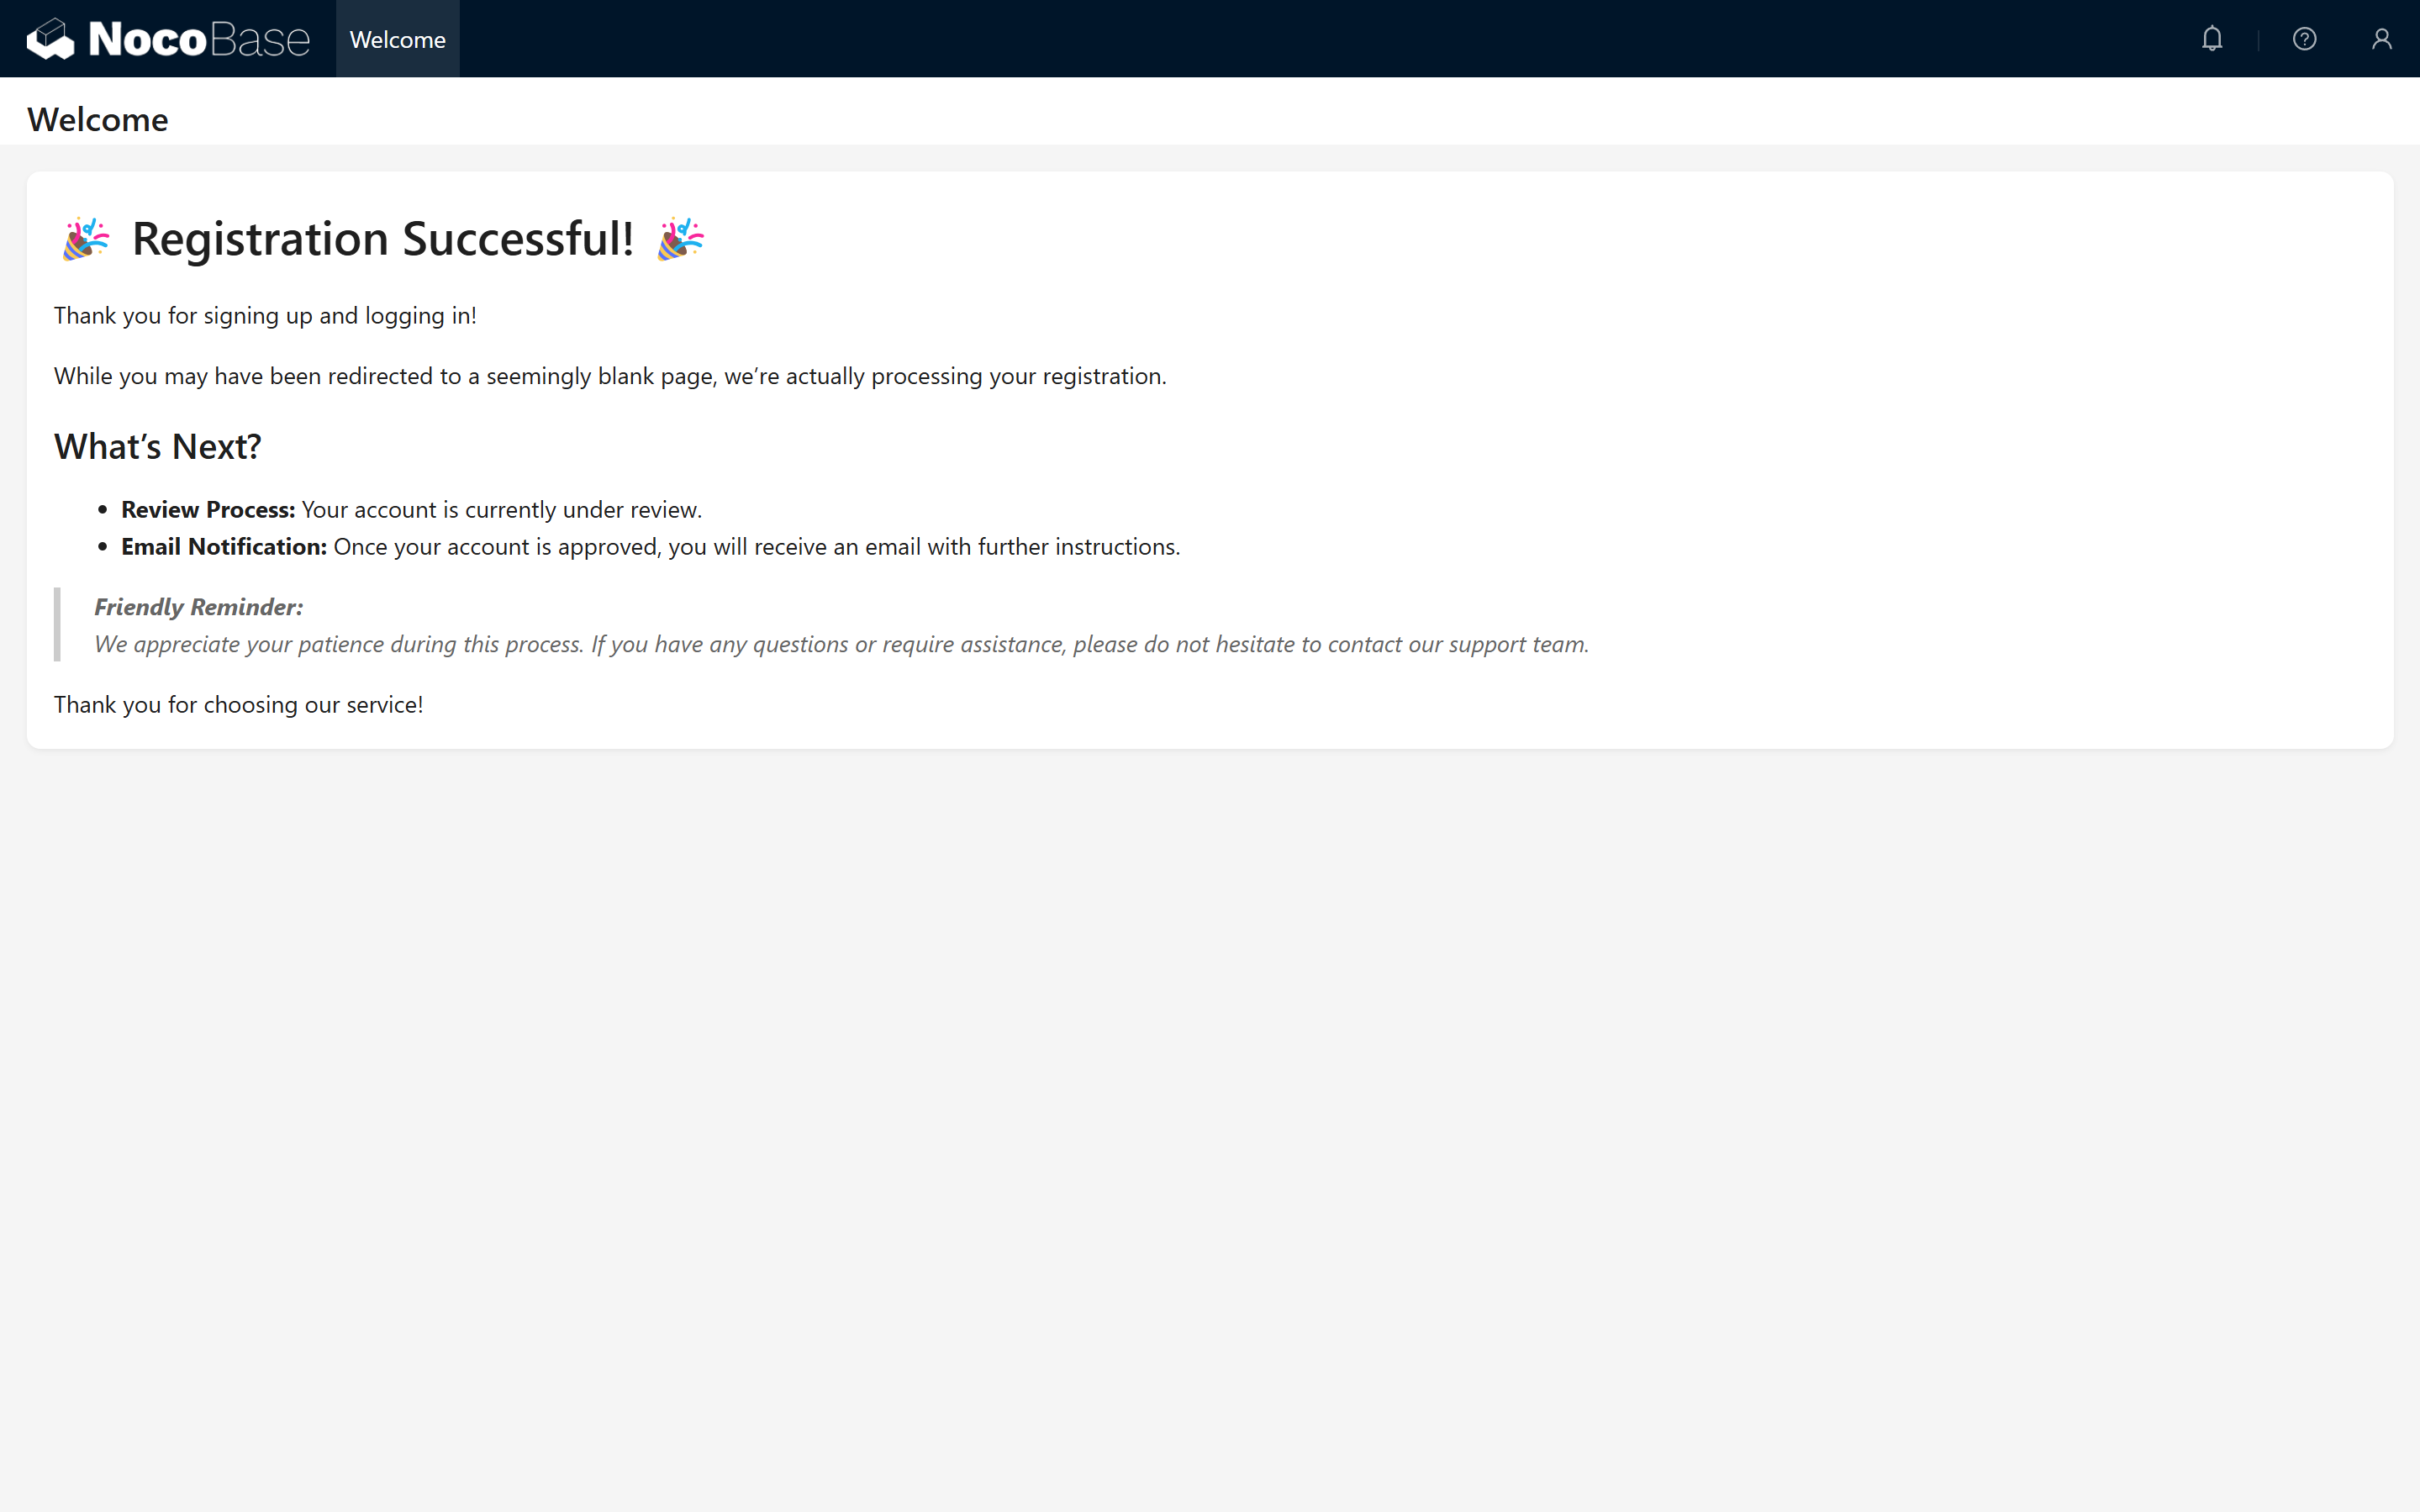
1.5.1 Create a Page (e.g., “Registration Successful”) and Enter Prompt Information
Optional Step: You can add a friendly prompt on this blank page, such as “Your account is under review, please wait patiently for approval,” to inform the user of the current status.
1.5.2 Assign Permissions to the Prompt Page
Next, go to the user permission management configuration and assign this page to the “Guest” role. After successful registration, the system will automatically redirect to this page. 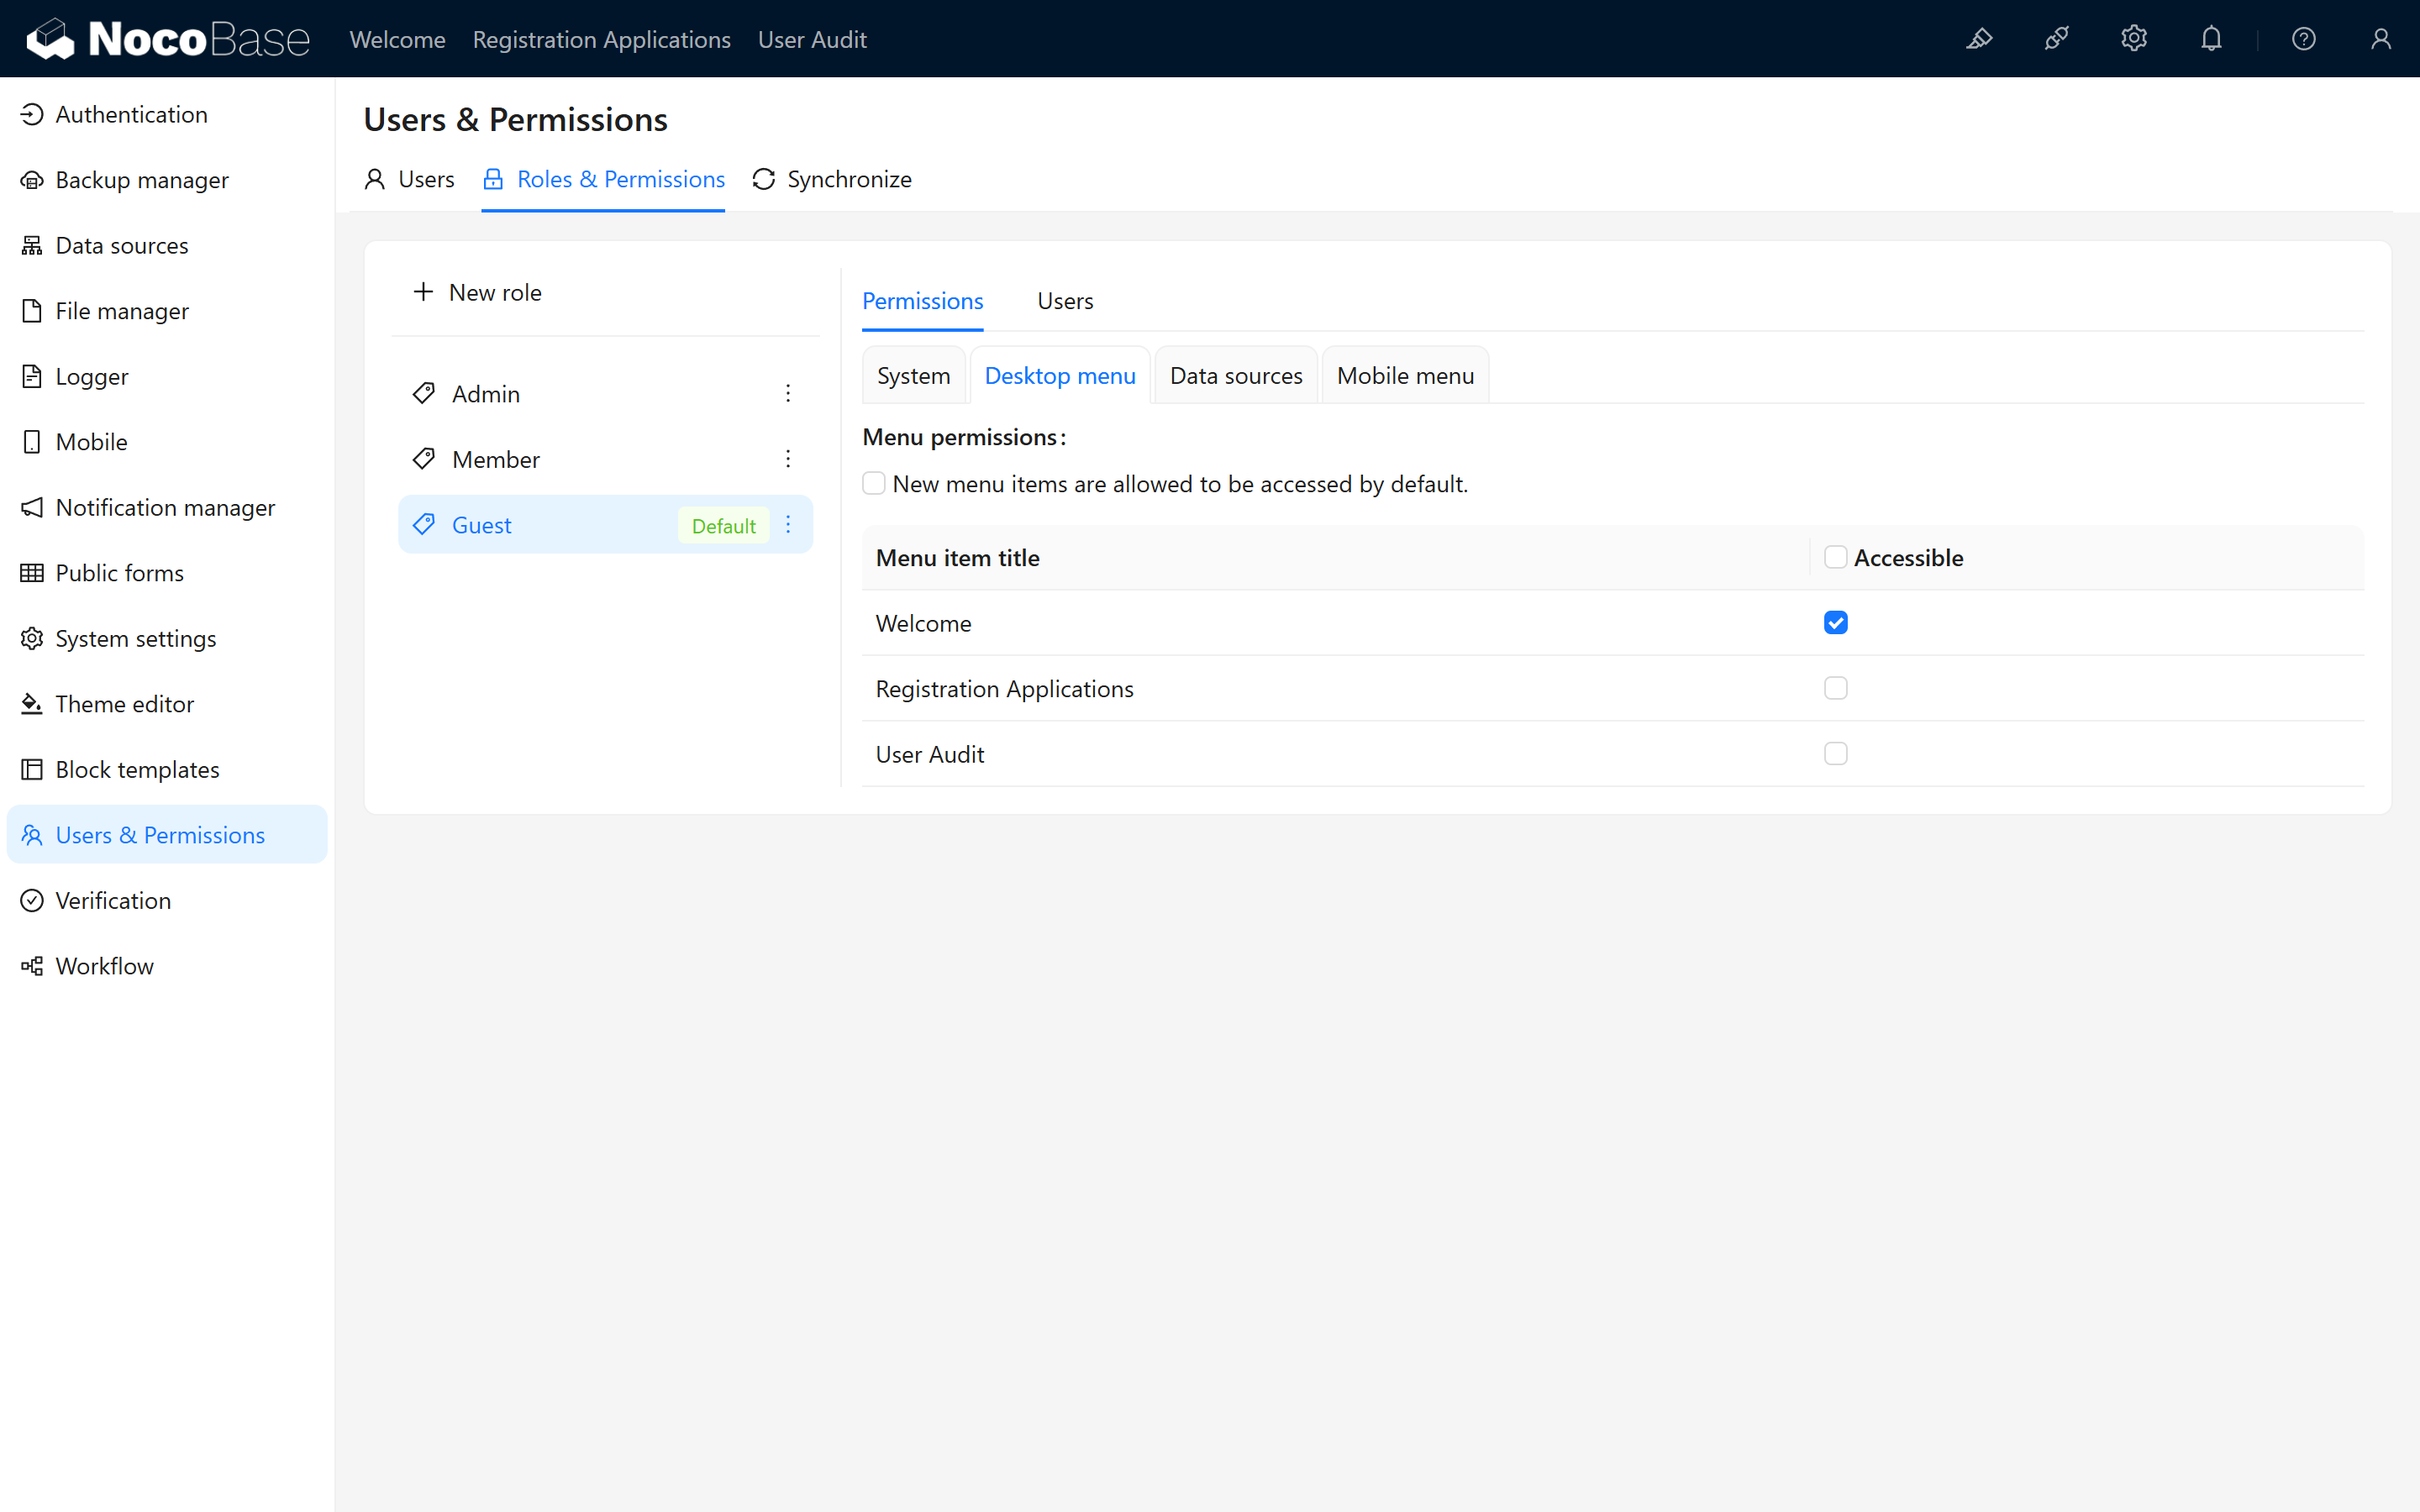
1.6 Extend User Collection Fields (Optional)
Optional Step: If you need to collect additional information during registration to assist with the audit, add relevant fields (for example, “Application Reason” or “Invitation Code”) in the user collection. This step can be omitted if only basic registration auditing is needed.
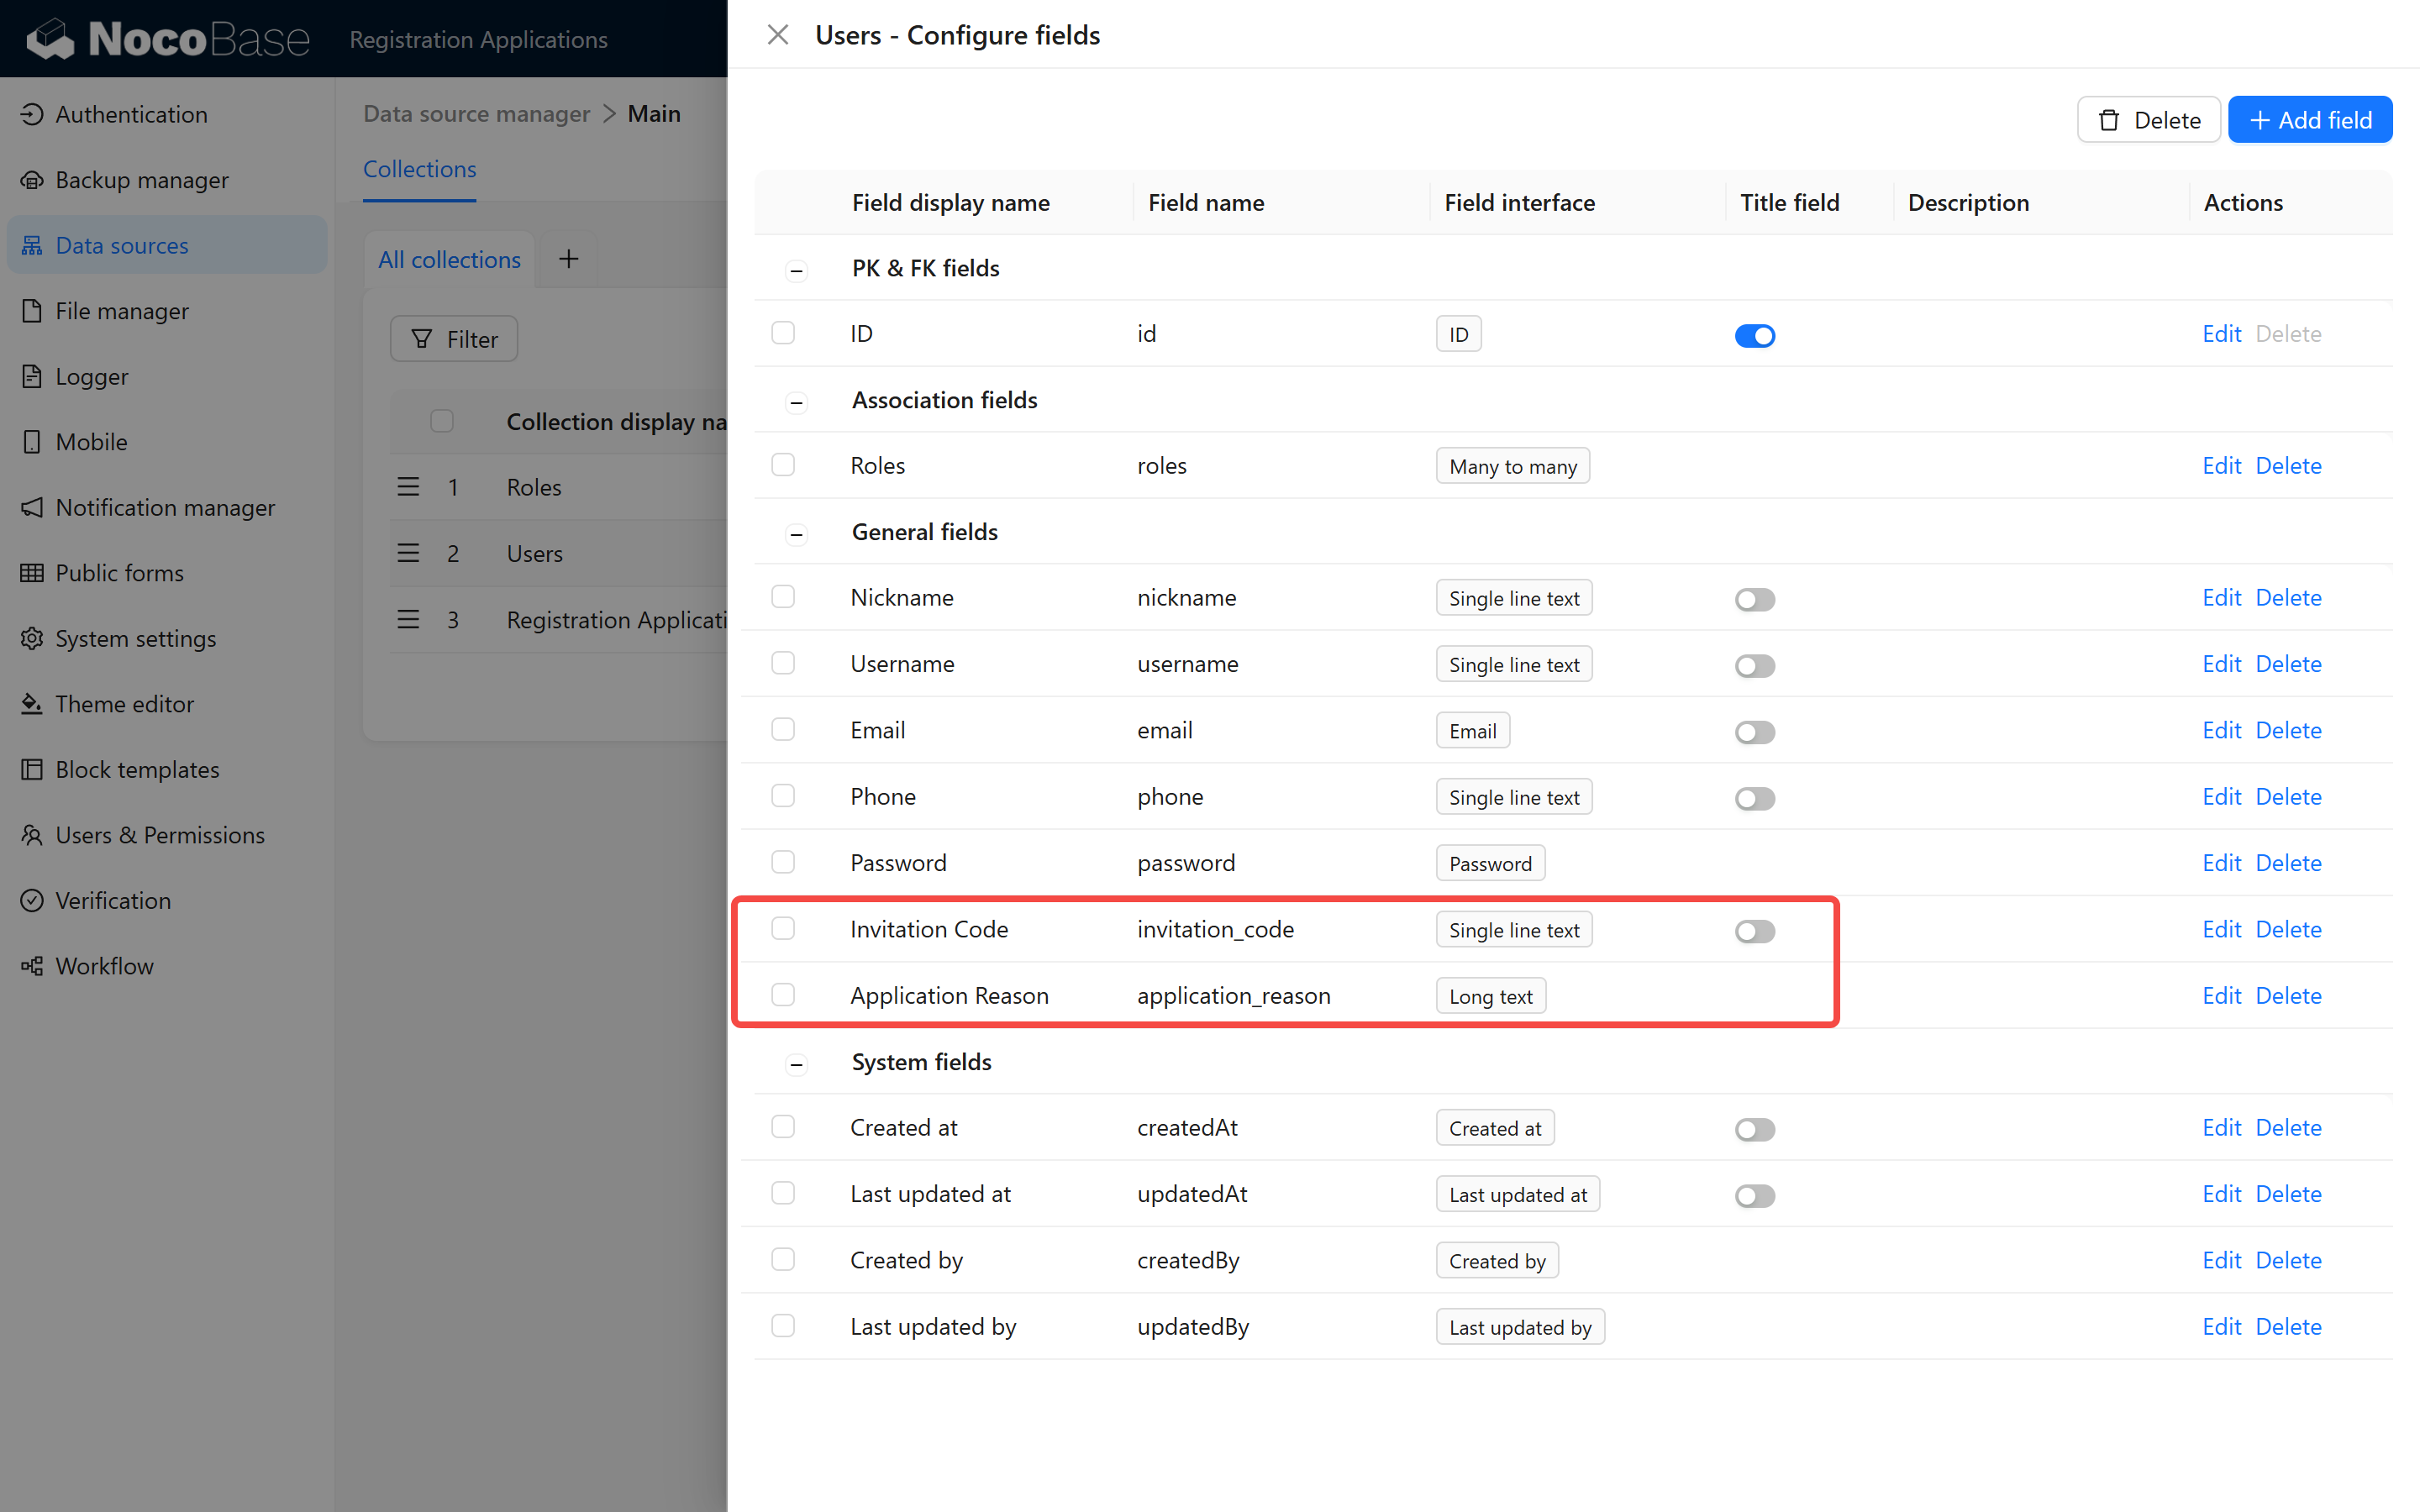
1.6.1 Add Application Field
Enter the User Collection and add a field to record the applicant’s reason for registration or invitation code information.
1.6.2 Enable the Field in “User Authentication”
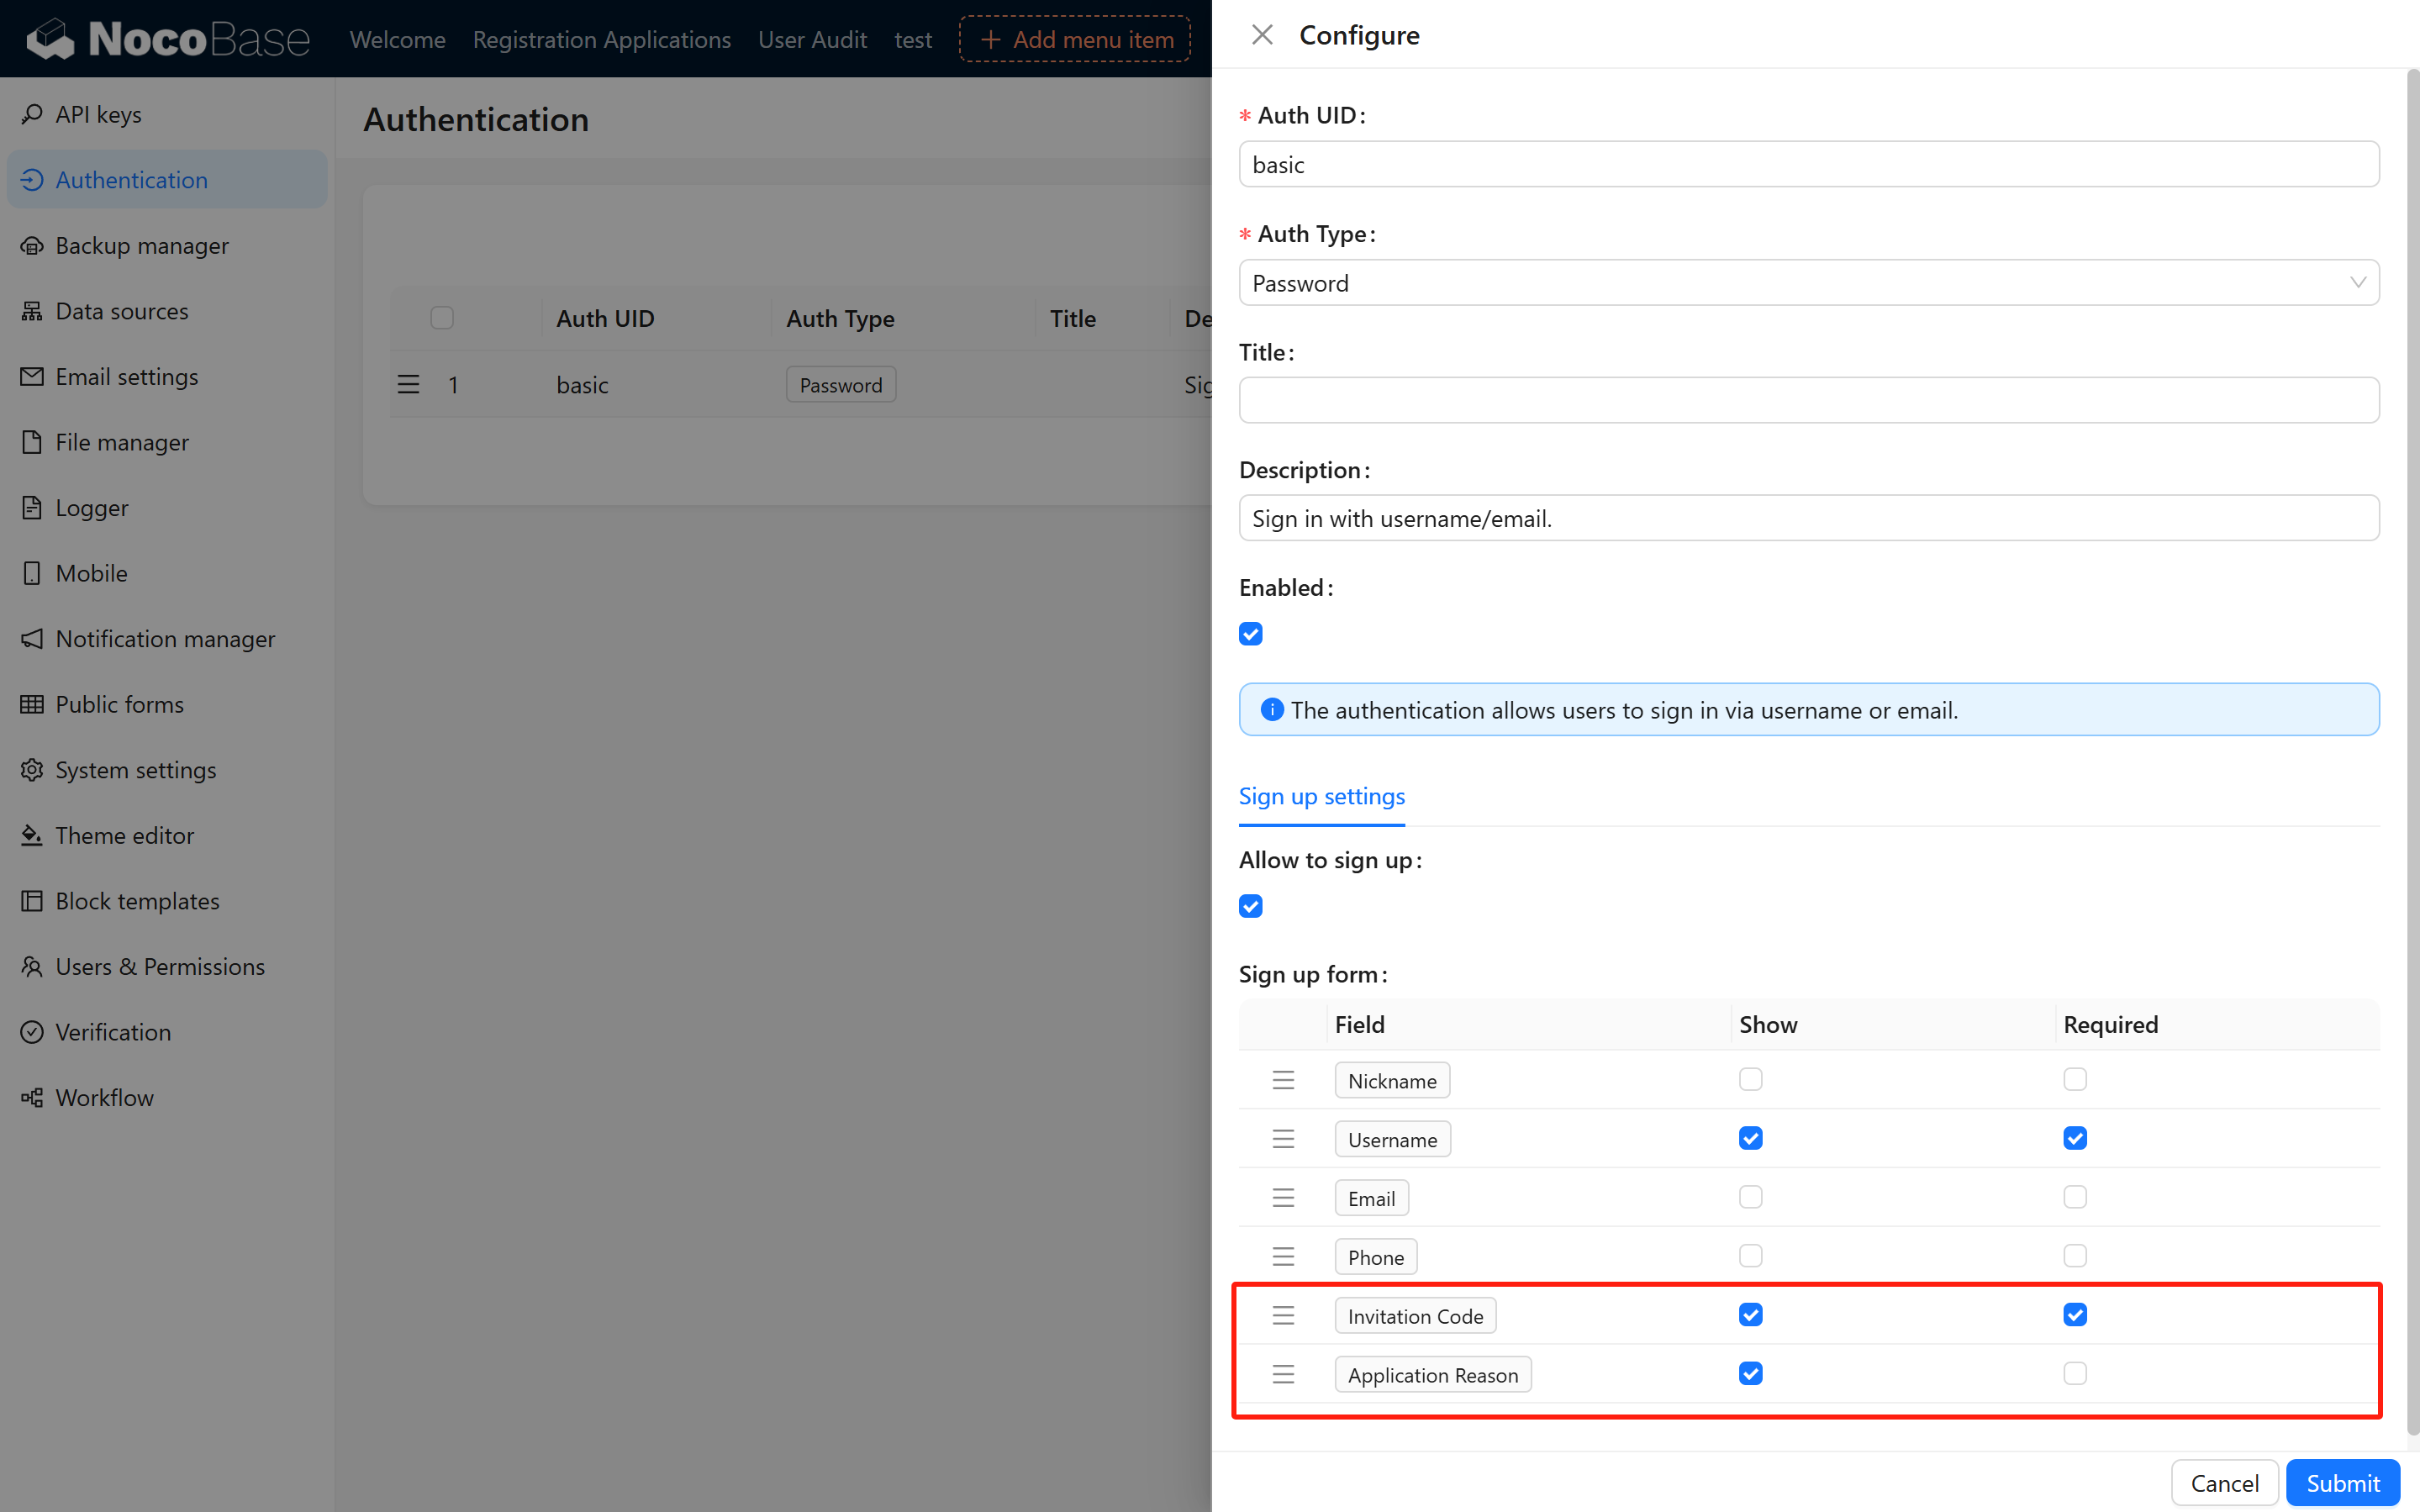
After configuration, go to the login page and click Register Account to see the corresponding field in the registration form (if the optional field is configured, otherwise only the basic form will be displayed). 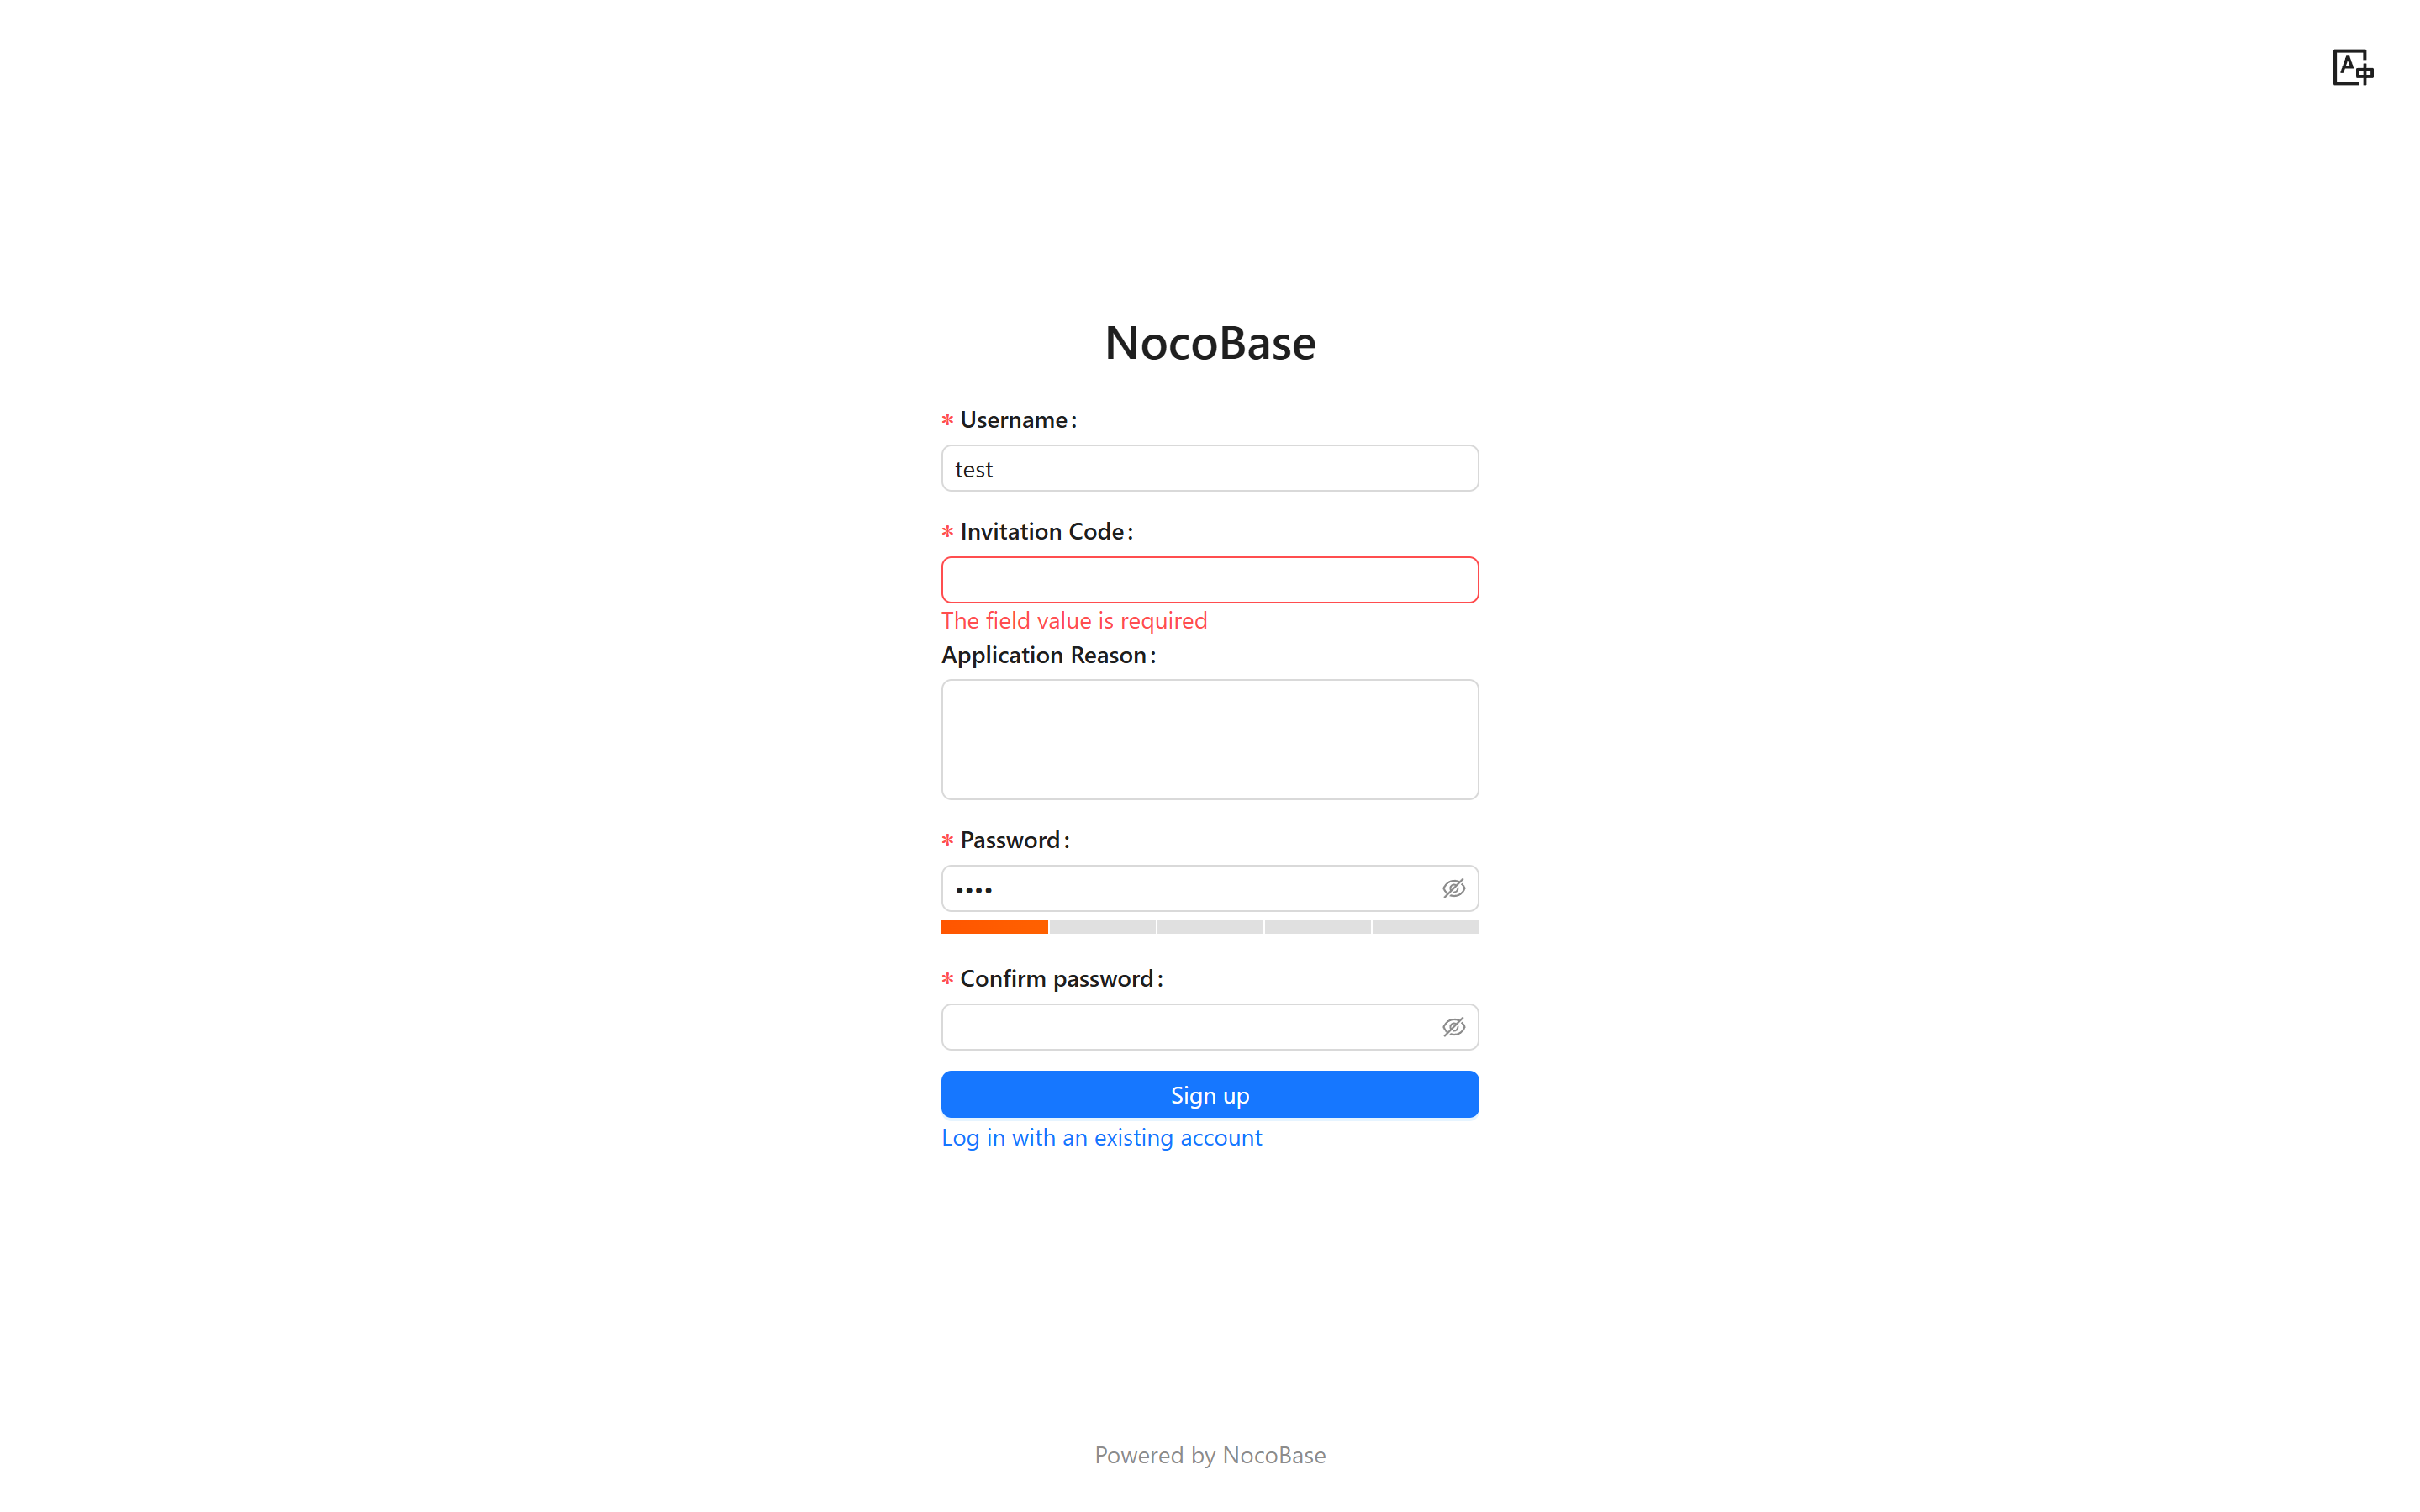
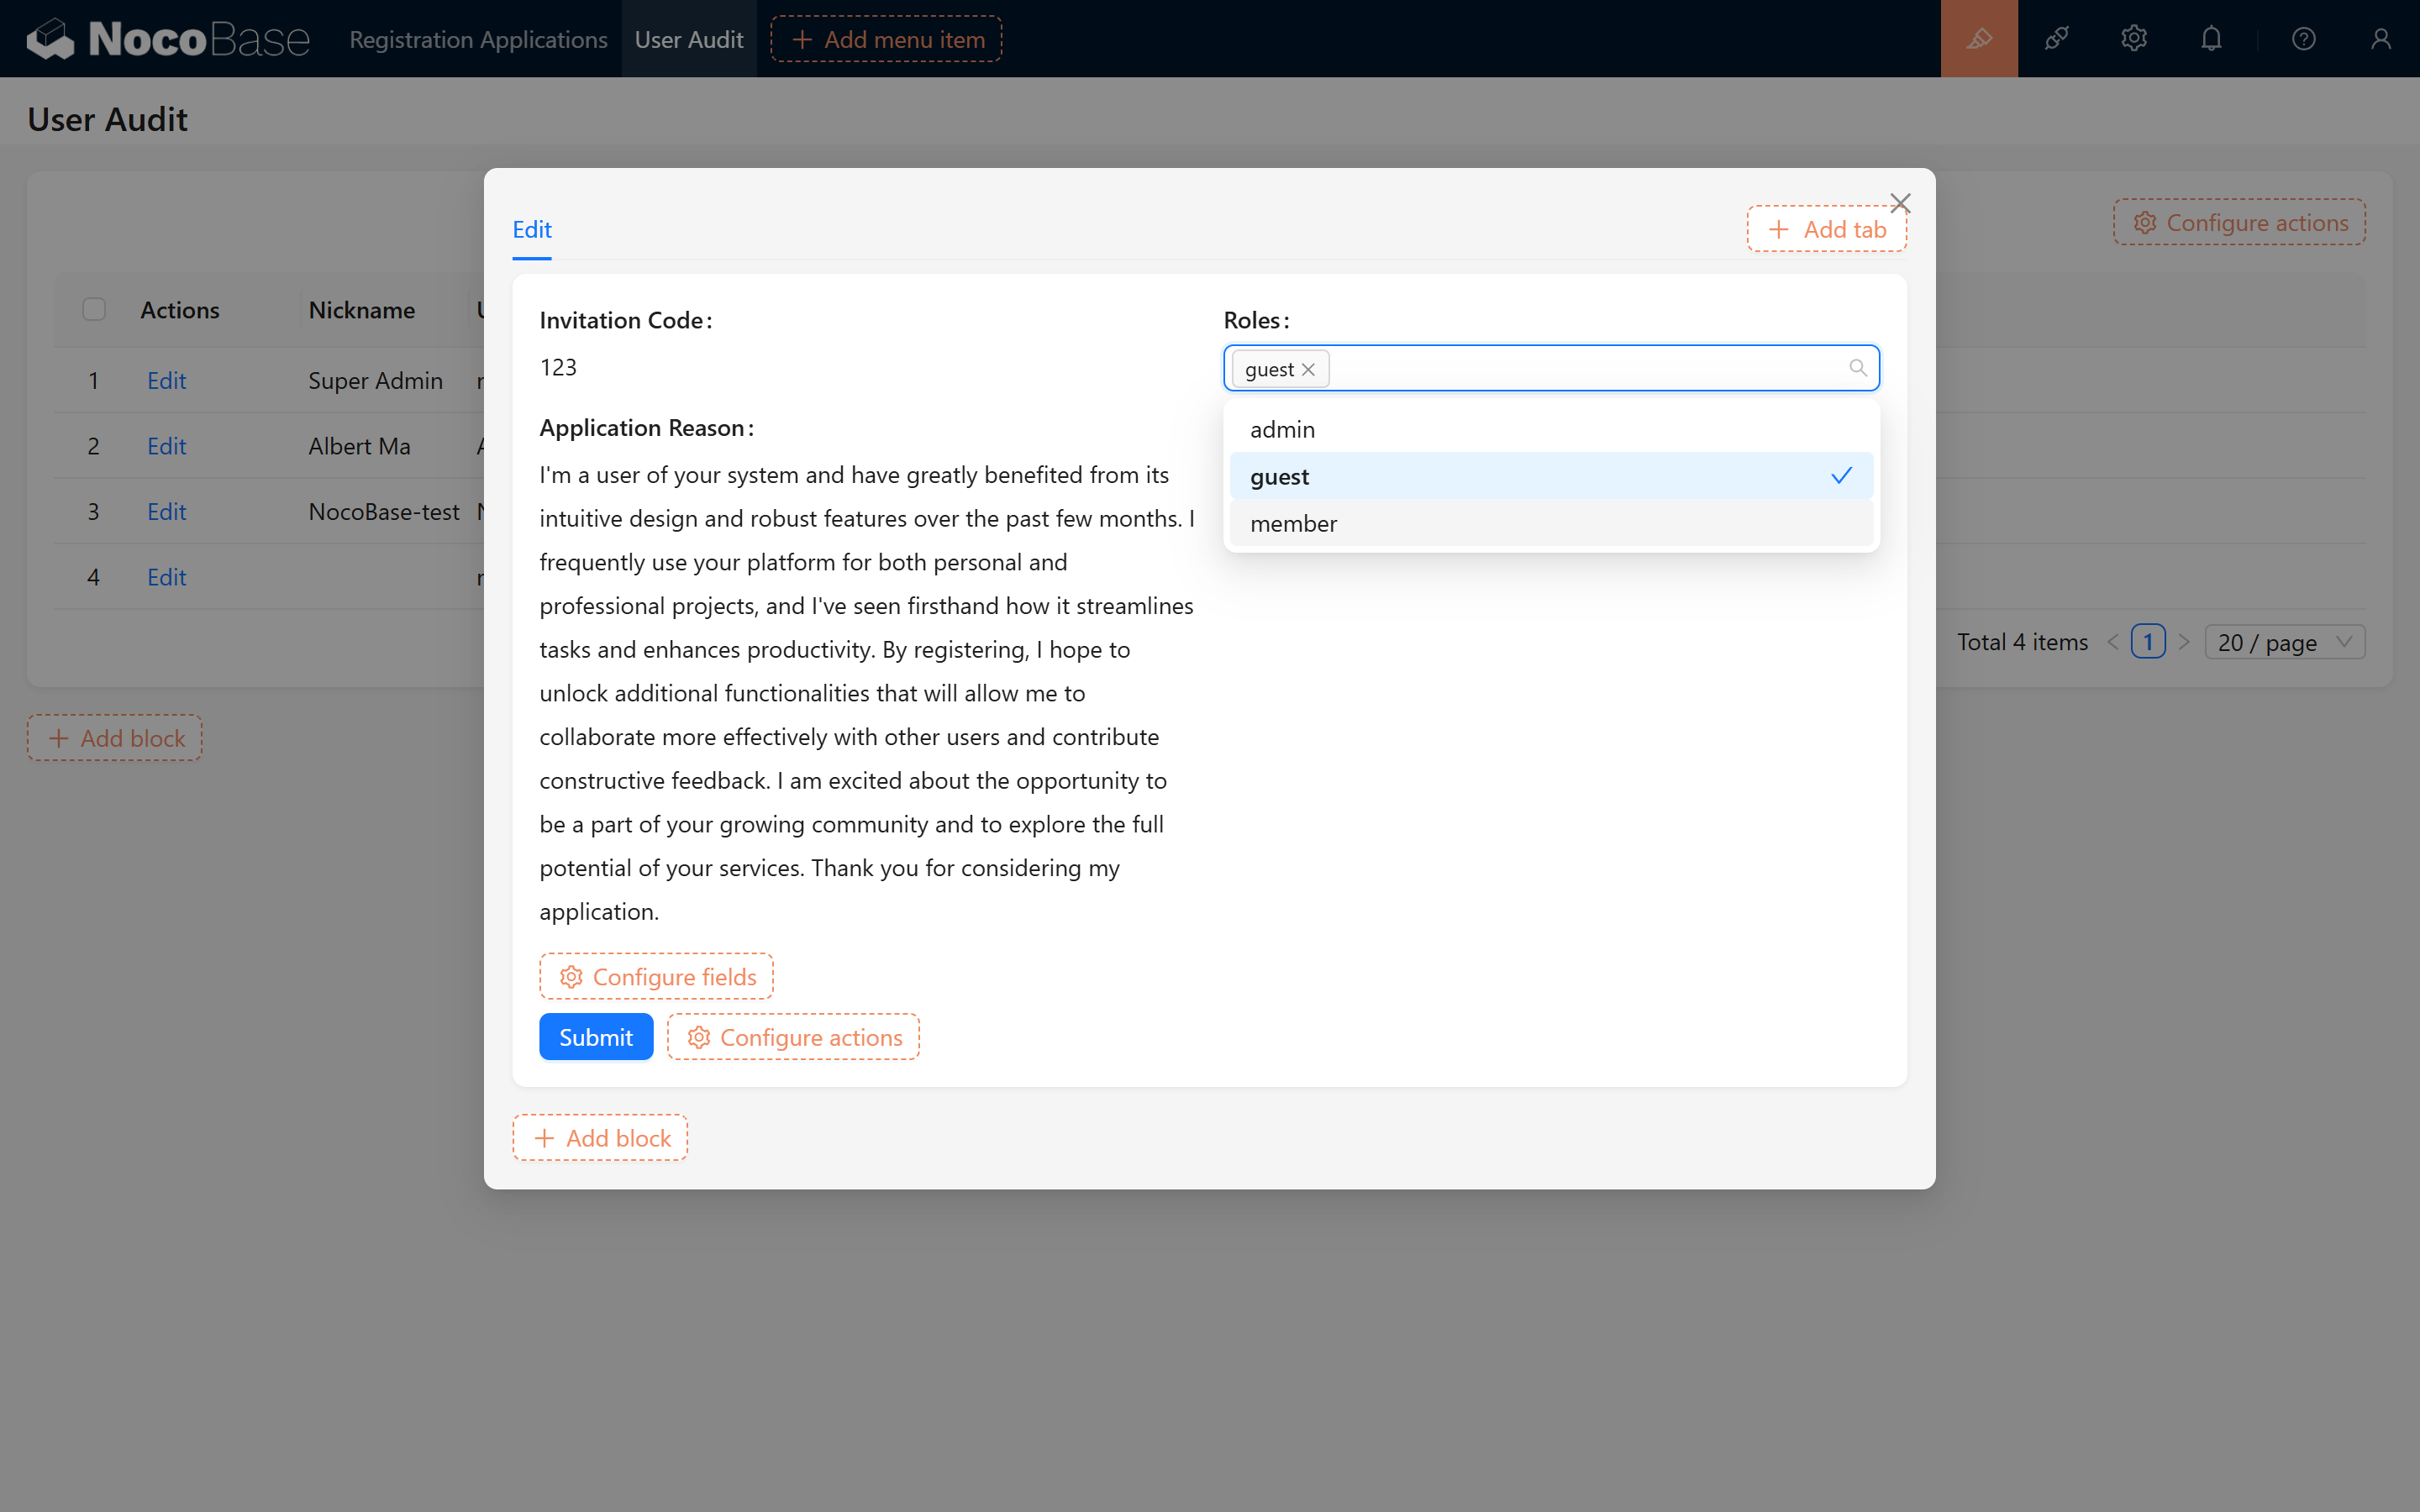
1.6.3 Add Corresponding Fields to the Audit Page
Add these fields to the audit page as well so that user roles can be audited and modified in real time.
2. Solution Two: Disable Direct Registration and Use an Audit Intermediate Collection
2.0 Applicable Scenario
This solution is suitable for scenarios that require a more flexible and customized registration audit process.
It uses an independent application information collection, workflow configuration, and Public Form plugin to realize the complete process—from user registration application submission to the automatic creation of users. The core steps ensure basic functionality and can be further expanded as needed.
2.1 Preliminary Preparation (Core)
2.1.1 Design the Application Information Collection
2.1.1.1 Create the “Application Information” Collection
-
Create the Collection In the NocoBase backend, create a new collection for storing user registration application information.
-
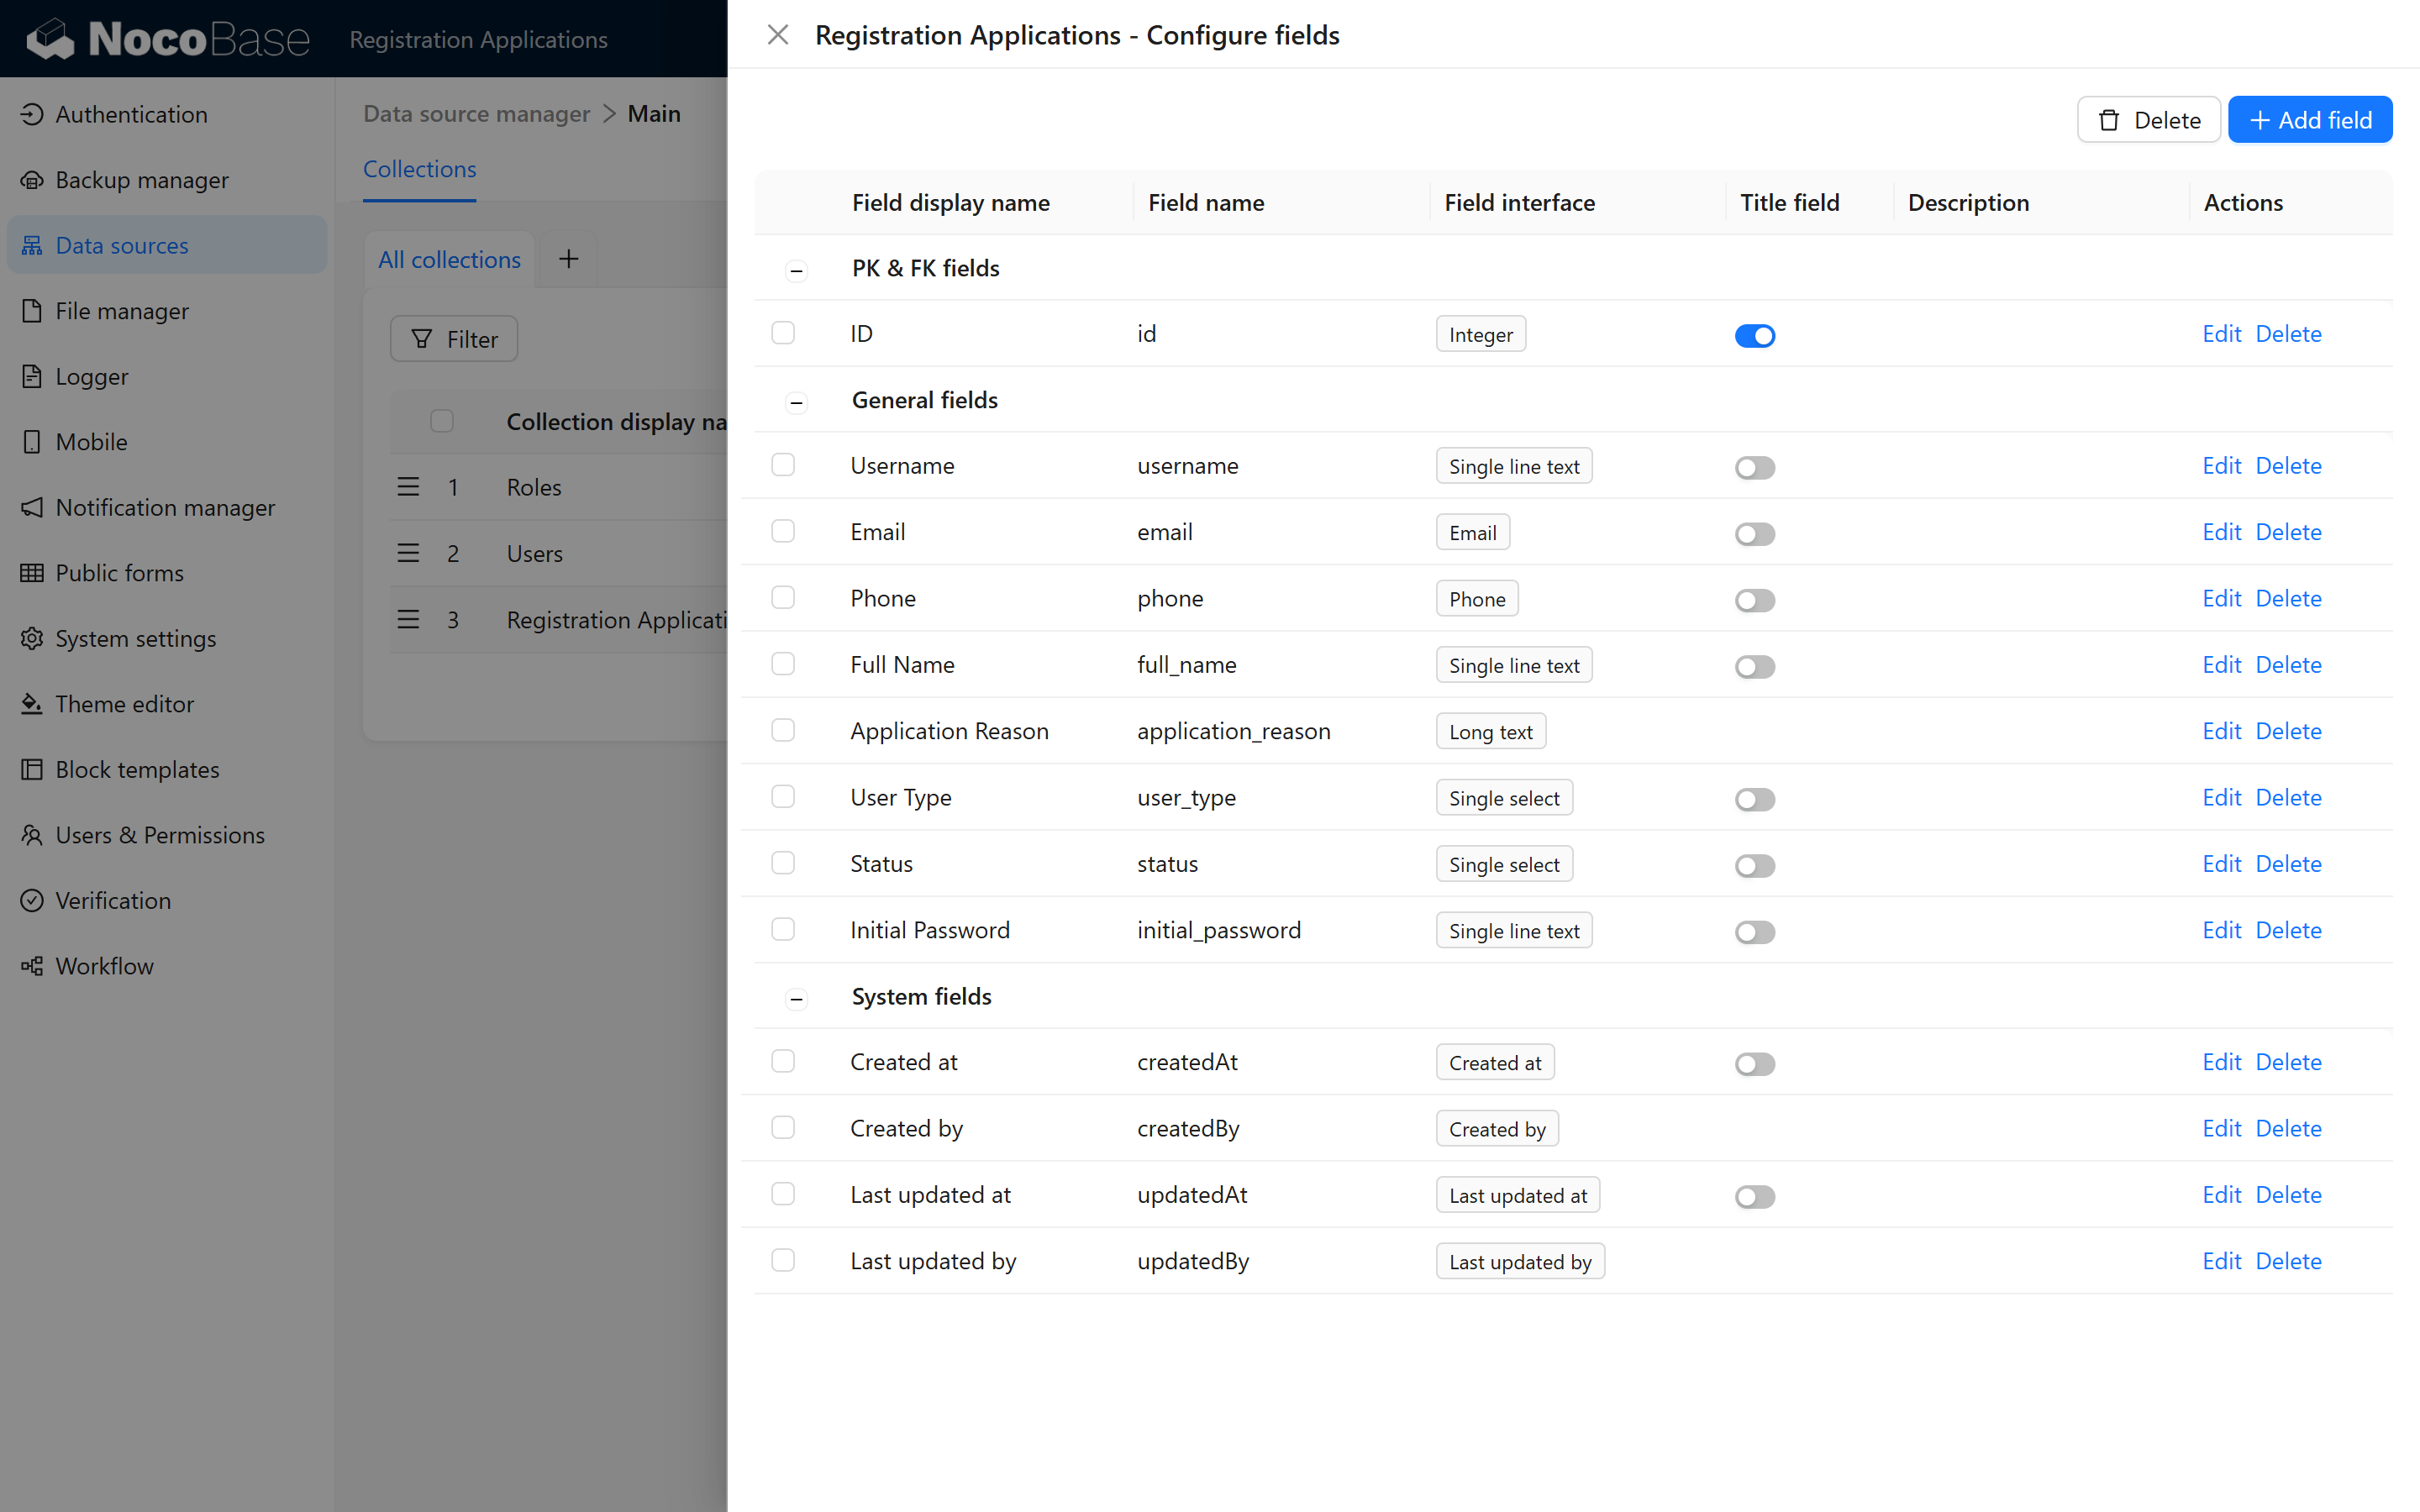
Configure the Fields Add the following fields to the collection, ensuring that the field types and descriptions are correct:
Field Display Name Field Name Field Interface Description ID id Integer Automatically generated by the system; unique record ID Username username Single line text The applicant’s username Email email Email The applicant’s email address Phone phone Phone The applicant’s contact number Full Name full_name Single line text The applicant’s full name Application Reason application_reason Long text The reason or explanation provided by the applicant User Type user_type Single select Specifies the future user type (e.g., email registration, open registration) Status status Single select Current status of the application (e.g., pending, approved, rejected) Initial Password initial_password Single line text The initial password for the new user (default: nocobase) Created at createdAt Created at Timestamp of record creation by the system Created by createdBy Created by The creator of the record as logged by the system Last updated at updatedAt Last updated at Timestamp of the last update by the system Last updated by updatedBy Last updated by The last person who updated the record -
Preview the Collection Structure Refer to the image below to confirm that the collection structure is configured correctly:
2.1.1.2 Data Entry and Display
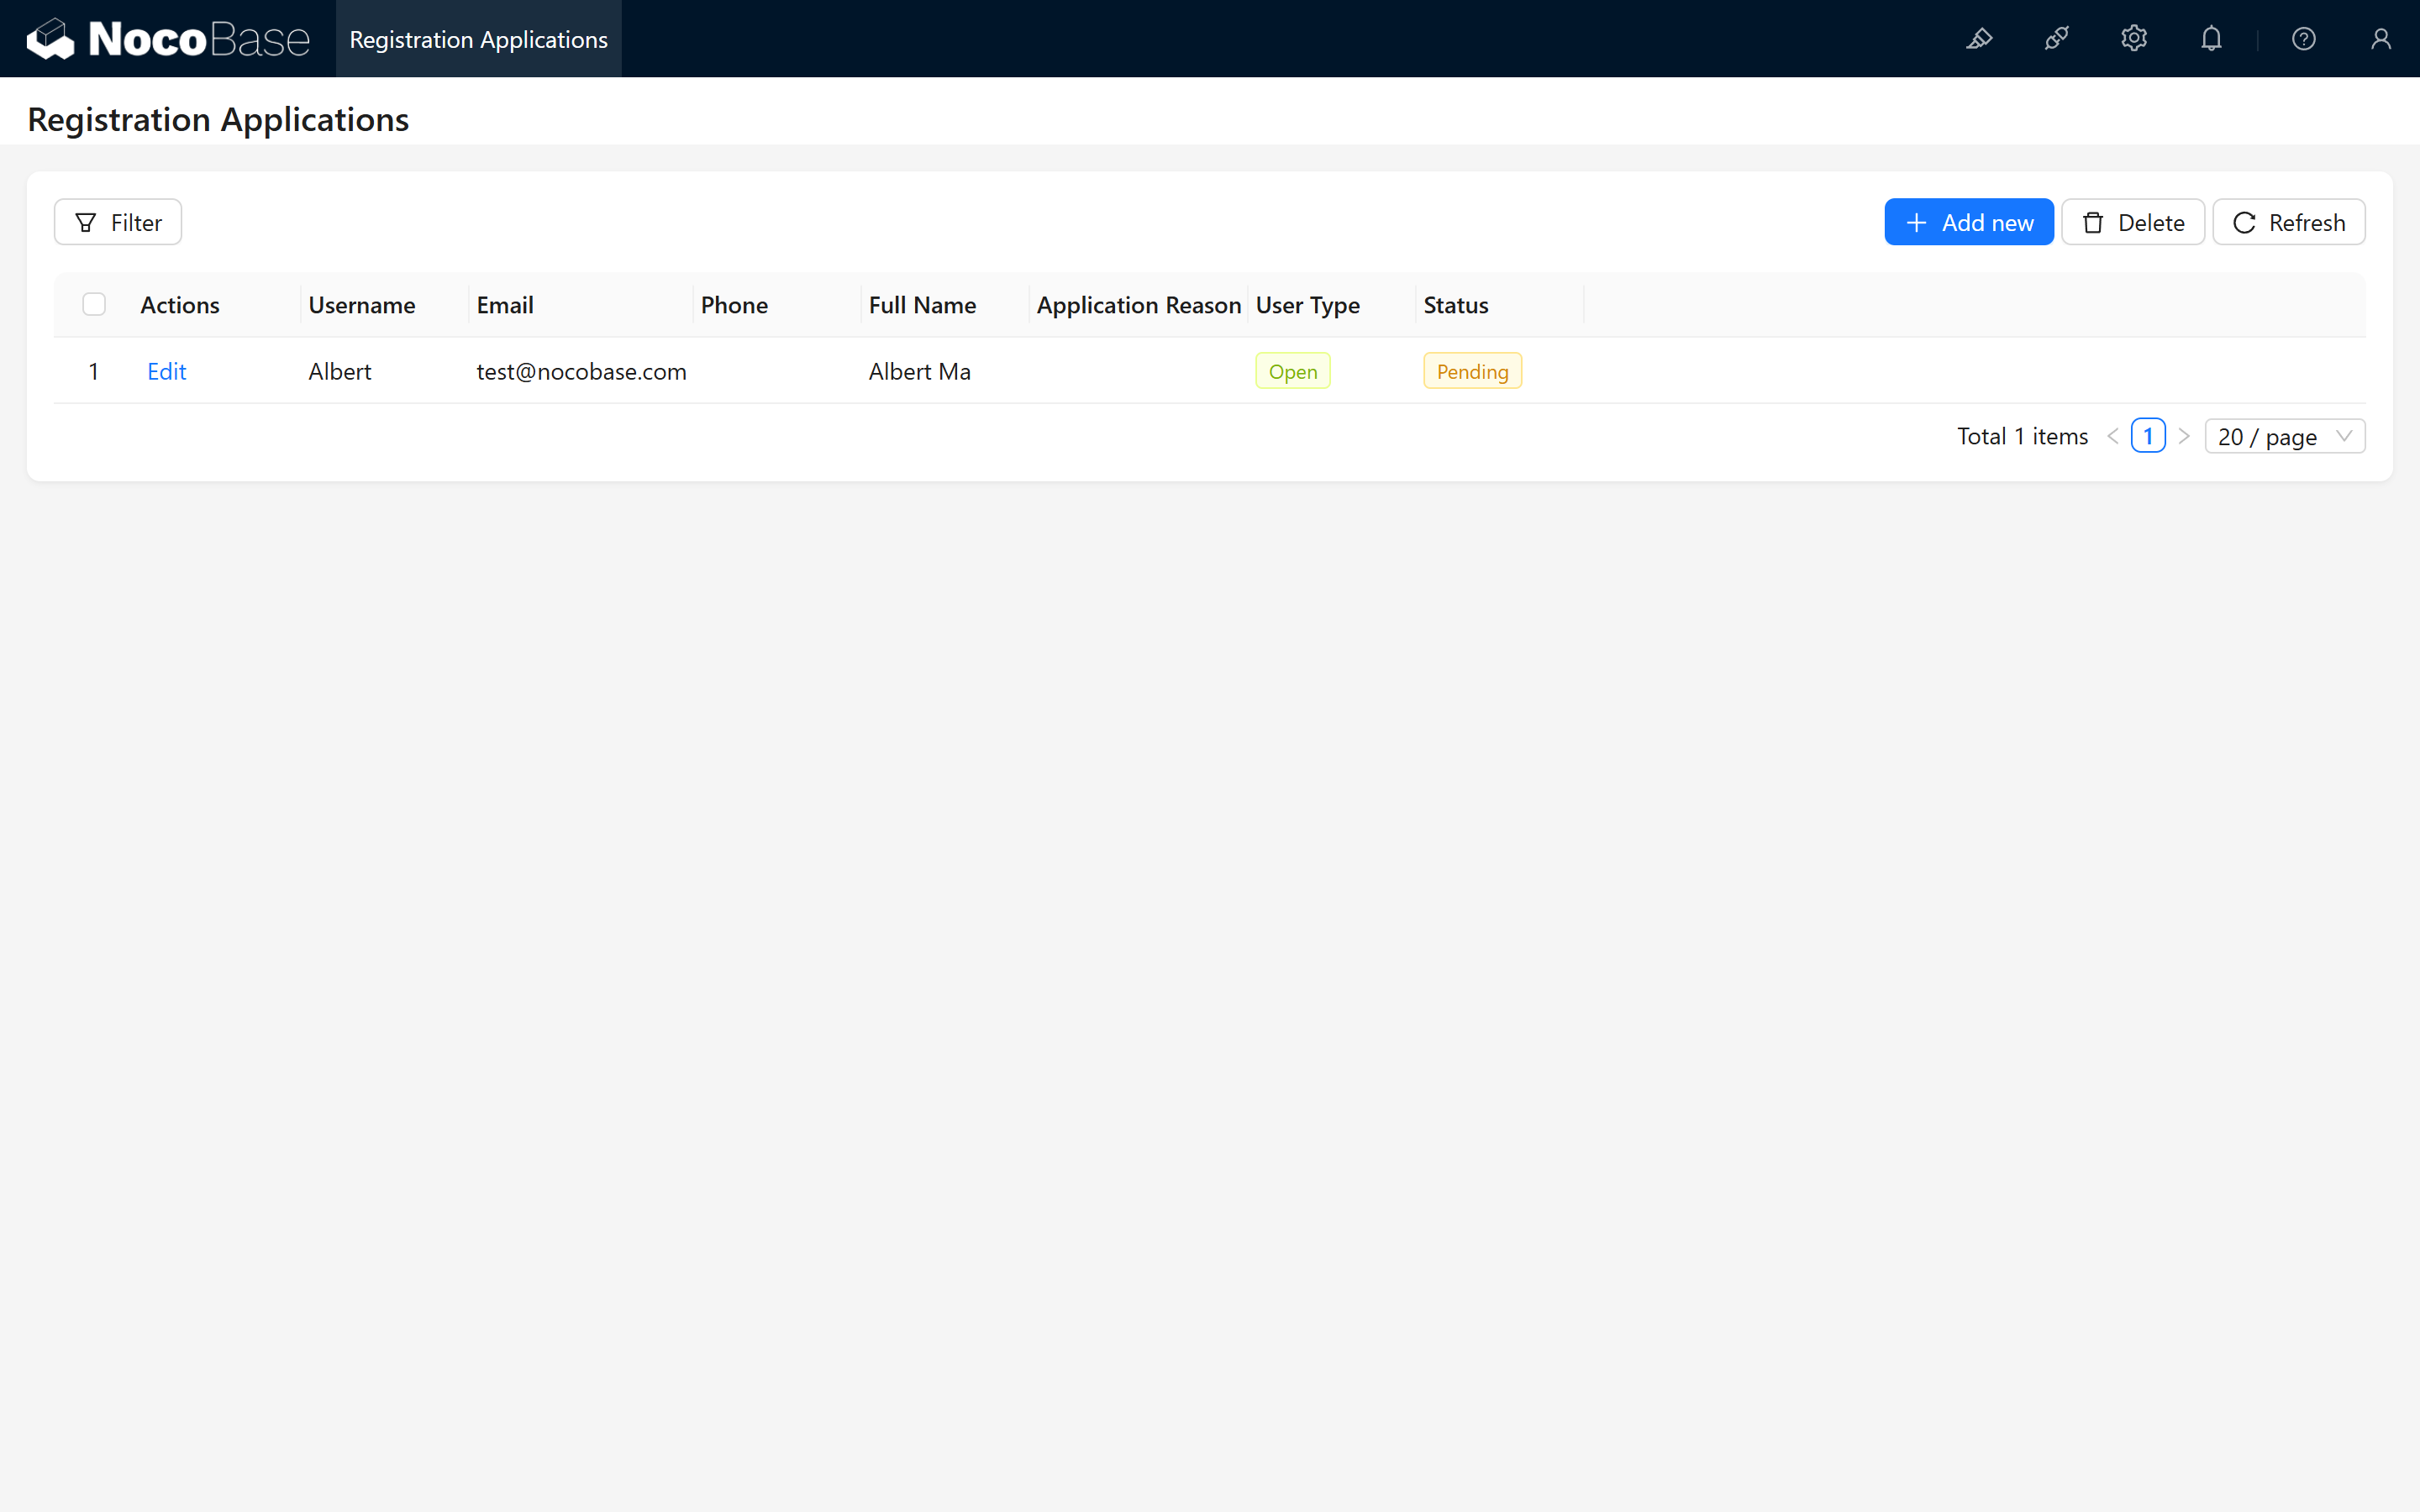
- Configure the Audit Interface In the main interface, set up a management interface called “Registration Application Audit” to display the submitted application information.
- Enter Test Data
Enter test data in the management interface to ensure that the data is displayed correctly.
2.2 Workflow Configuration
This section explains how to configure the workflow to automatically create new users after the application is approved.
2.2.1 Create the Audit Workflow
2.2.1.1 Create a New Workflow
- Access the Workflow Interface In the NocoBase backend, go to the workflow configuration page and select “Create New Workflow.”
- Select the Trigger Event You can choose either a “Post-Operation” or “Pre-Operation” event; here, we use a pre-operation event as an example.
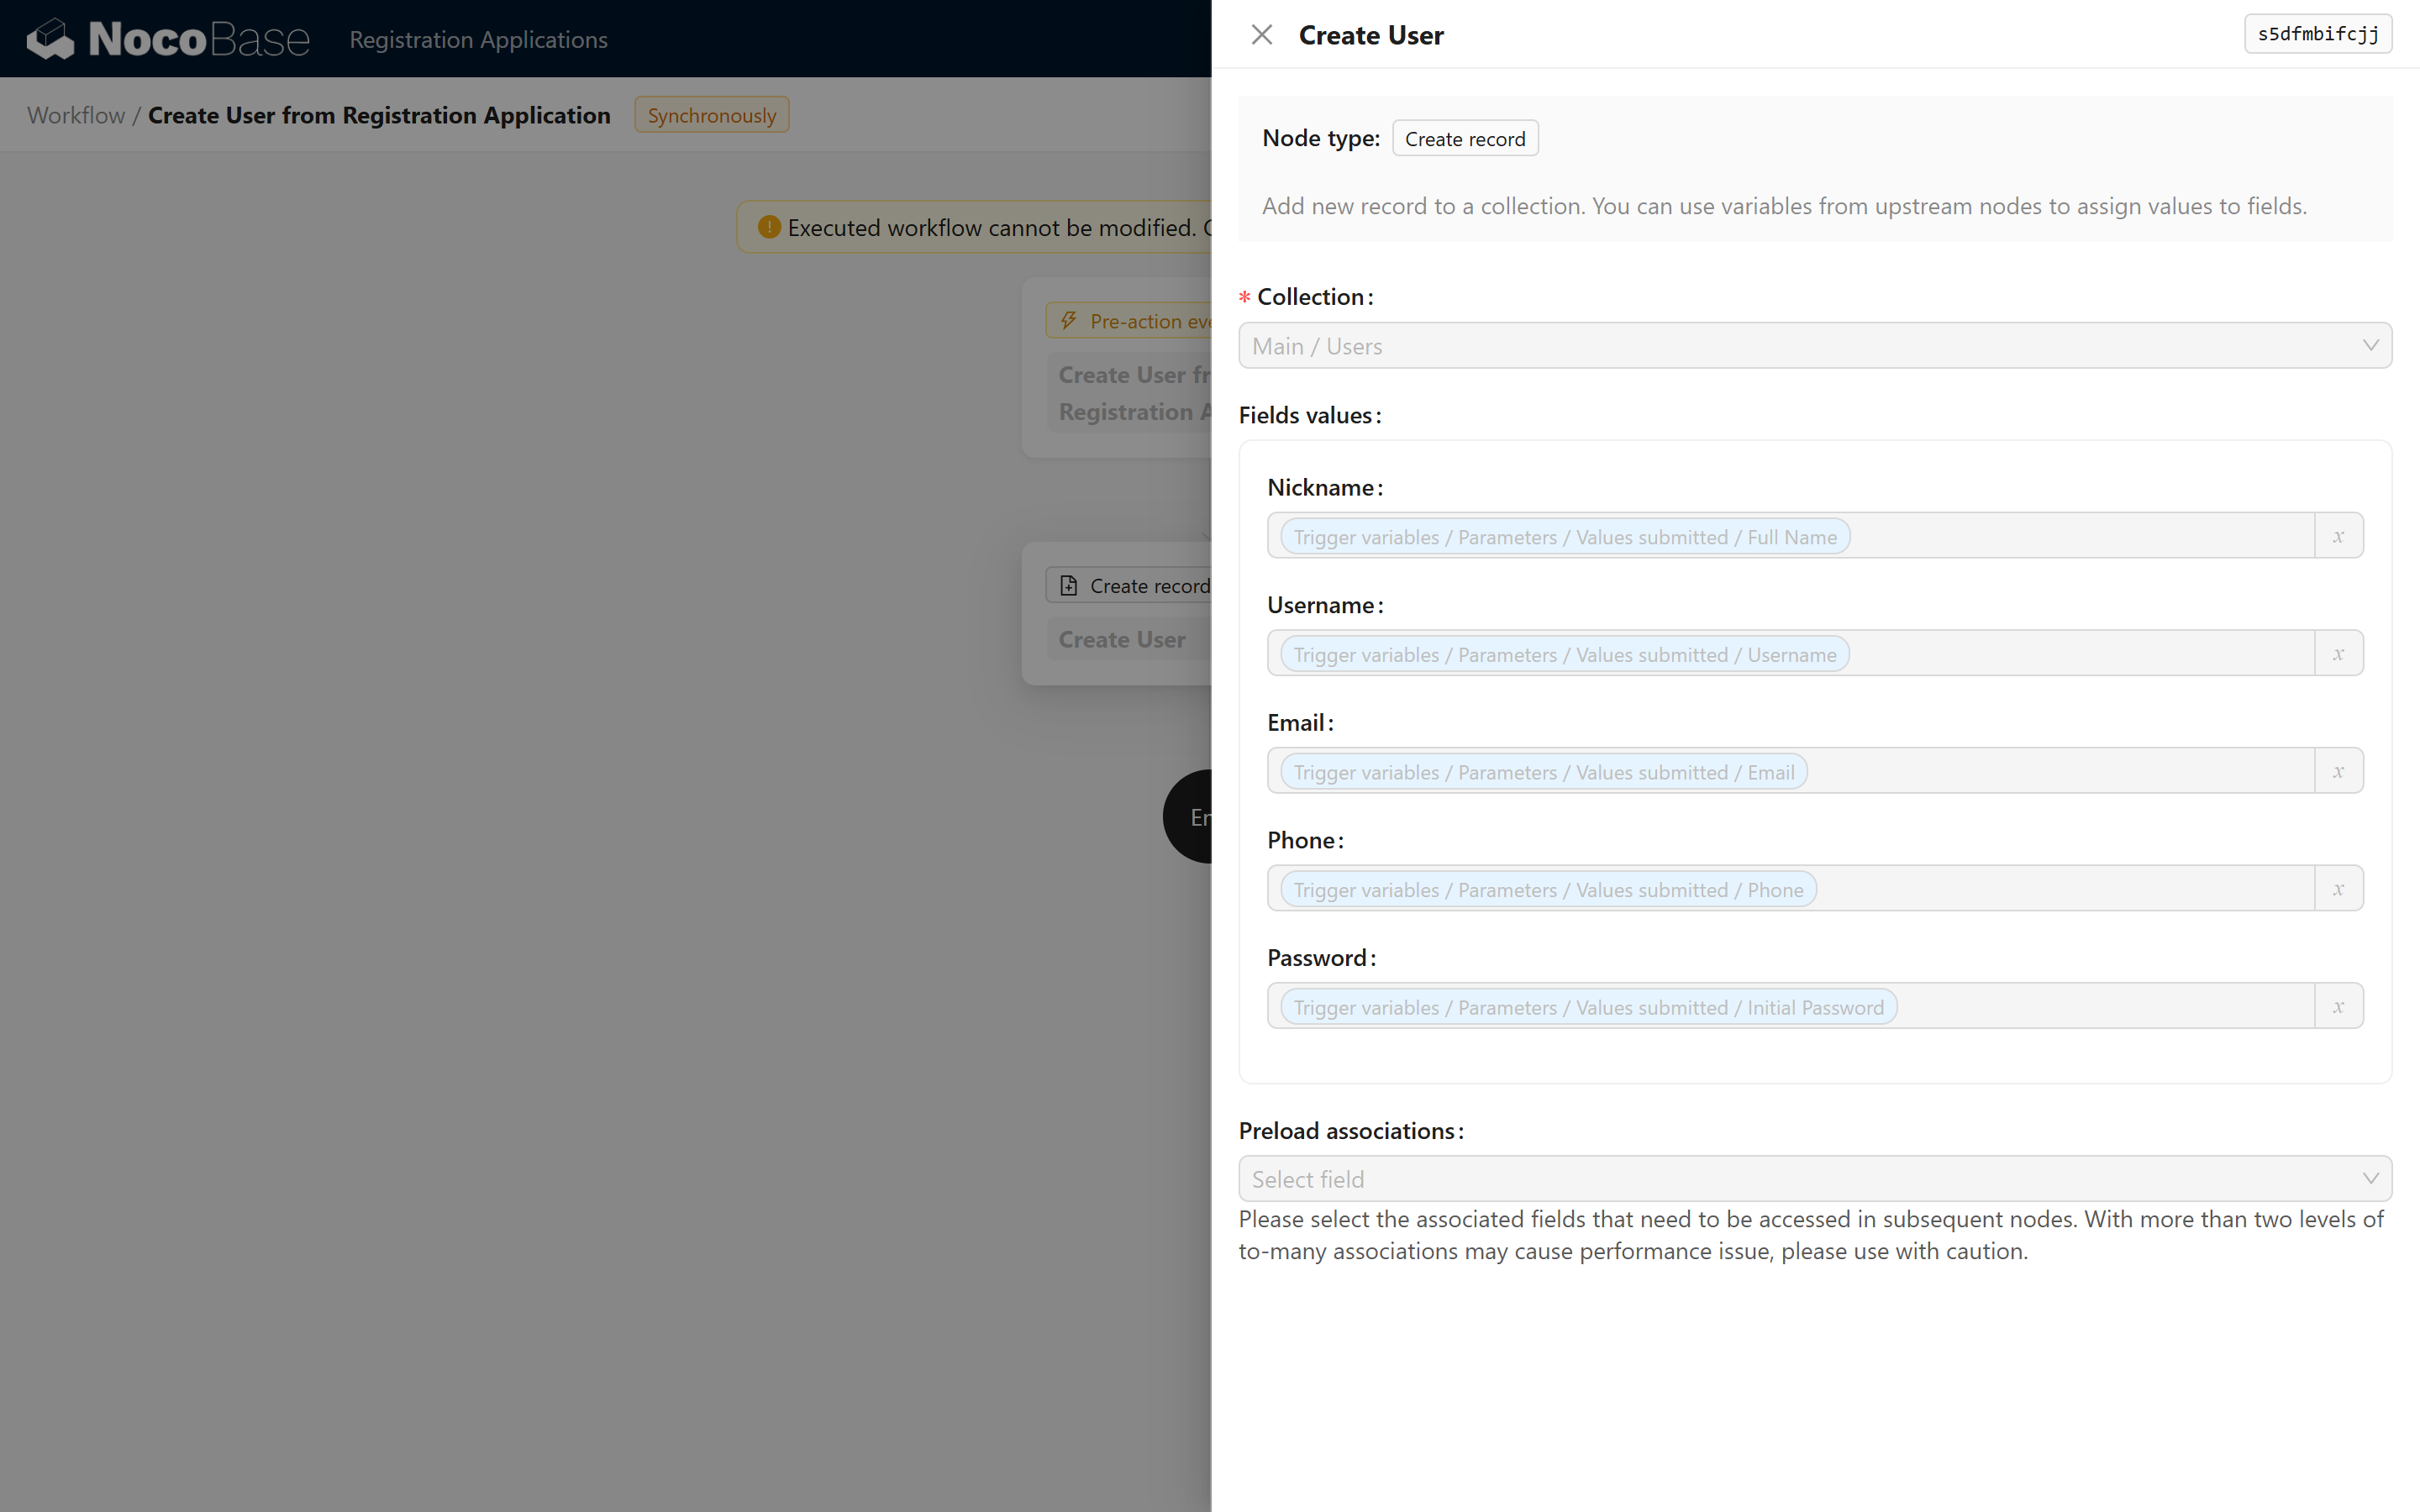
- Configure Workflow Nodes
Create a new “Create New User” node that converts the current form data into new user data, setting up field mapping and processing logic. Refer to the image below:
2.2.2 Configure the Audit Form Actions
2.2.2.1 Add “Approve” and “Reject” Actions
In the application information form, add two actions: “Approve” and “Reject.” 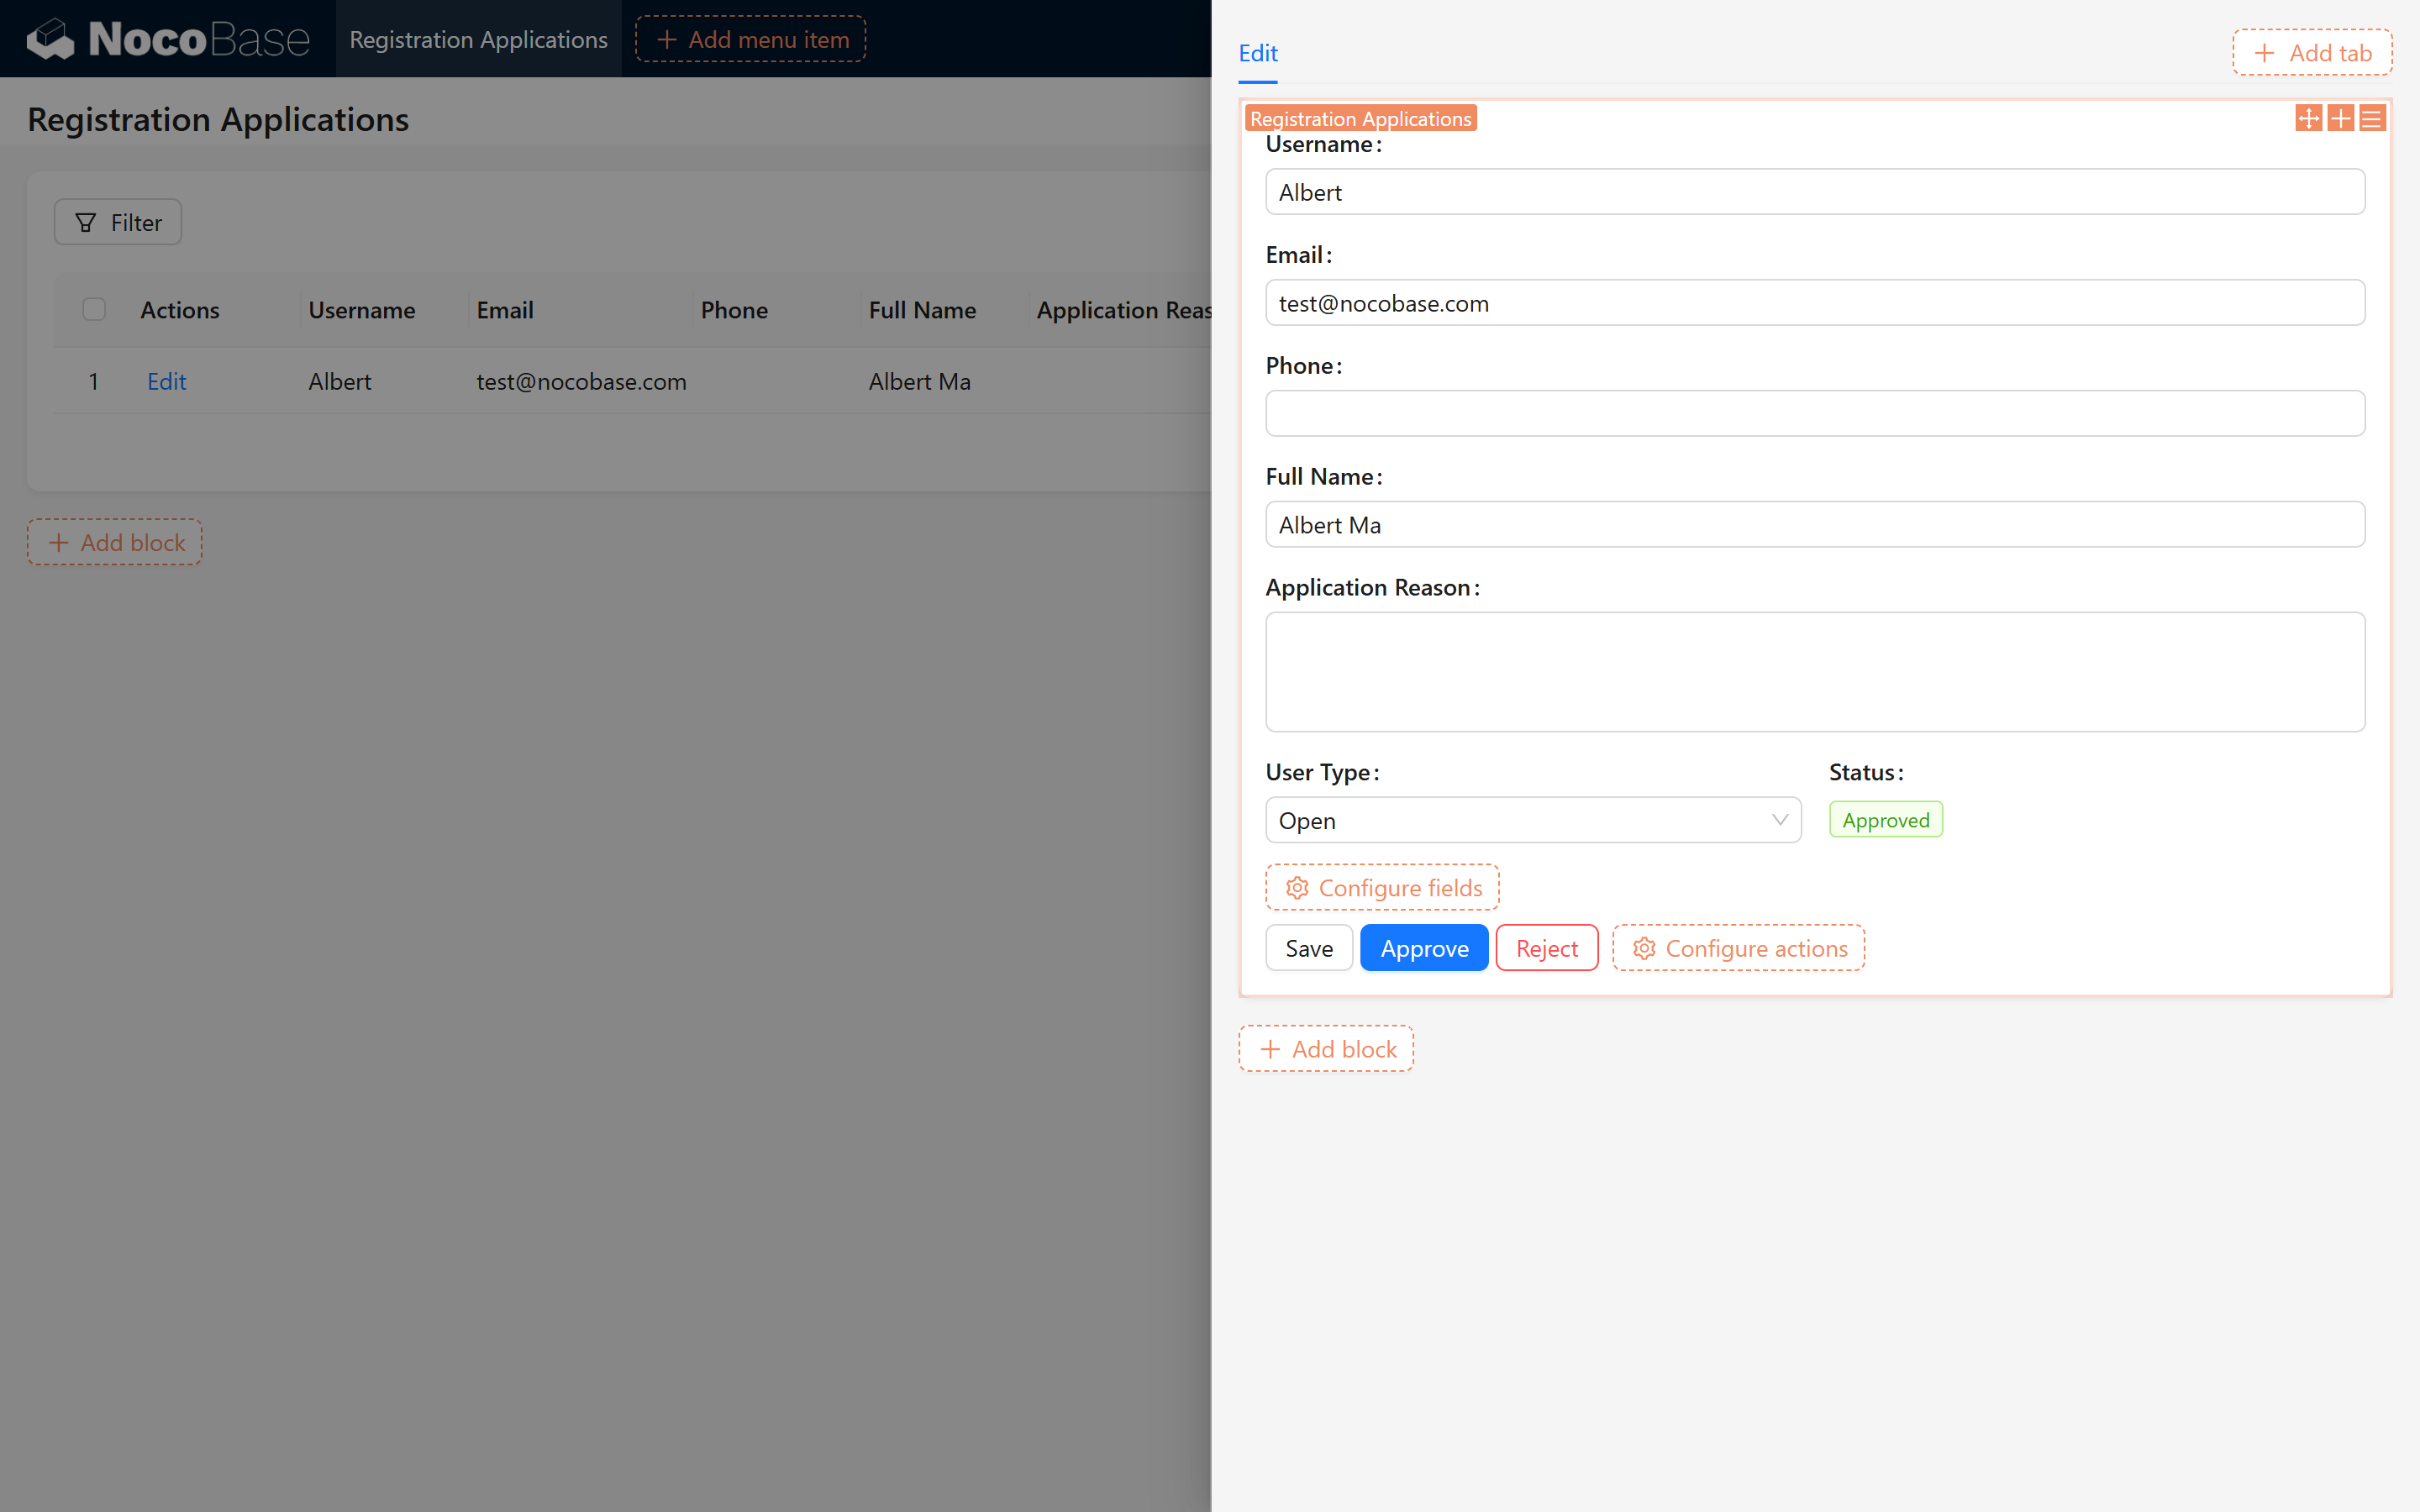
2.2.2.2 Configure Action Functions
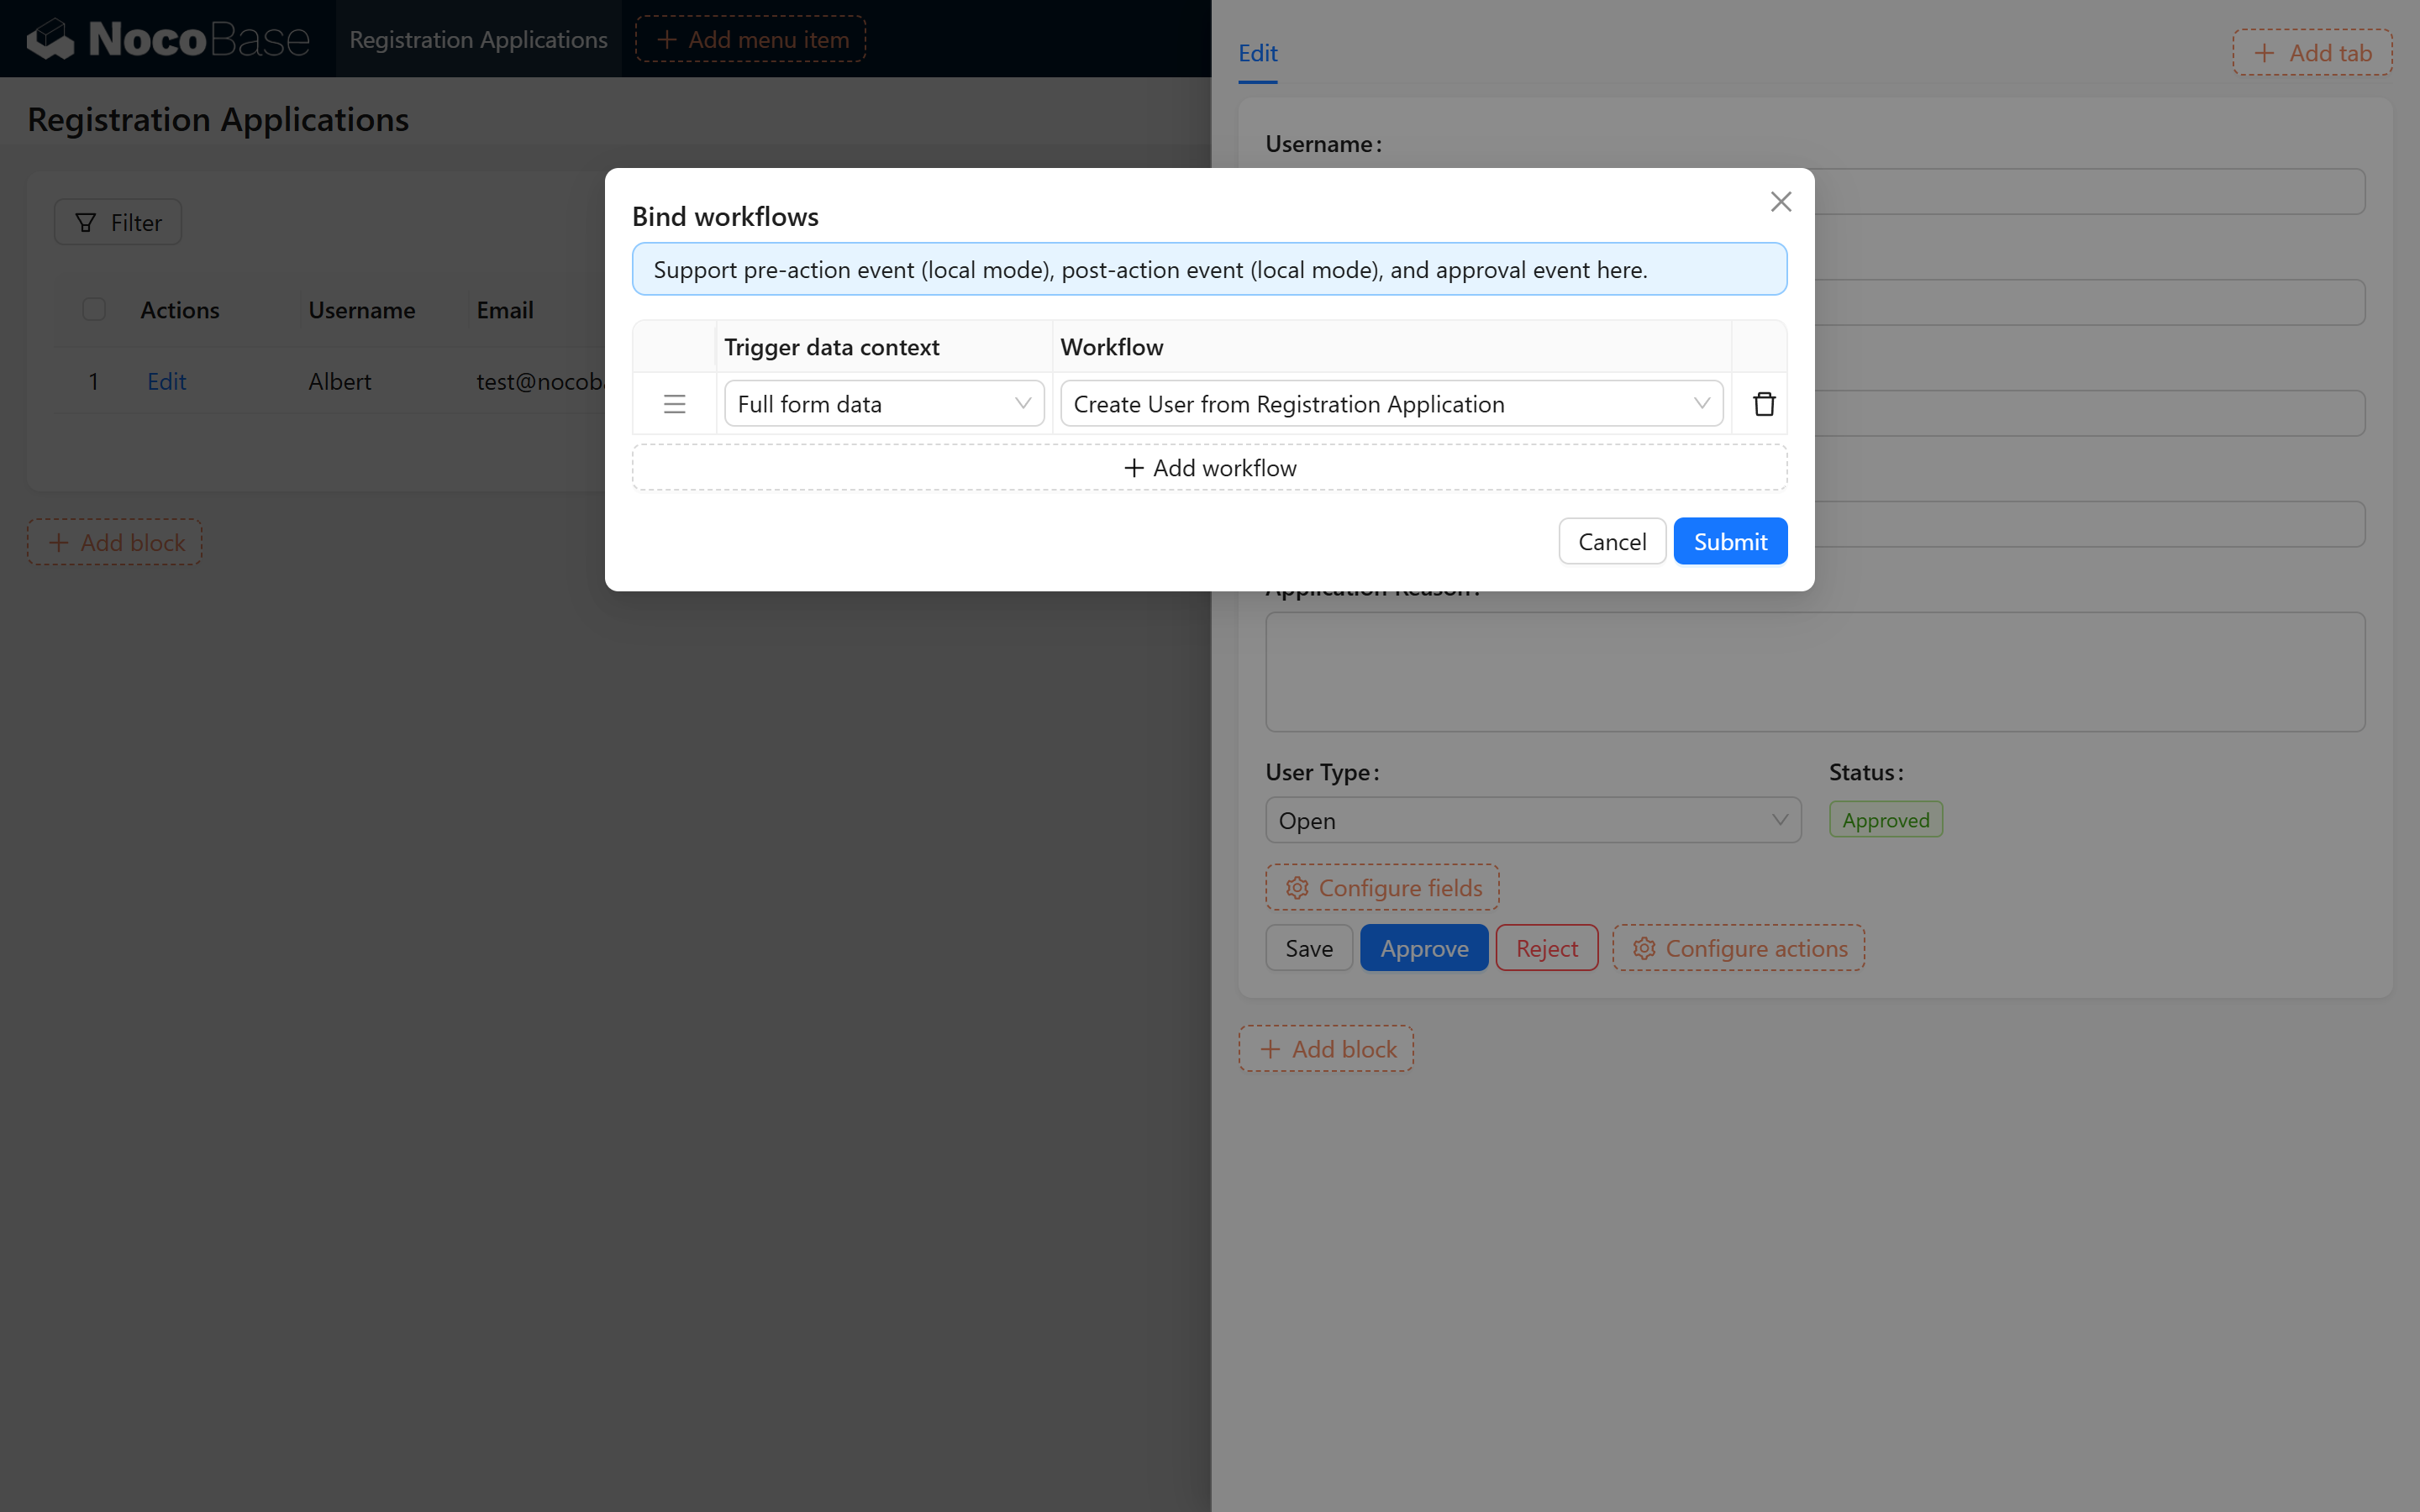
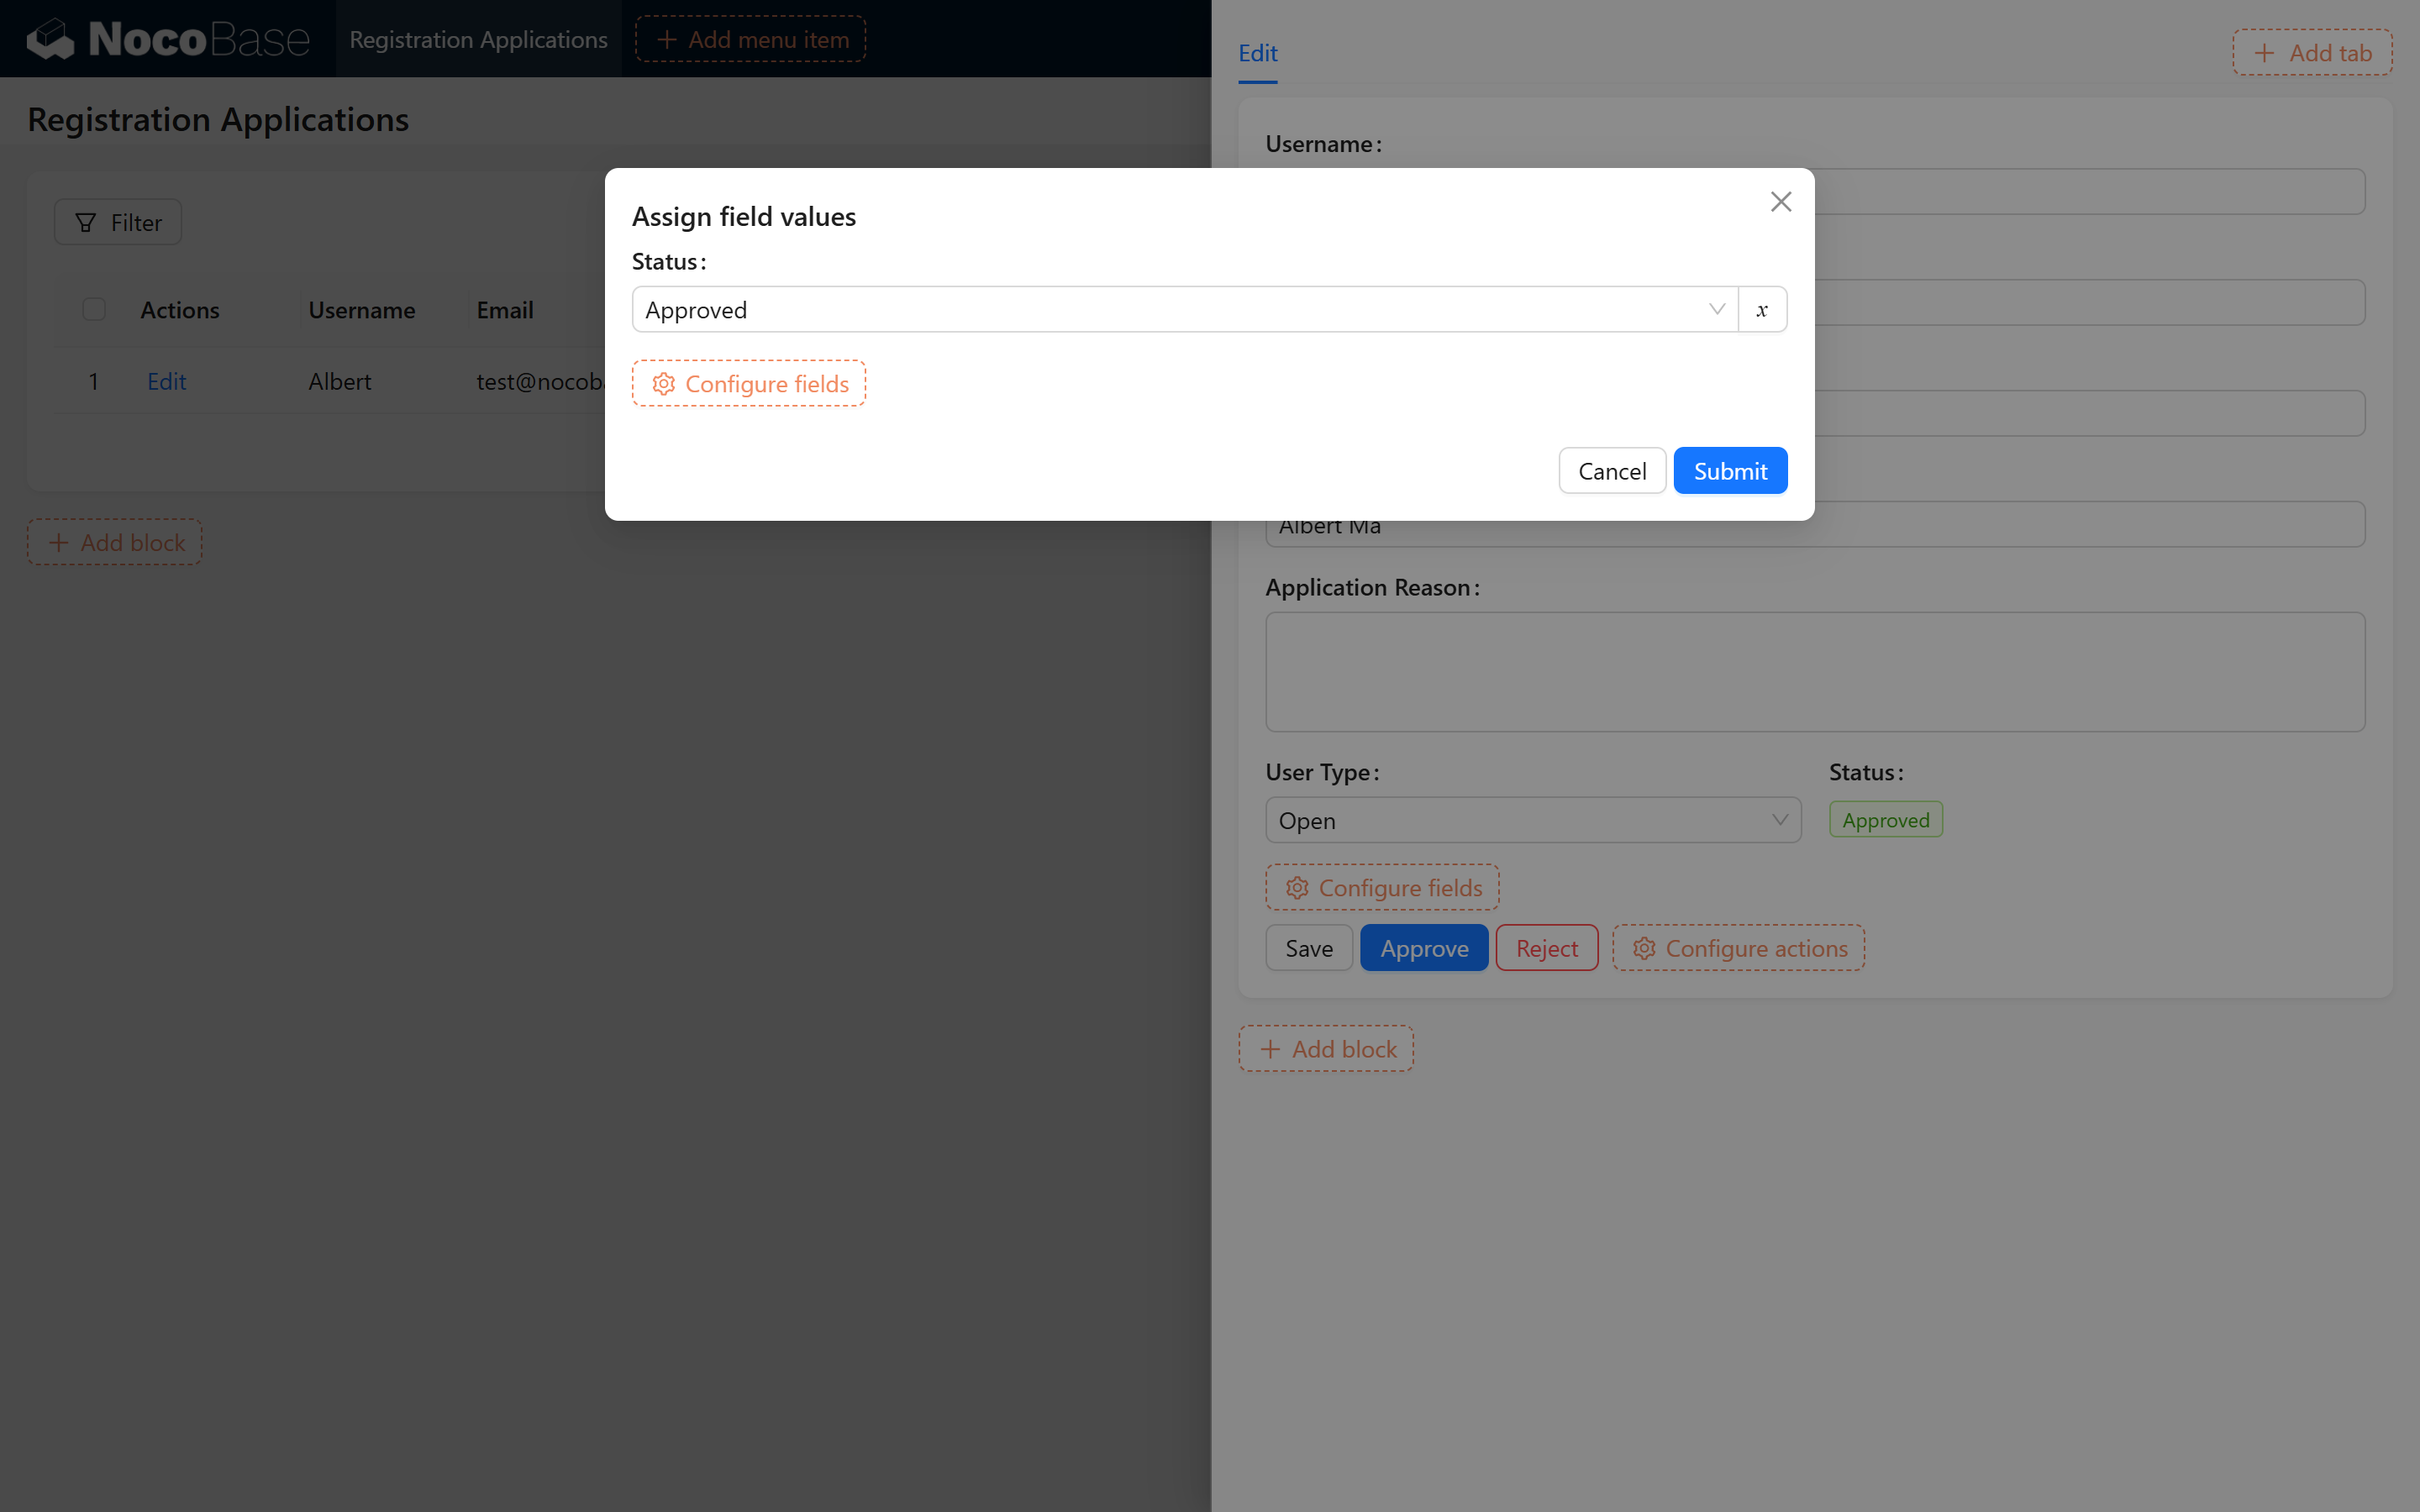
- Configure the “Approve” Action
- Bind it to the workflow just created.
- Upon submission, set the Status field to “Approved.” Refer to the images:
- Configure the “Reject” Action
- Upon submission, set the Status field to “Rejected.”
2.2.2.3 Set Action Linkage Rules
To prevent duplicate operations, set a linkage rule: hide the actions when the Status is not “Pending.” Refer to the image: 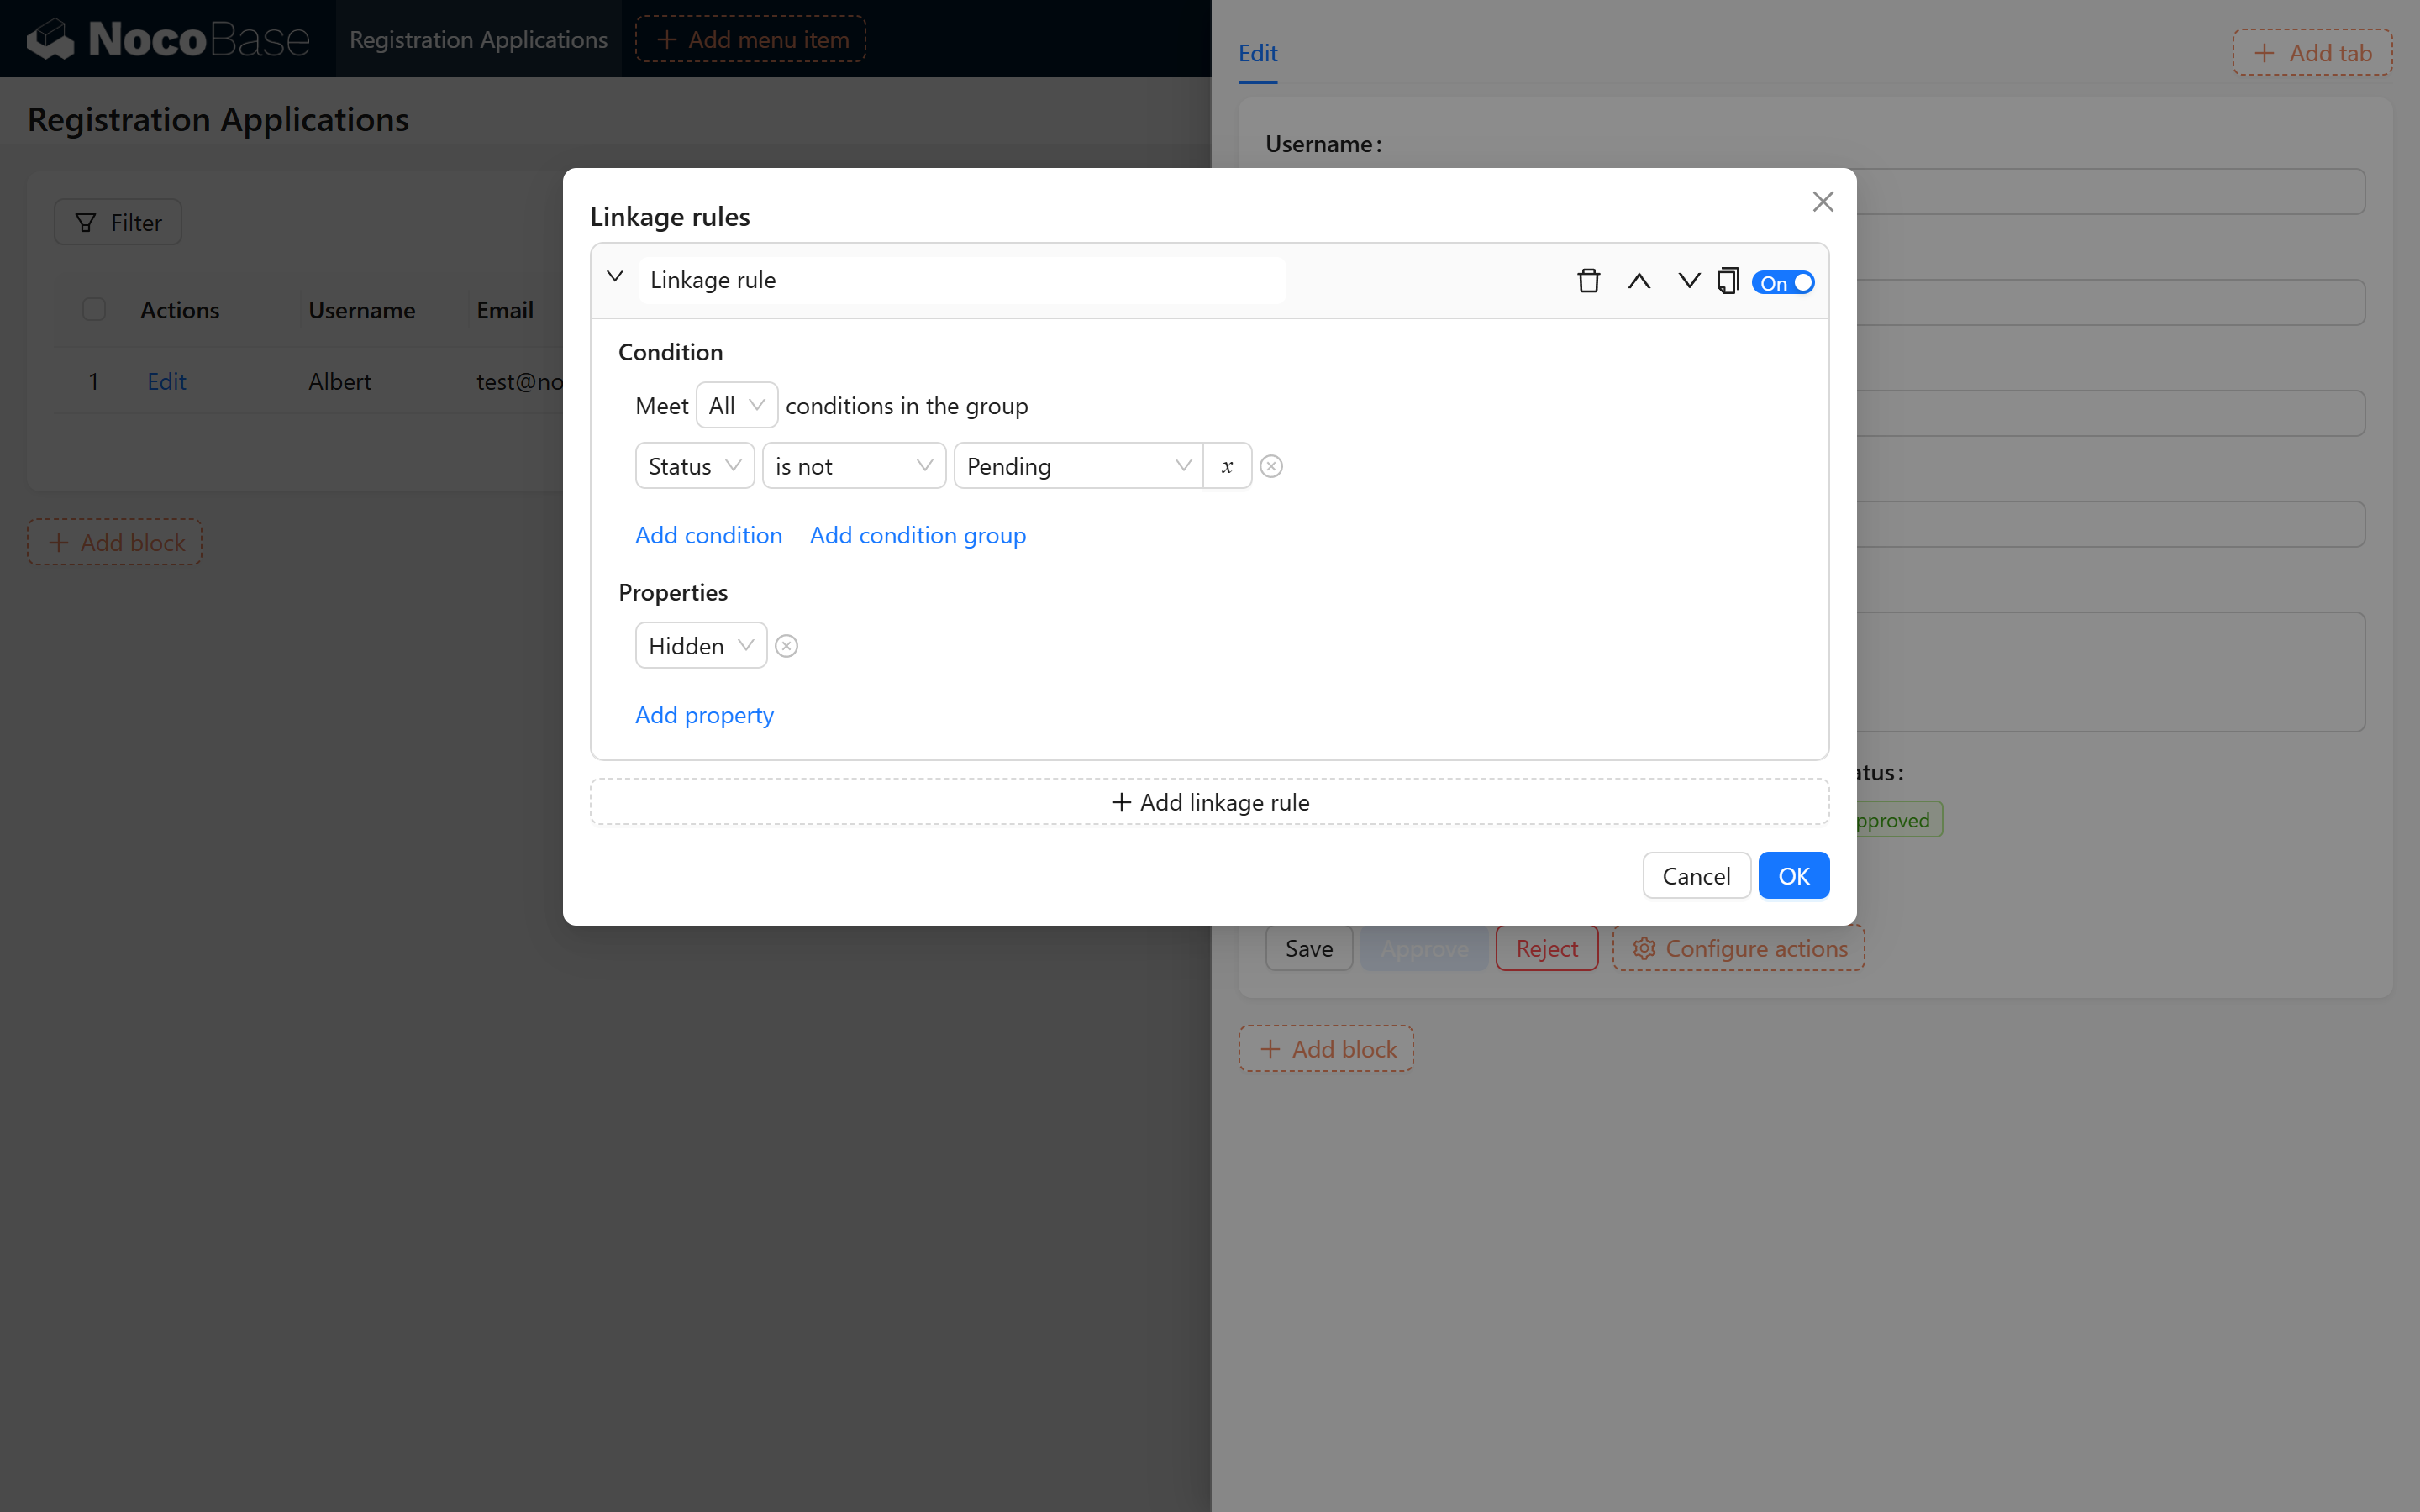
2.3 Activate and Configure the Public Form Plugin
Utilize the Public Form plugin to allow users to submit their registration applications through a webpage.
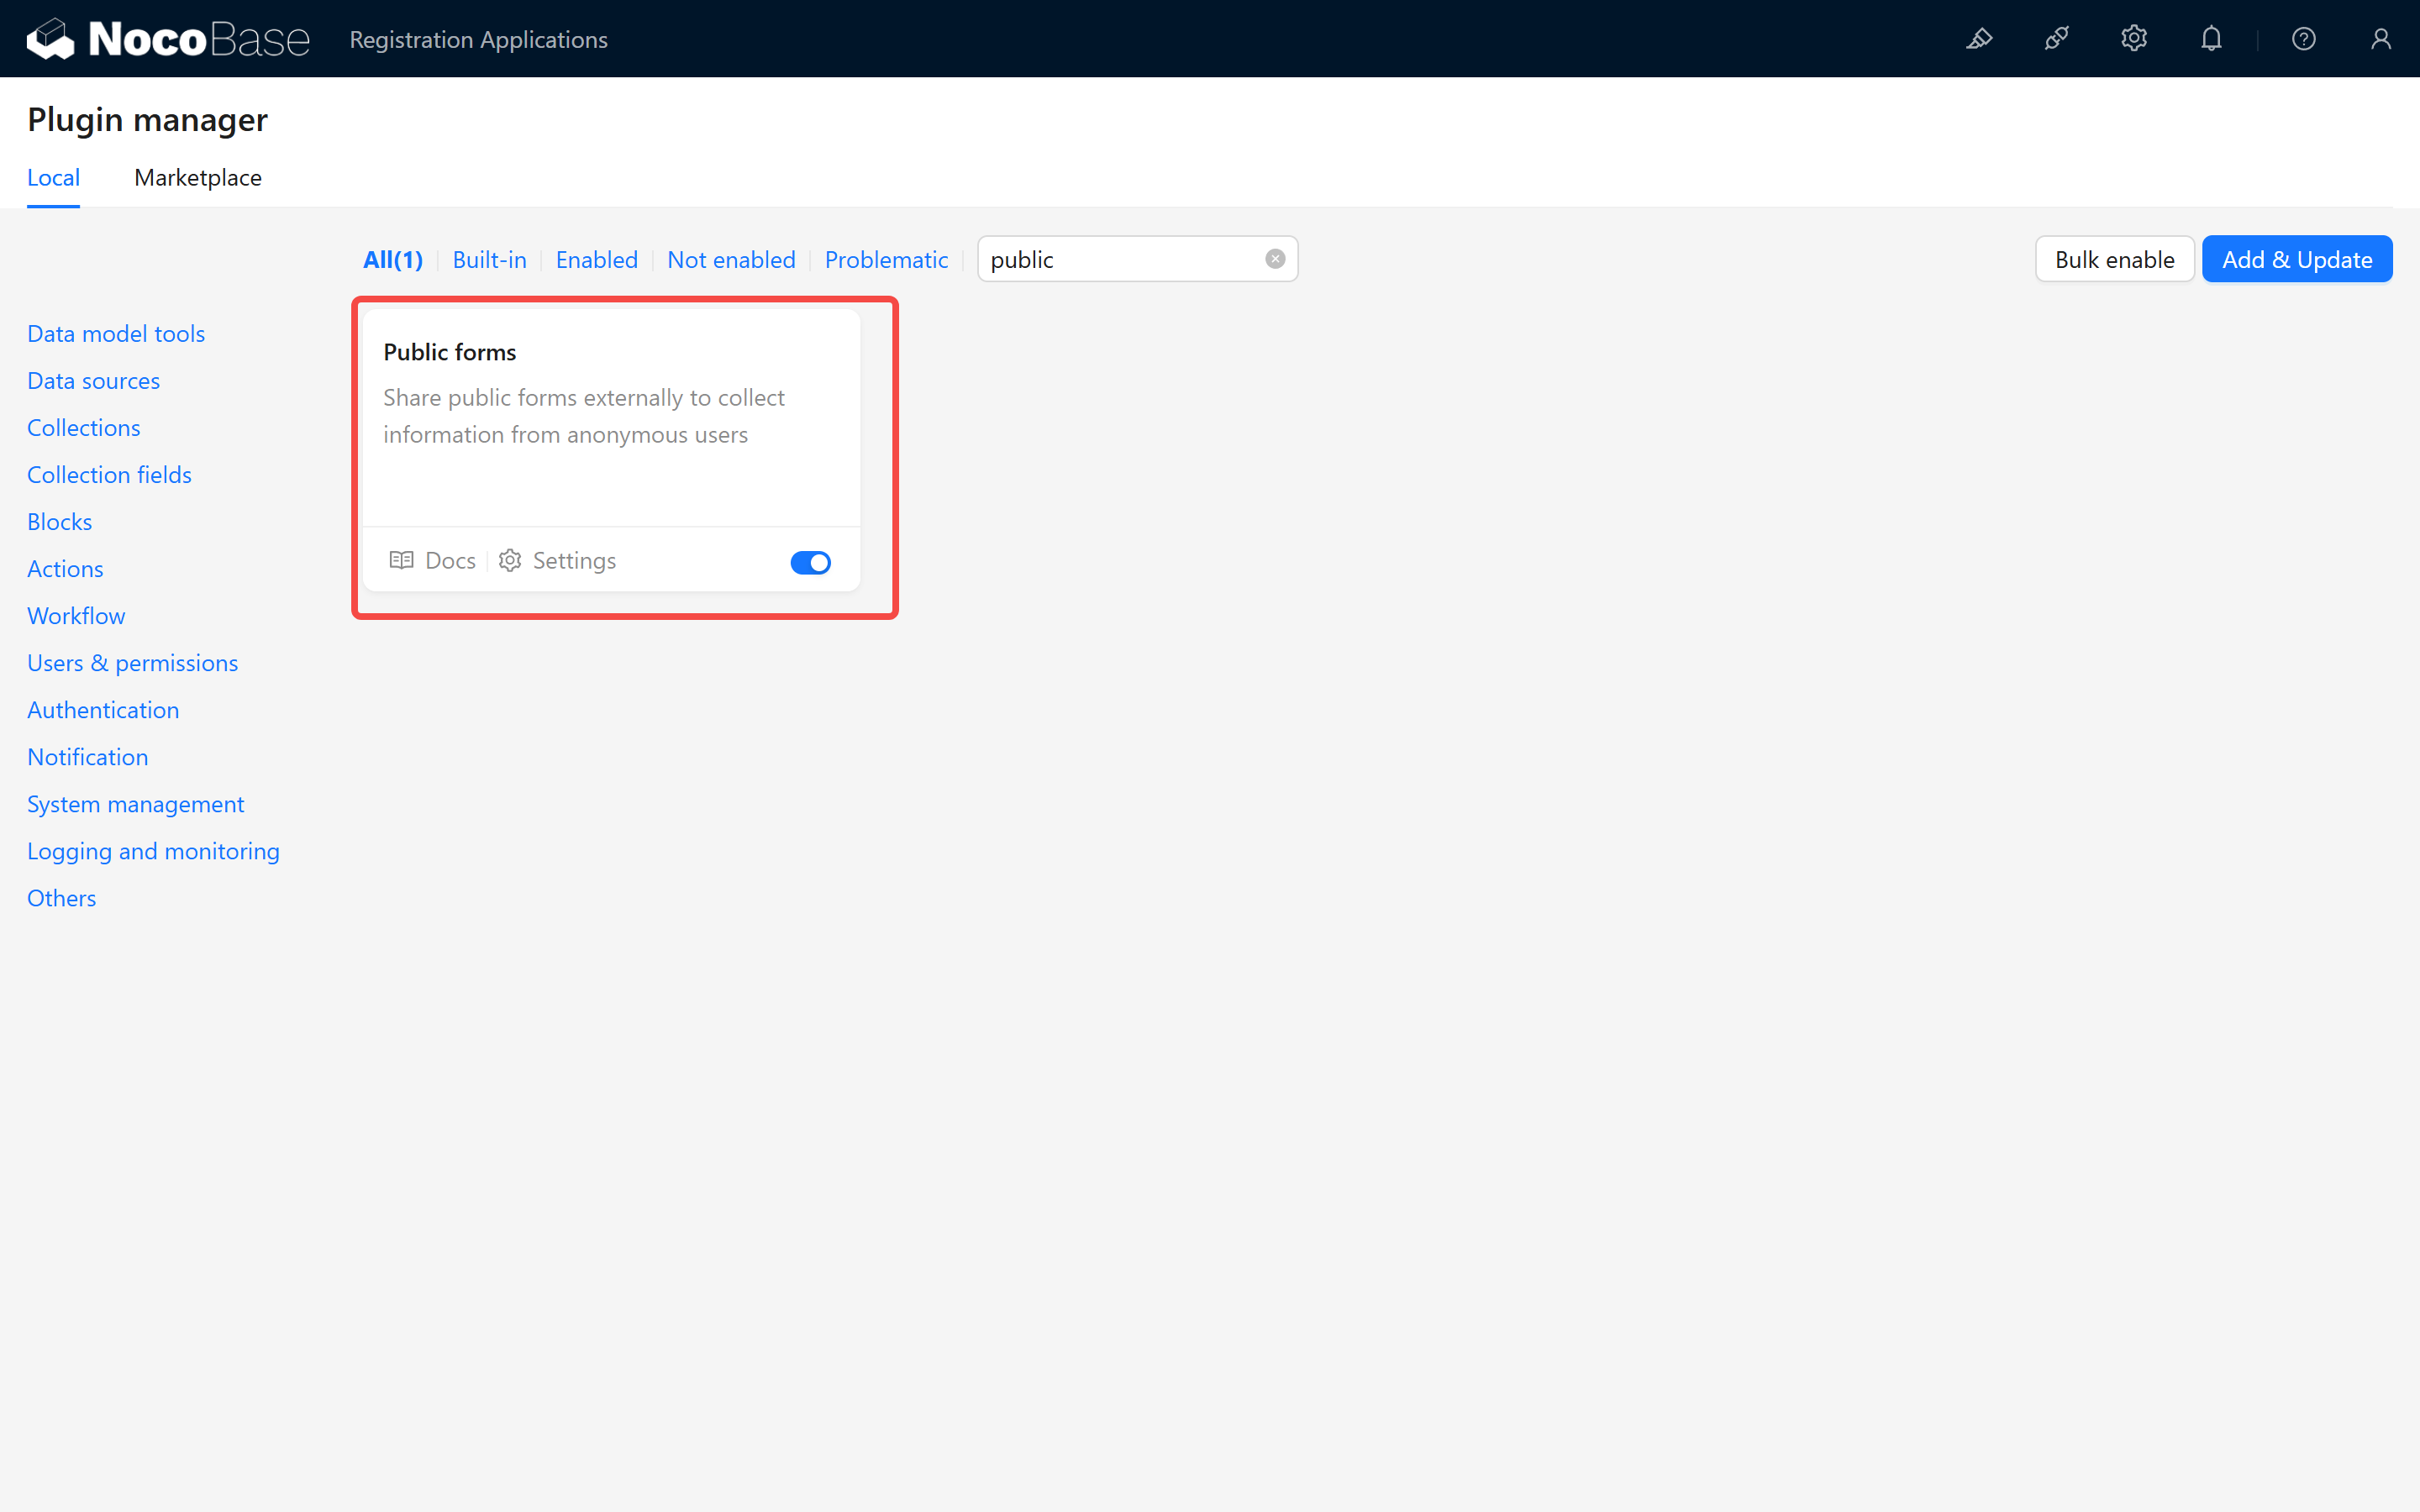
2.3.1 Activate the Public Form Plugin
2.3.1.1 Activate the Plugin
- Access Plugin Management
In the backend management interface, locate and activate the “Public Form” plugin. Refer to the image:
2.3.2 Create and Configure the Public Form
2.3.2.1 Create a Public Form
- Create a New Form In the backend management, create a Public Form for users to submit their registration applications.
- Configure Form Elements
Add the necessary form elements (such as username, email, contact number, etc.) and set the corresponding validation rules. Refer to the image:

2.3.3 Activate and Configure the Public Form Plugin (Core)
2.3.3.1 Test the Public Form
-
Open the Frontend Page Visit the Public Form page, fill out the form, and submit the application data.
-
Verify the Functionality Check whether the data is correctly entered into the application information collection and that a new user is automatically created through the workflow upon audit approval. Refer to the test result:
2.4 Further Extensions (Optional)
After completing the basic registration and audit process, you can extend additional functionalities as needed:
2.4.1 Invitation Code Registration
- Function Description: Limit the range and number of registered users by setting up an invitation code.
- Configuration Idea: Add an invitation code field to the application form and use a pre-operation event to validate and intercept the field before submission.
2.4.2 Automatic Email Notifications
- Function Description: Automatically send emails for audit results, successful registrations, etc.
- Configuration Idea: Combine NocoBase’s email node to add email-sending operations in the workflow.
If you encounter any issues during the operation, feel free to visit the NocoBase community or refer to the official documentation. We hope this guide helps you successfully implement user registration auditing based on your actual needs and provides flexibility for further extensions. Wishing you smooth usage and project success!